macOS Ventura is a new operating system from Apple that is designed to make your Mac more reliable, responsive, and easy to use. In our last post, we discussed installing a fresh macOS version on a separate partition without needing a USB or similar device. However, we will show you how it’s done for those who want to create a Ventura USB installer.
macOS Ventura is not compatible with all Macs, so be sure to check the list of compatible Macs before proceeding.
What You’ll Need
- A USB drive with at least 16GB of storage space
- The macOS Ventura installer (this can be downloaded from the Apple)
- Internet connection
- Forty-five minutes of free time.
- A good battery life or a power adapter
How to Create a macOS Ventura USB Installer
Download The MacOS Ventura Installer
Apple Beta Software Program is designed for developers and early adopters to test upcoming macOS iPadOS and iOS releases. Click here to visit Apple’s Beta Software Program website and sign in with your Apple ID. If you don’t have an Apple ID, you can create one here.

Once signed in, click the Enroll Your Devices button on the top-right corner of the page.
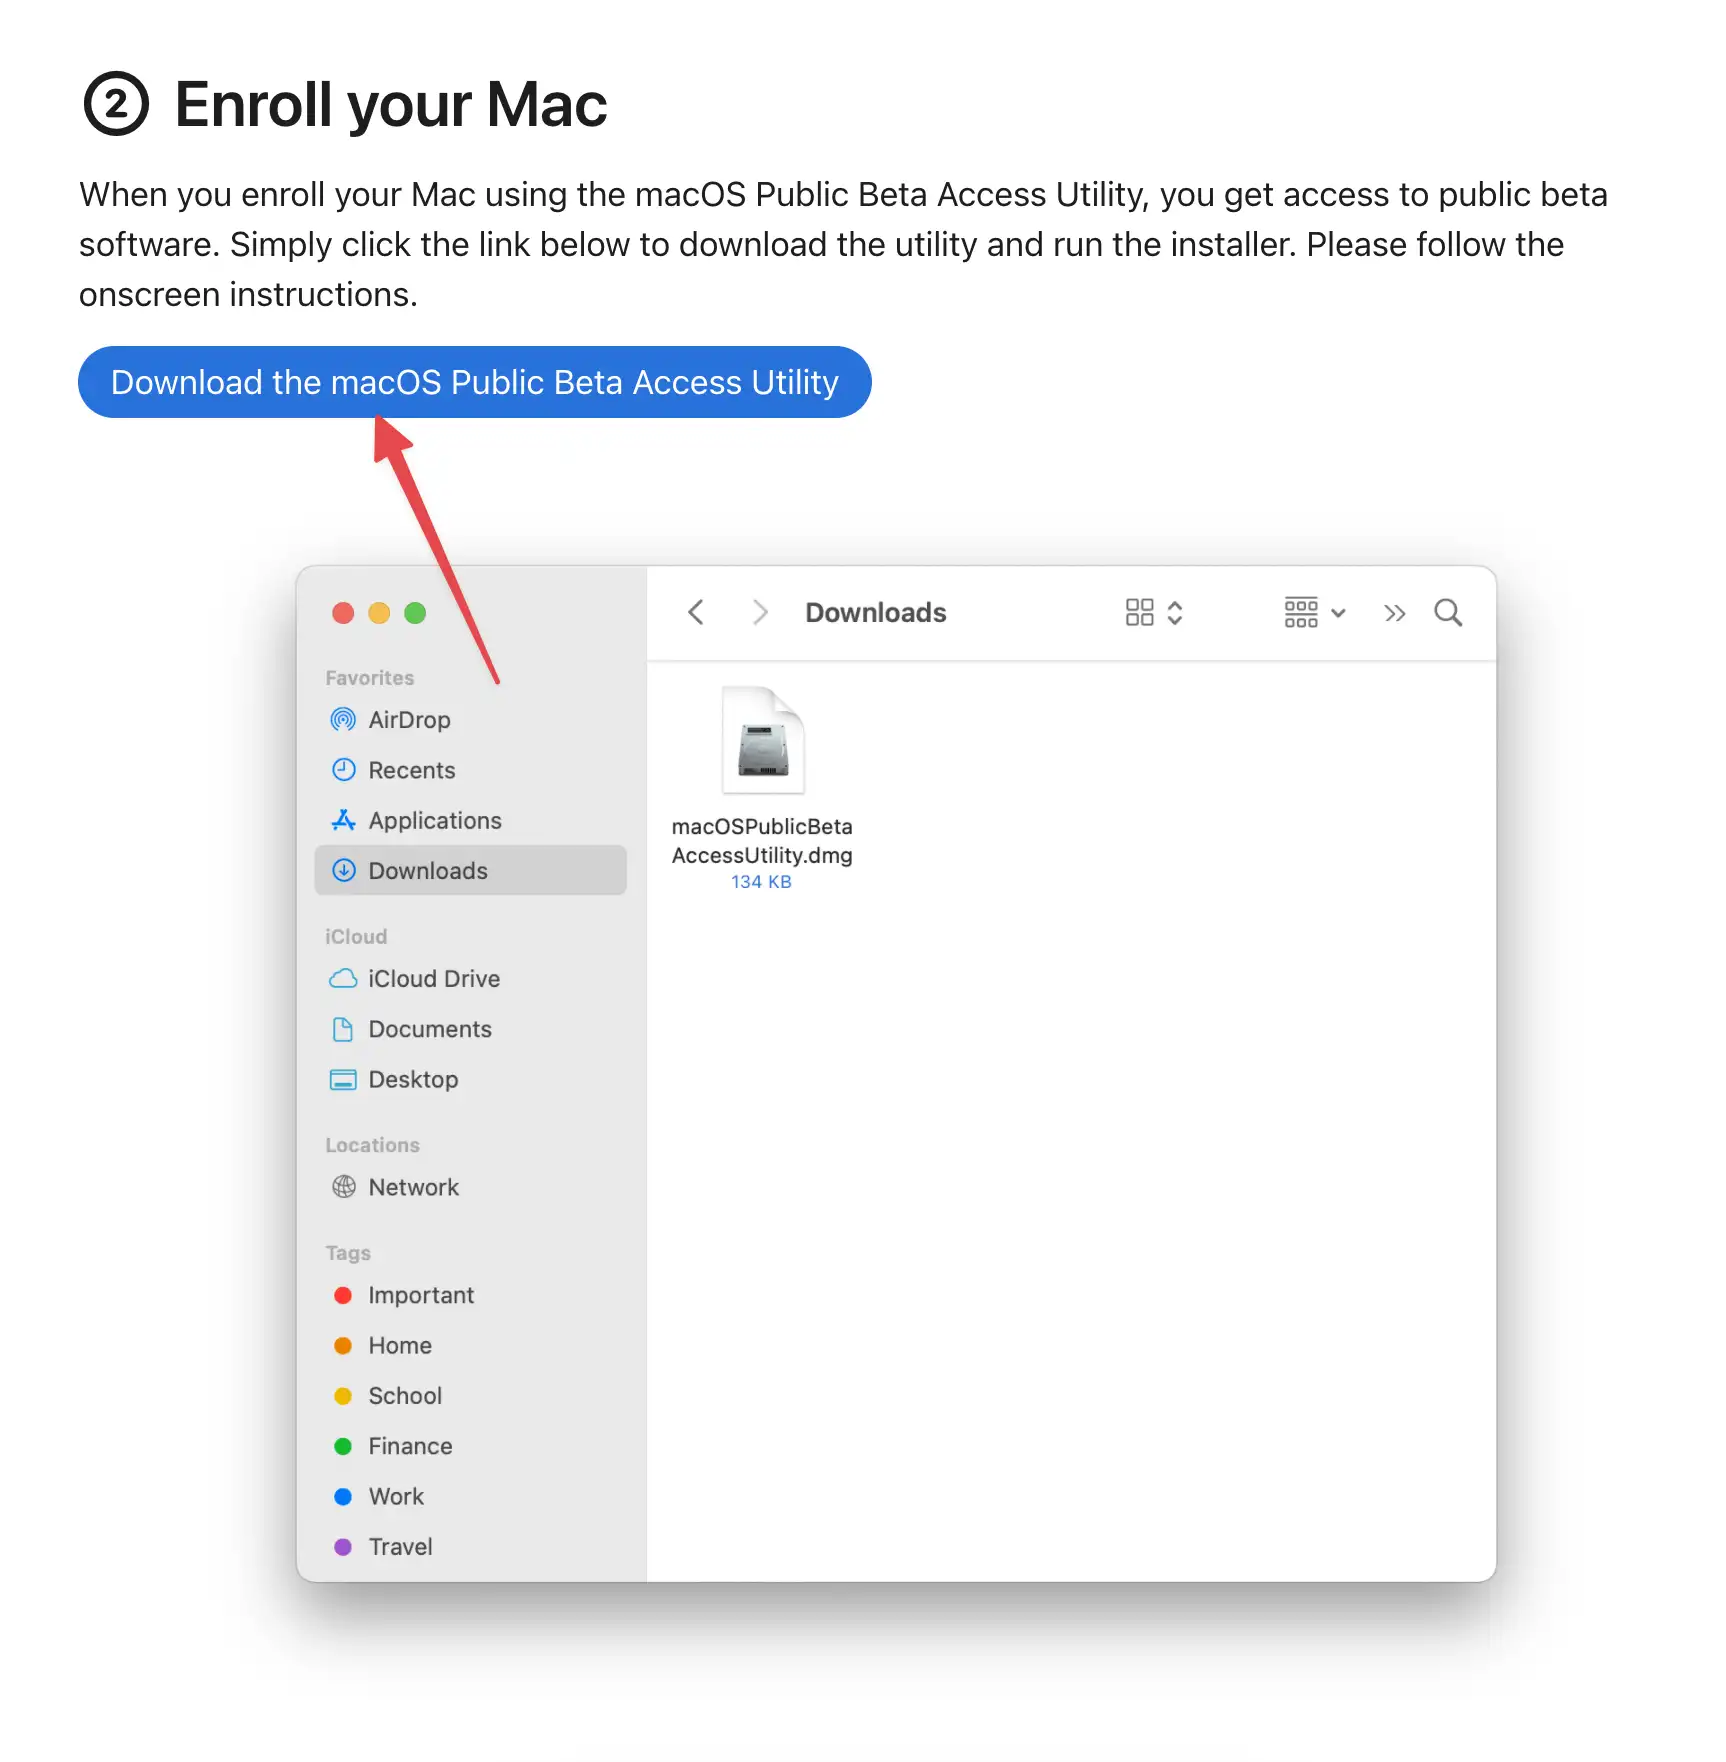
On the next page, scroll to the Enroll your Mac section and click the Download macOS Ventura Public Beta Access Utility button.
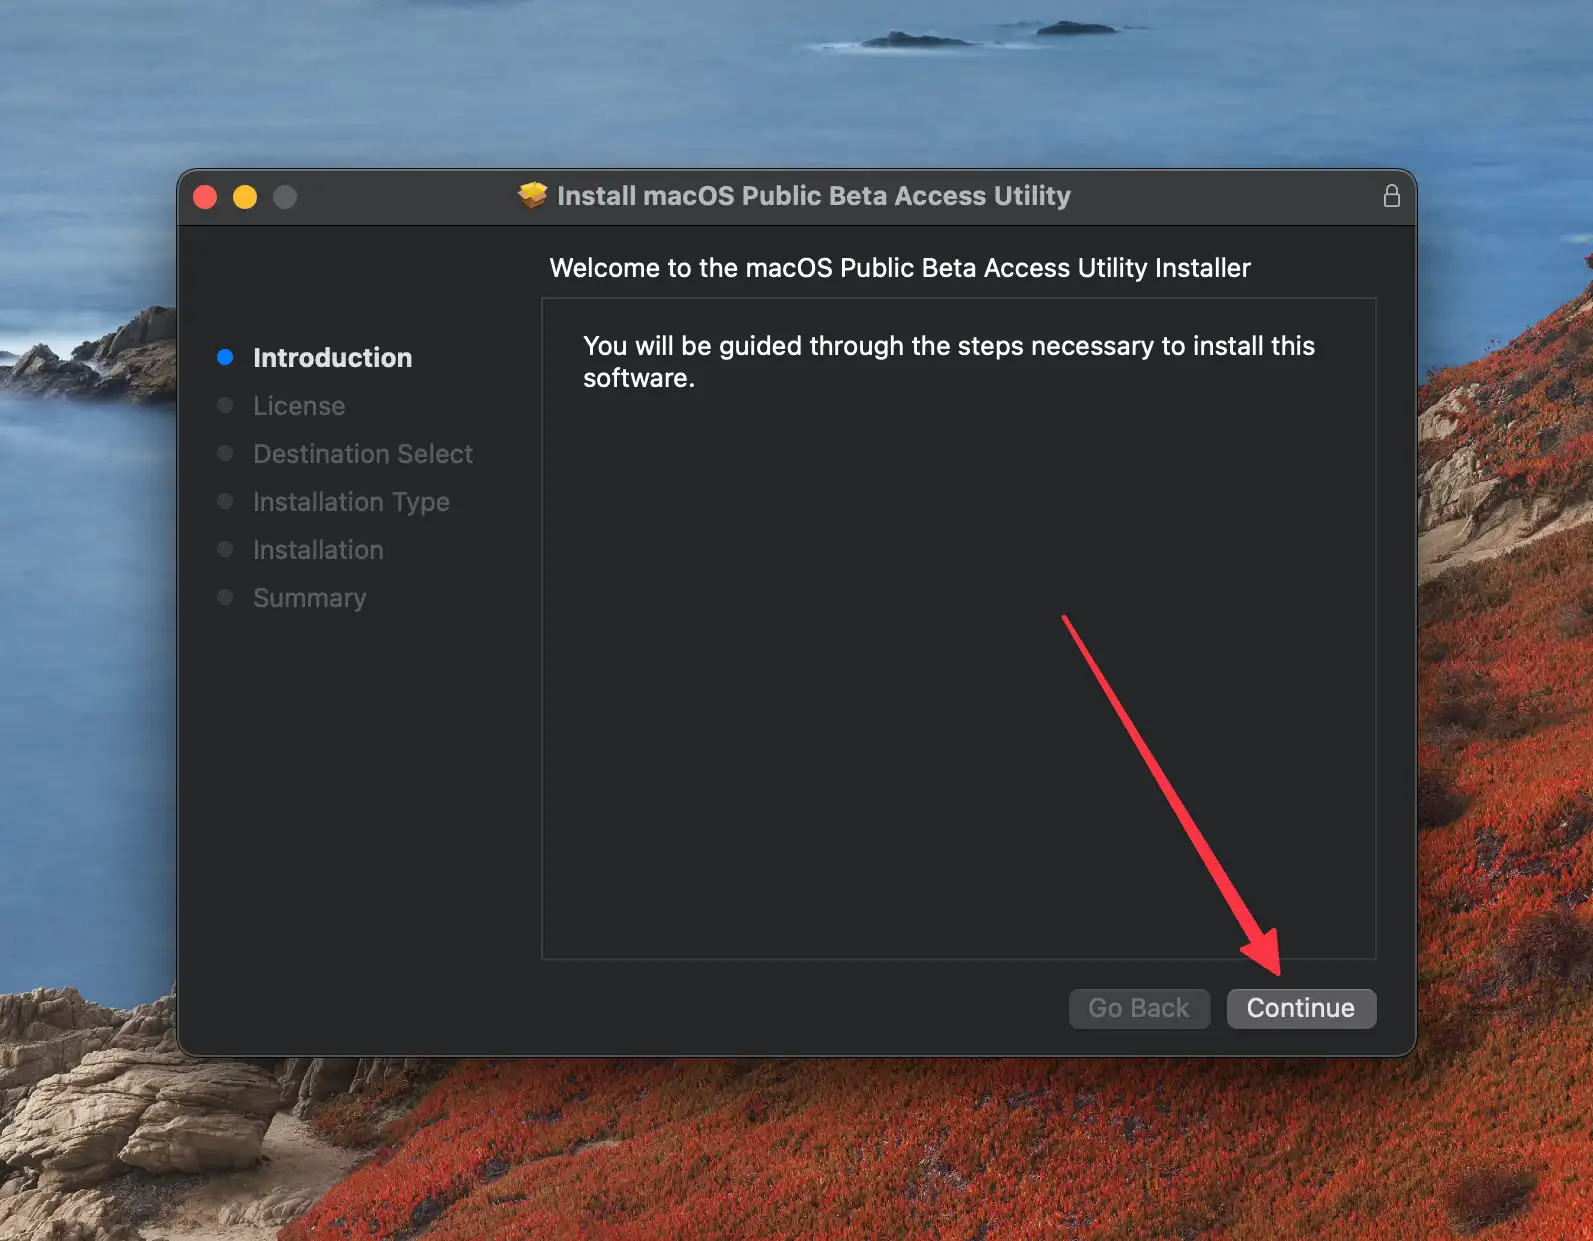
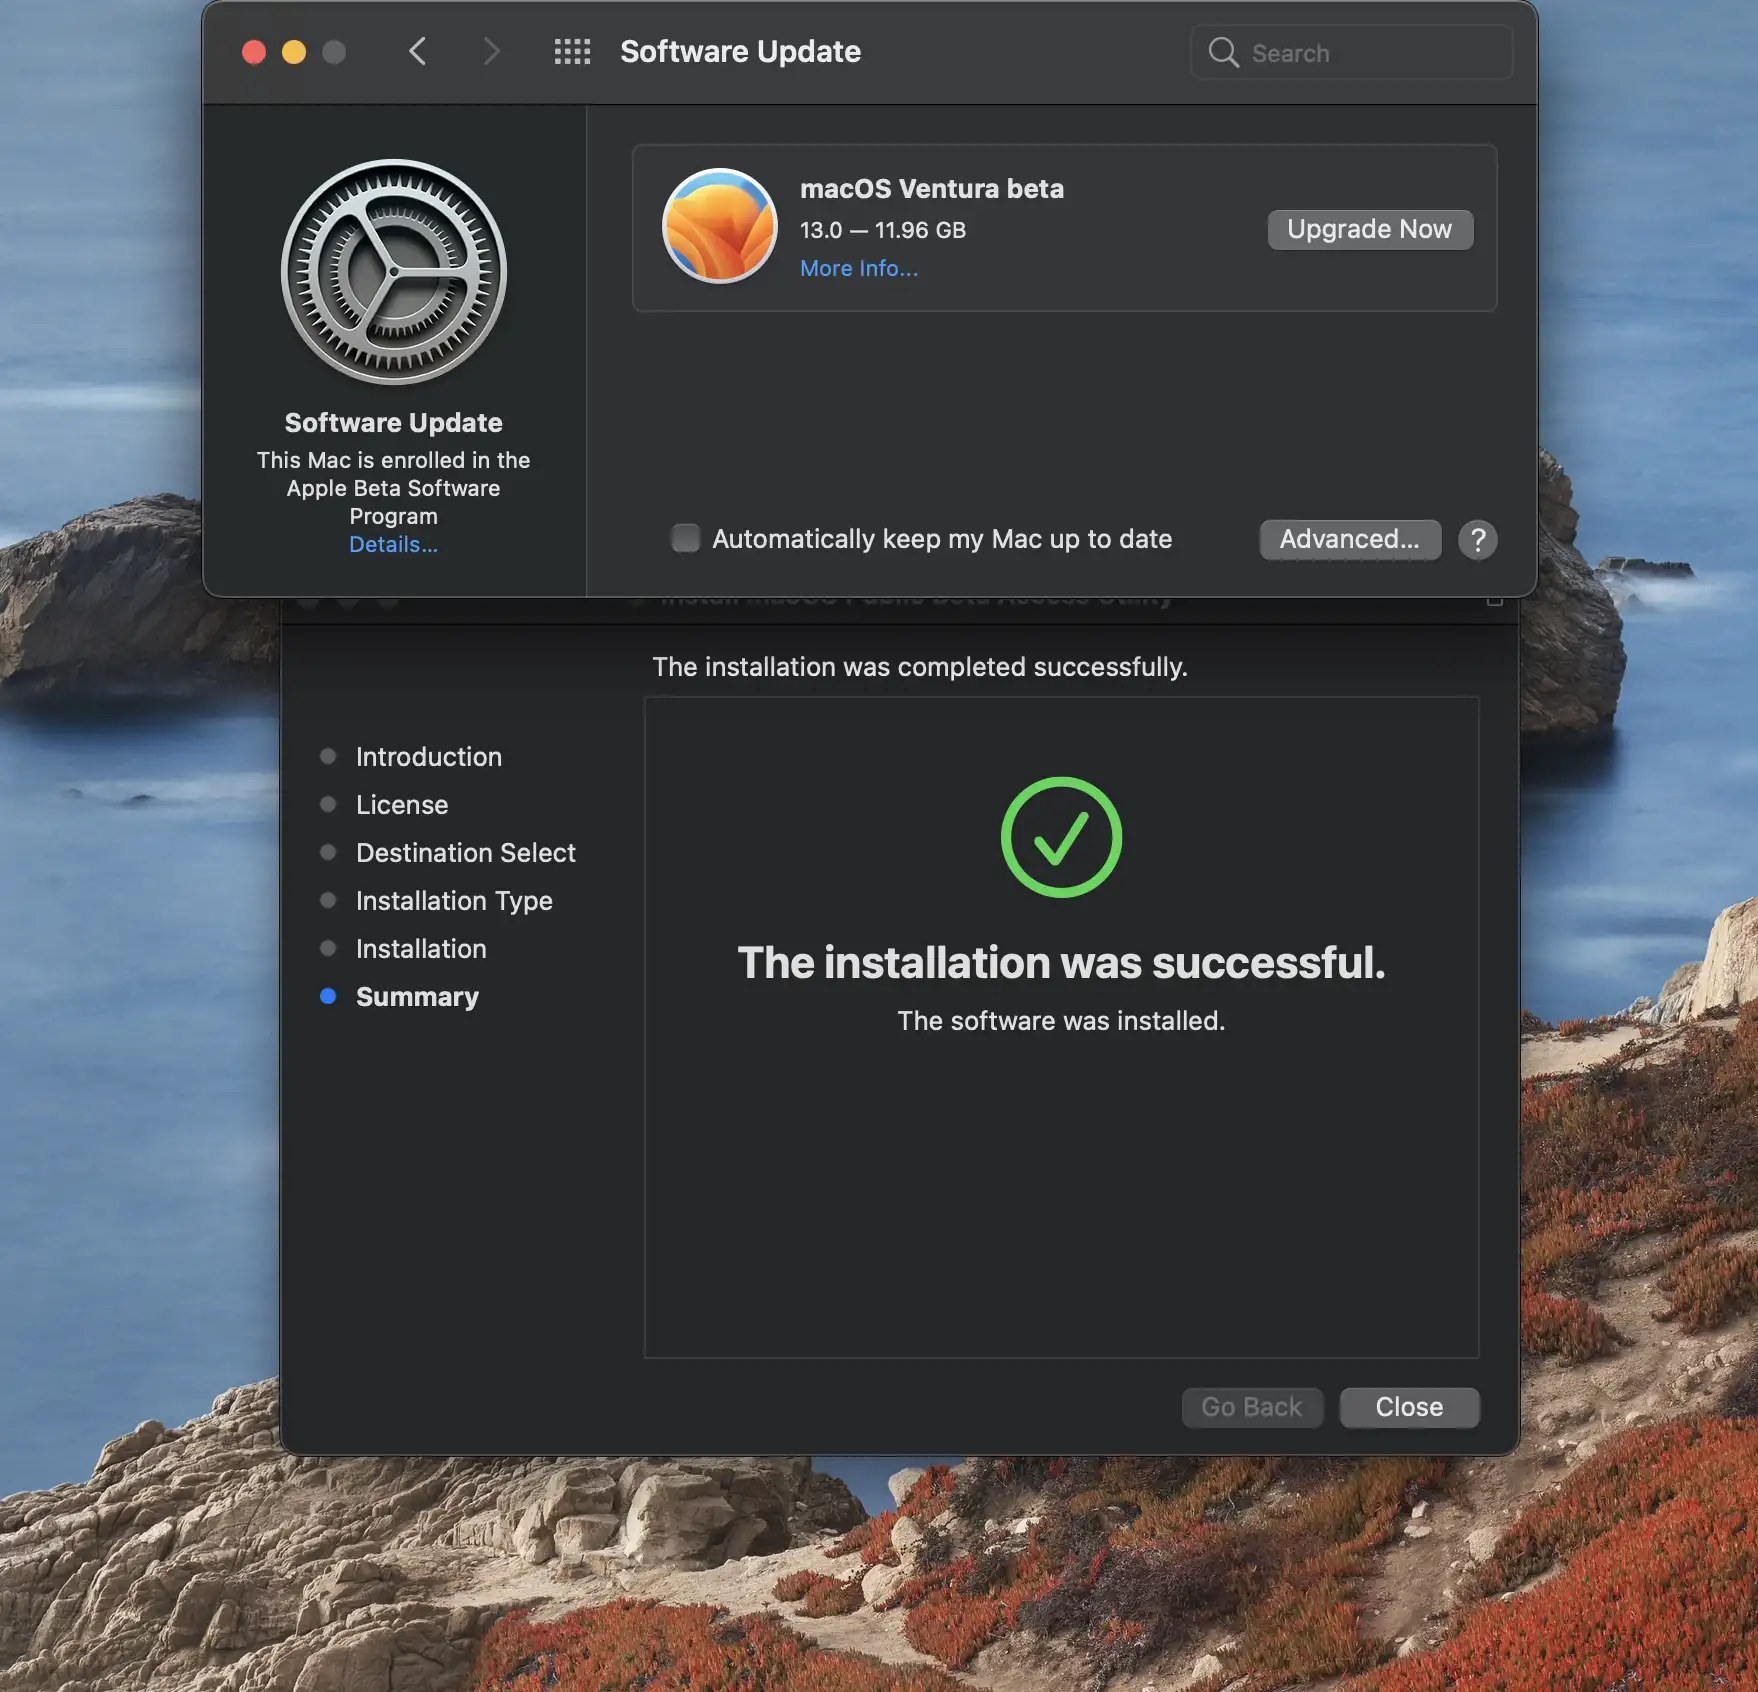
A disk image file (.pkg) will download to your computer. Just follow the on-screen instructions to install it.
Once it has finished downloading, you will see the Install macOS Ventura Public Beta app in the Applications folder, or go to Launchpad and look for it.
Create A USB With The Mac OS Extended Format
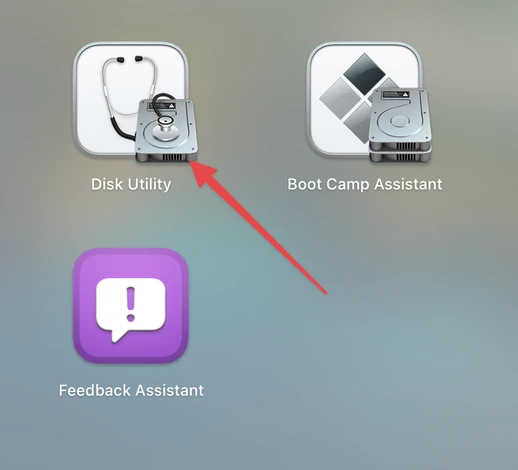
1. Plug your USB drive into your Mac and open Disk Utility.
2. Select your USB drive from the left sidebar and click the “Erase” button.
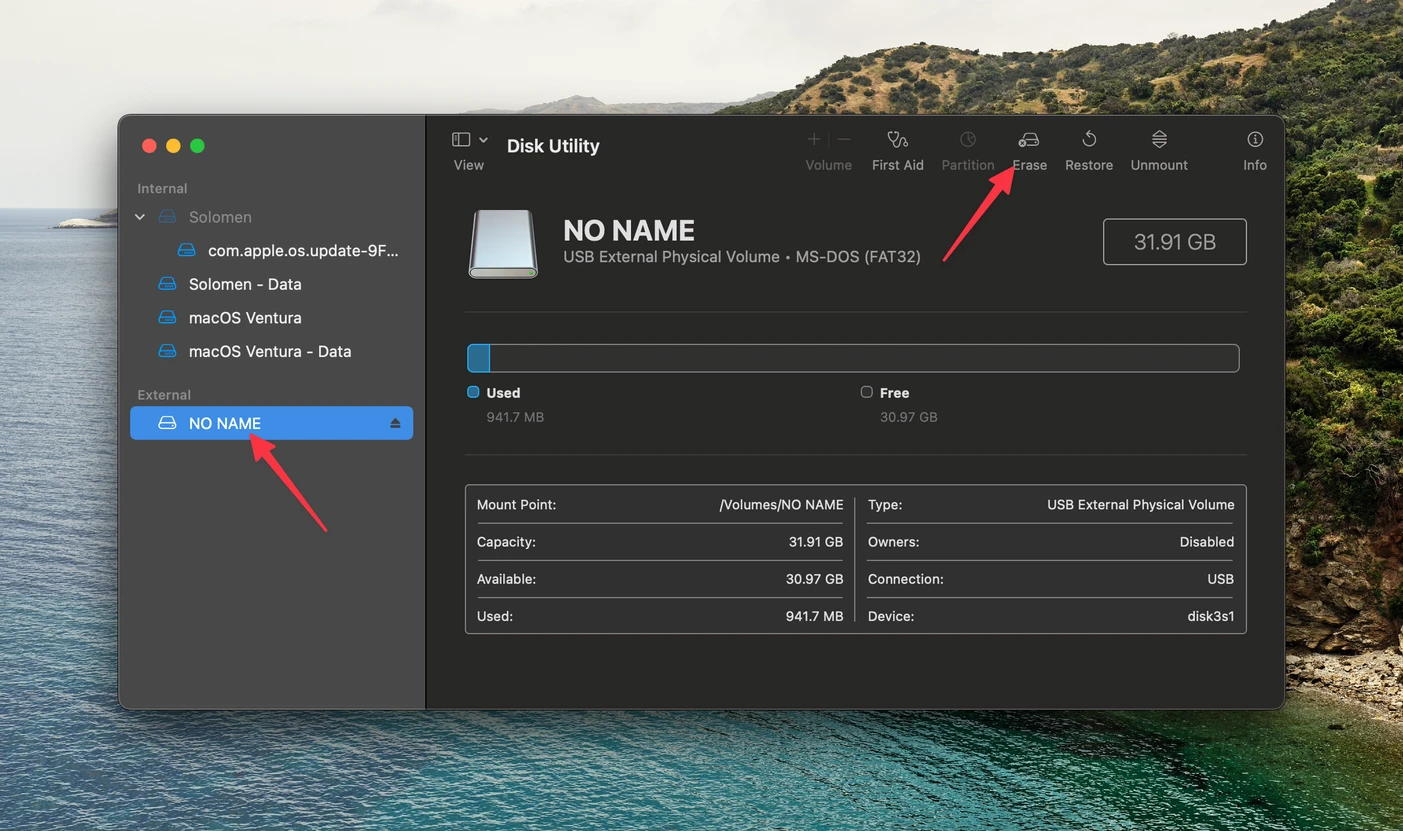
3. In the pop-up window, choose “Mac OS Extended (Journaled)” from the format drop-down menu and click on the “Erase” button. In name, you can give it something like “Ventura” or “NONAME.”
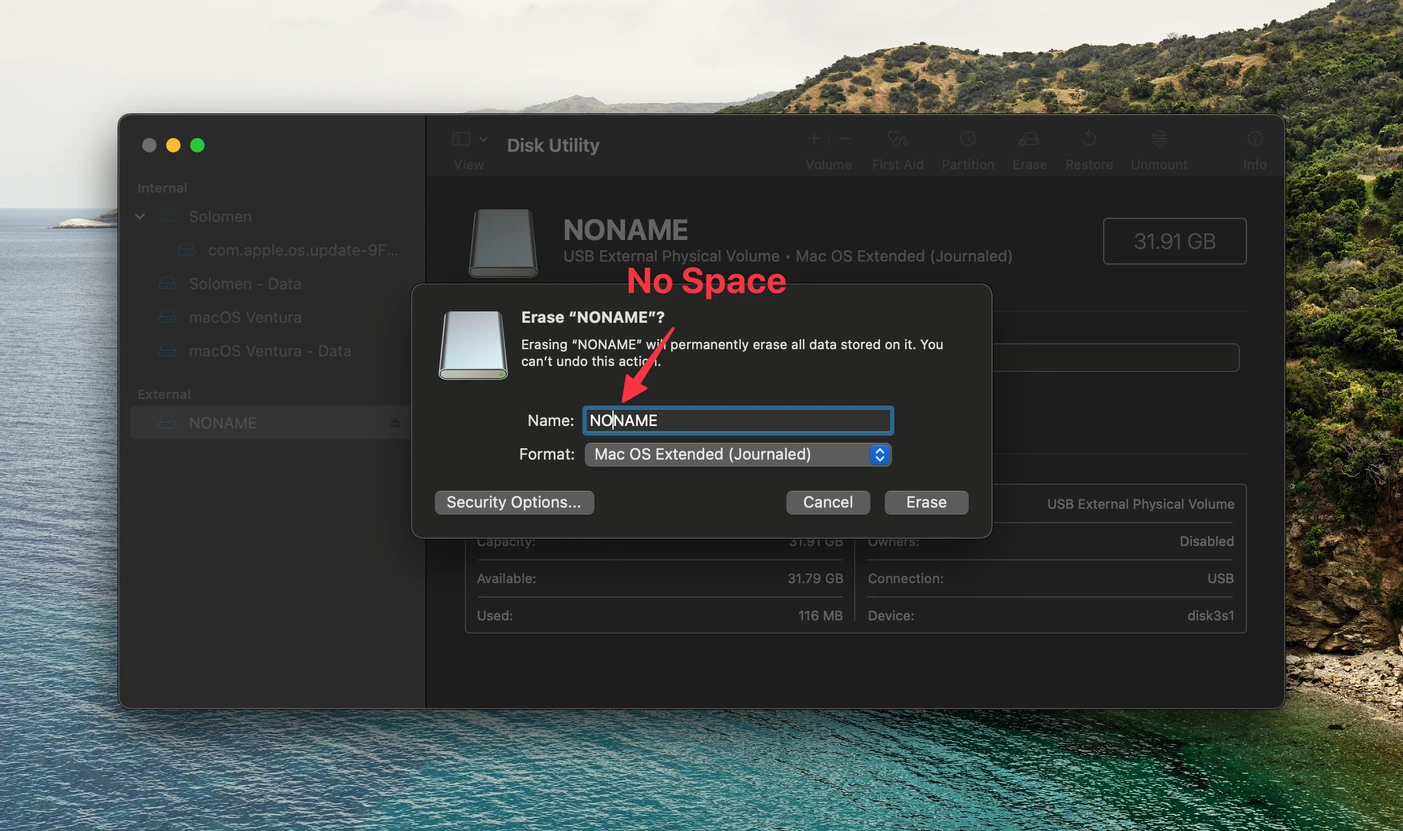
Note: In this guide, we use “NONAME” to name the USB drive. It is essential, and we will use this name in the next steps.
4. When the erase process is complete, close Disk Utility
Use Terminal To Create A Bootable Installer For macOS Ventura
Terminal is a text-based tool that lets you control your Mac using commands. It can also help you quickly create a bootable installer for macOS Ventura without any third-party app.
1. Launch the Terminal app from Applications > Utilities or Spotlight.
2. In the Terminal window, type in the following command and press Enter:
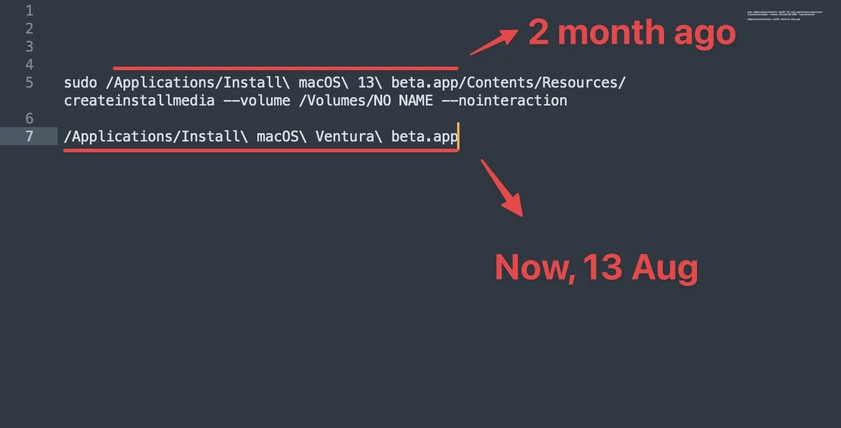
sudo /Applications/Install\ macOS\ Ventura\ beta.app/Contents/Resources/createinstallmedia --volume /Volumes/NONAME --nointeraction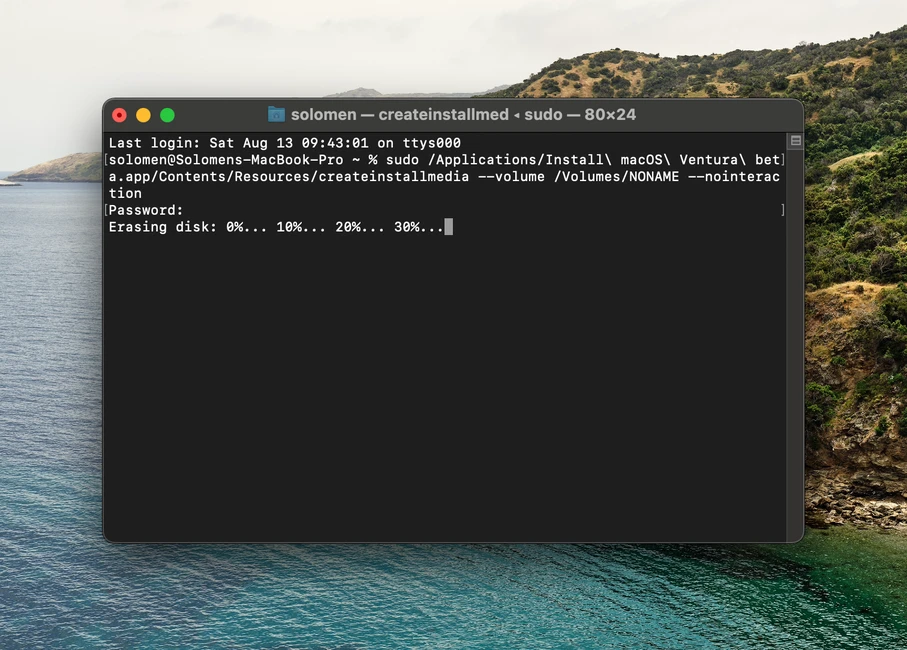
We use “NONAME” to name the USB drive in this guide. It can be changed to any word you want, depending on how you call your USB drive in the above step.
3. Enter your admin password when prompted and wait for the process to finish.
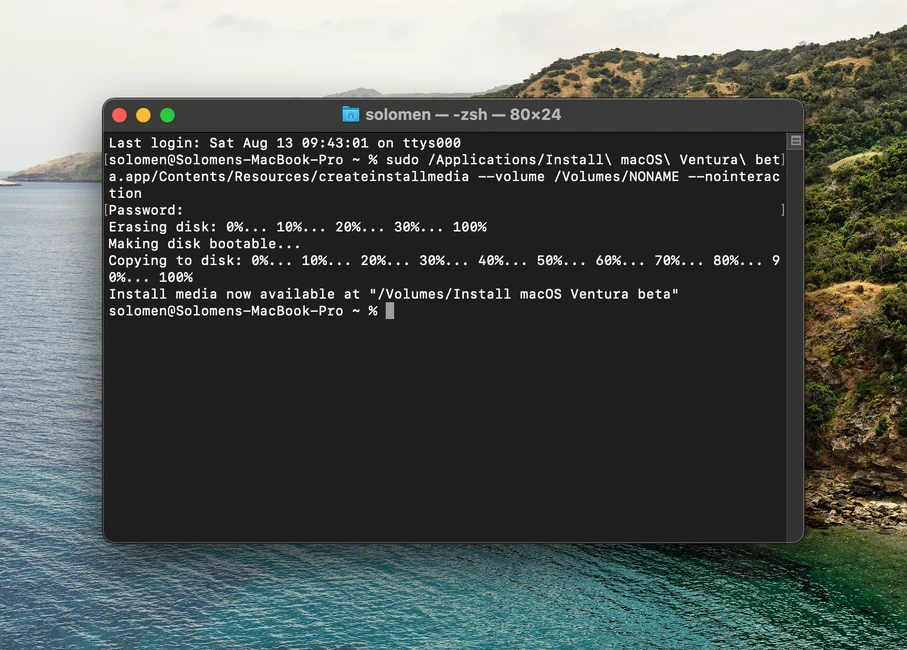
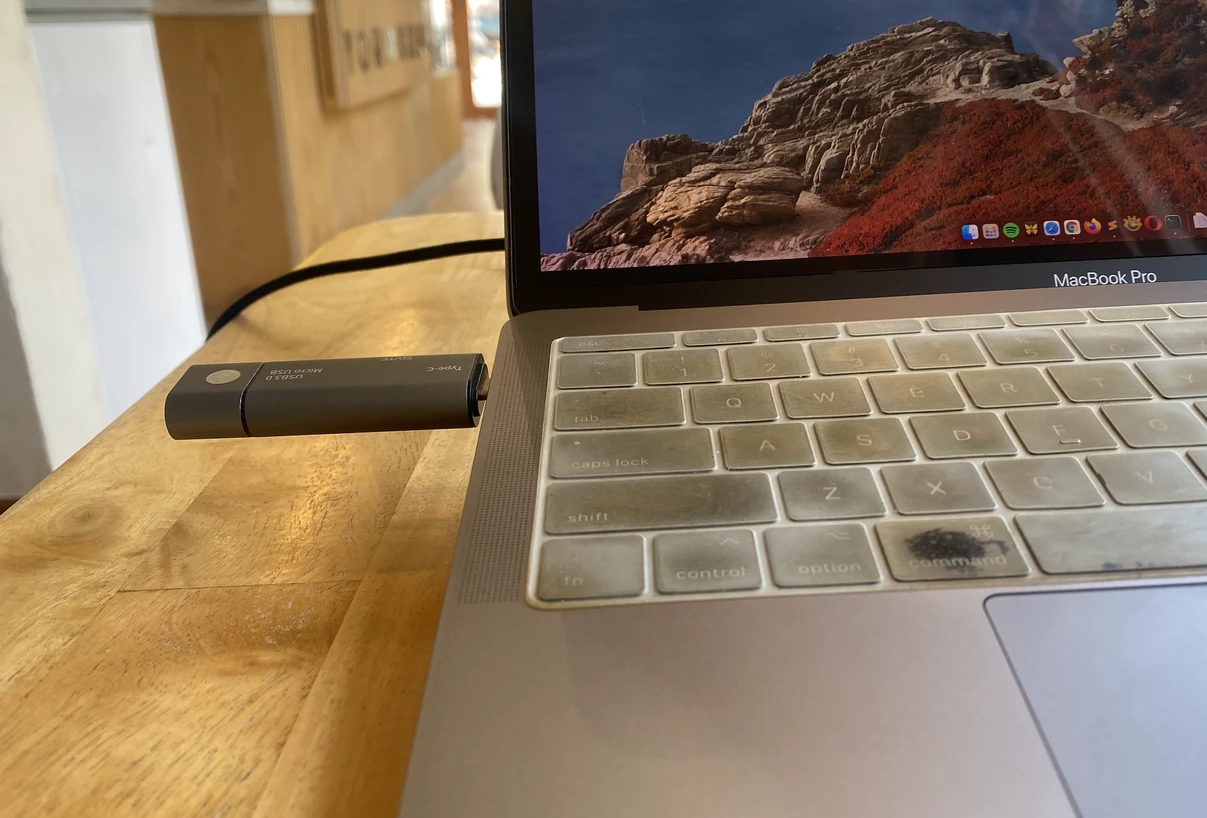
I have a Macbook Pro 2017 and a micro SD card connected to my Mac using a USB-C adapter. It took about 10 minutes for the entire process to finish.
More:
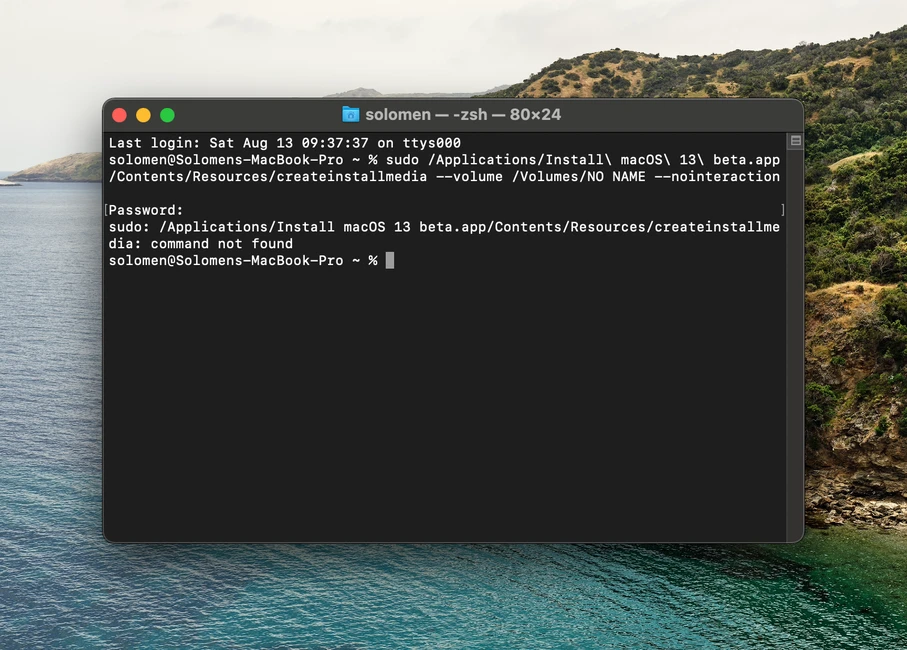
/Applications/Install macOS Ventura beta.app: It can be changed by Apple to a new version of macOS Ventura beta or release version. You may get an error when you use the command above to create a bootable installer.
sudo: /Applications/Install macOS 13 beta.app/Contents/Resources/createinstallmedia: command not found
If you are getting this error, replace /Applications/Install macOS Ventura beta.app with the correct path to the installer app.
The simple way to find the correct path is to drag and drop the Install macOS Ventura beta.app from the Applications folder into the Terminal window.
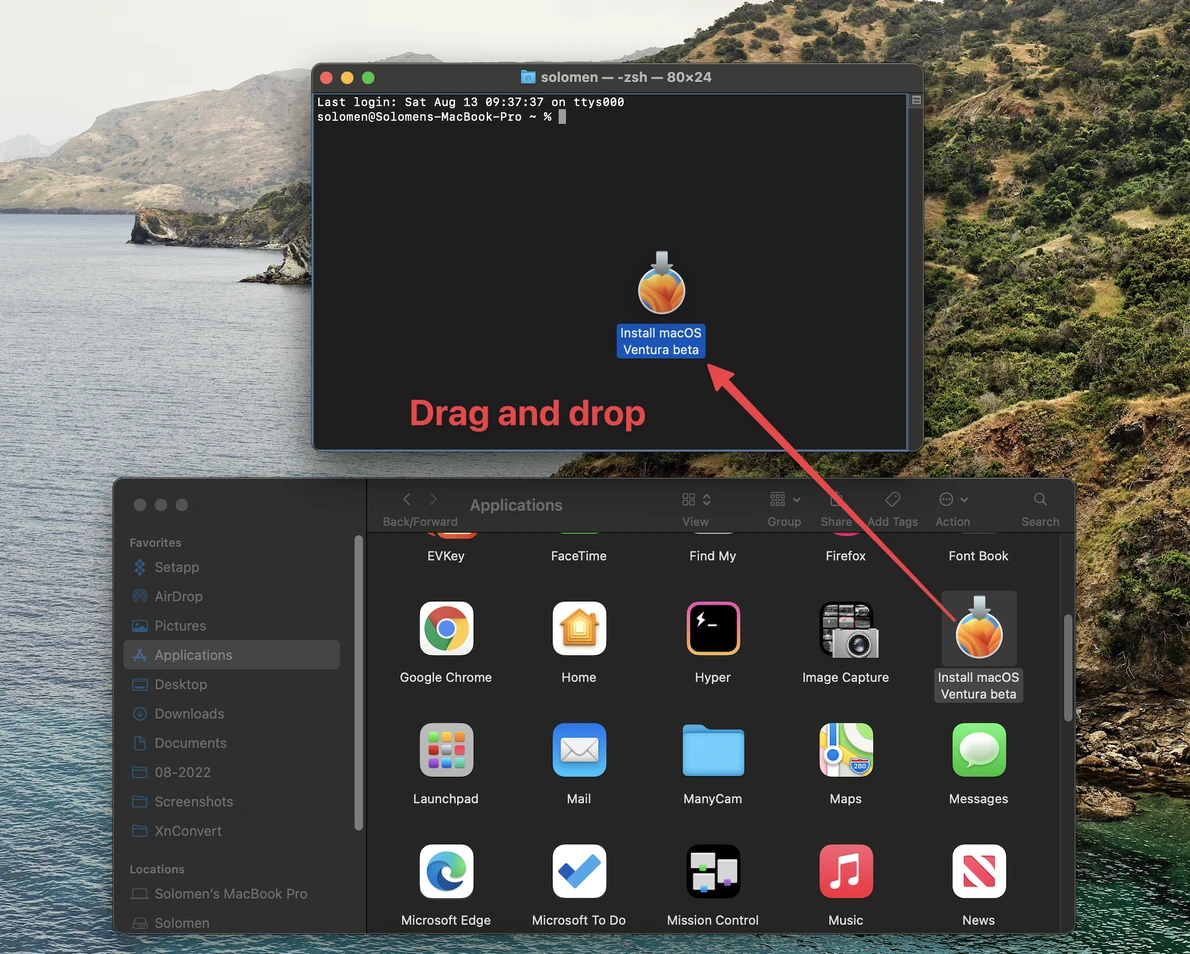
This will automatically fill in the correct path to the app.
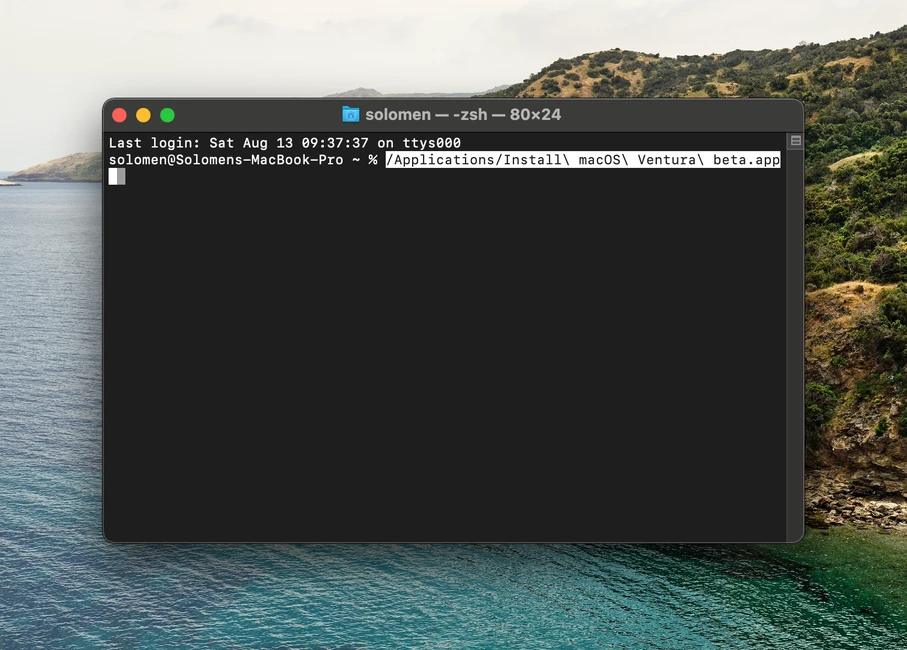
It’s time to replace the /Applications/Install macOS Ventura beta.app in the command above with the new path and hit Enter.
How To Boot From The USB Installer
Now that you have successfully created a bootable installer for macOS Ventura, it’s time to boot your Mac from it and install the new operating system.
Intel processors and Apple silicon M-series chip-equipped Macs use different boot processes.
Mac with Intel processors
1. Connect the USB drive to your Mac and restart your computer.
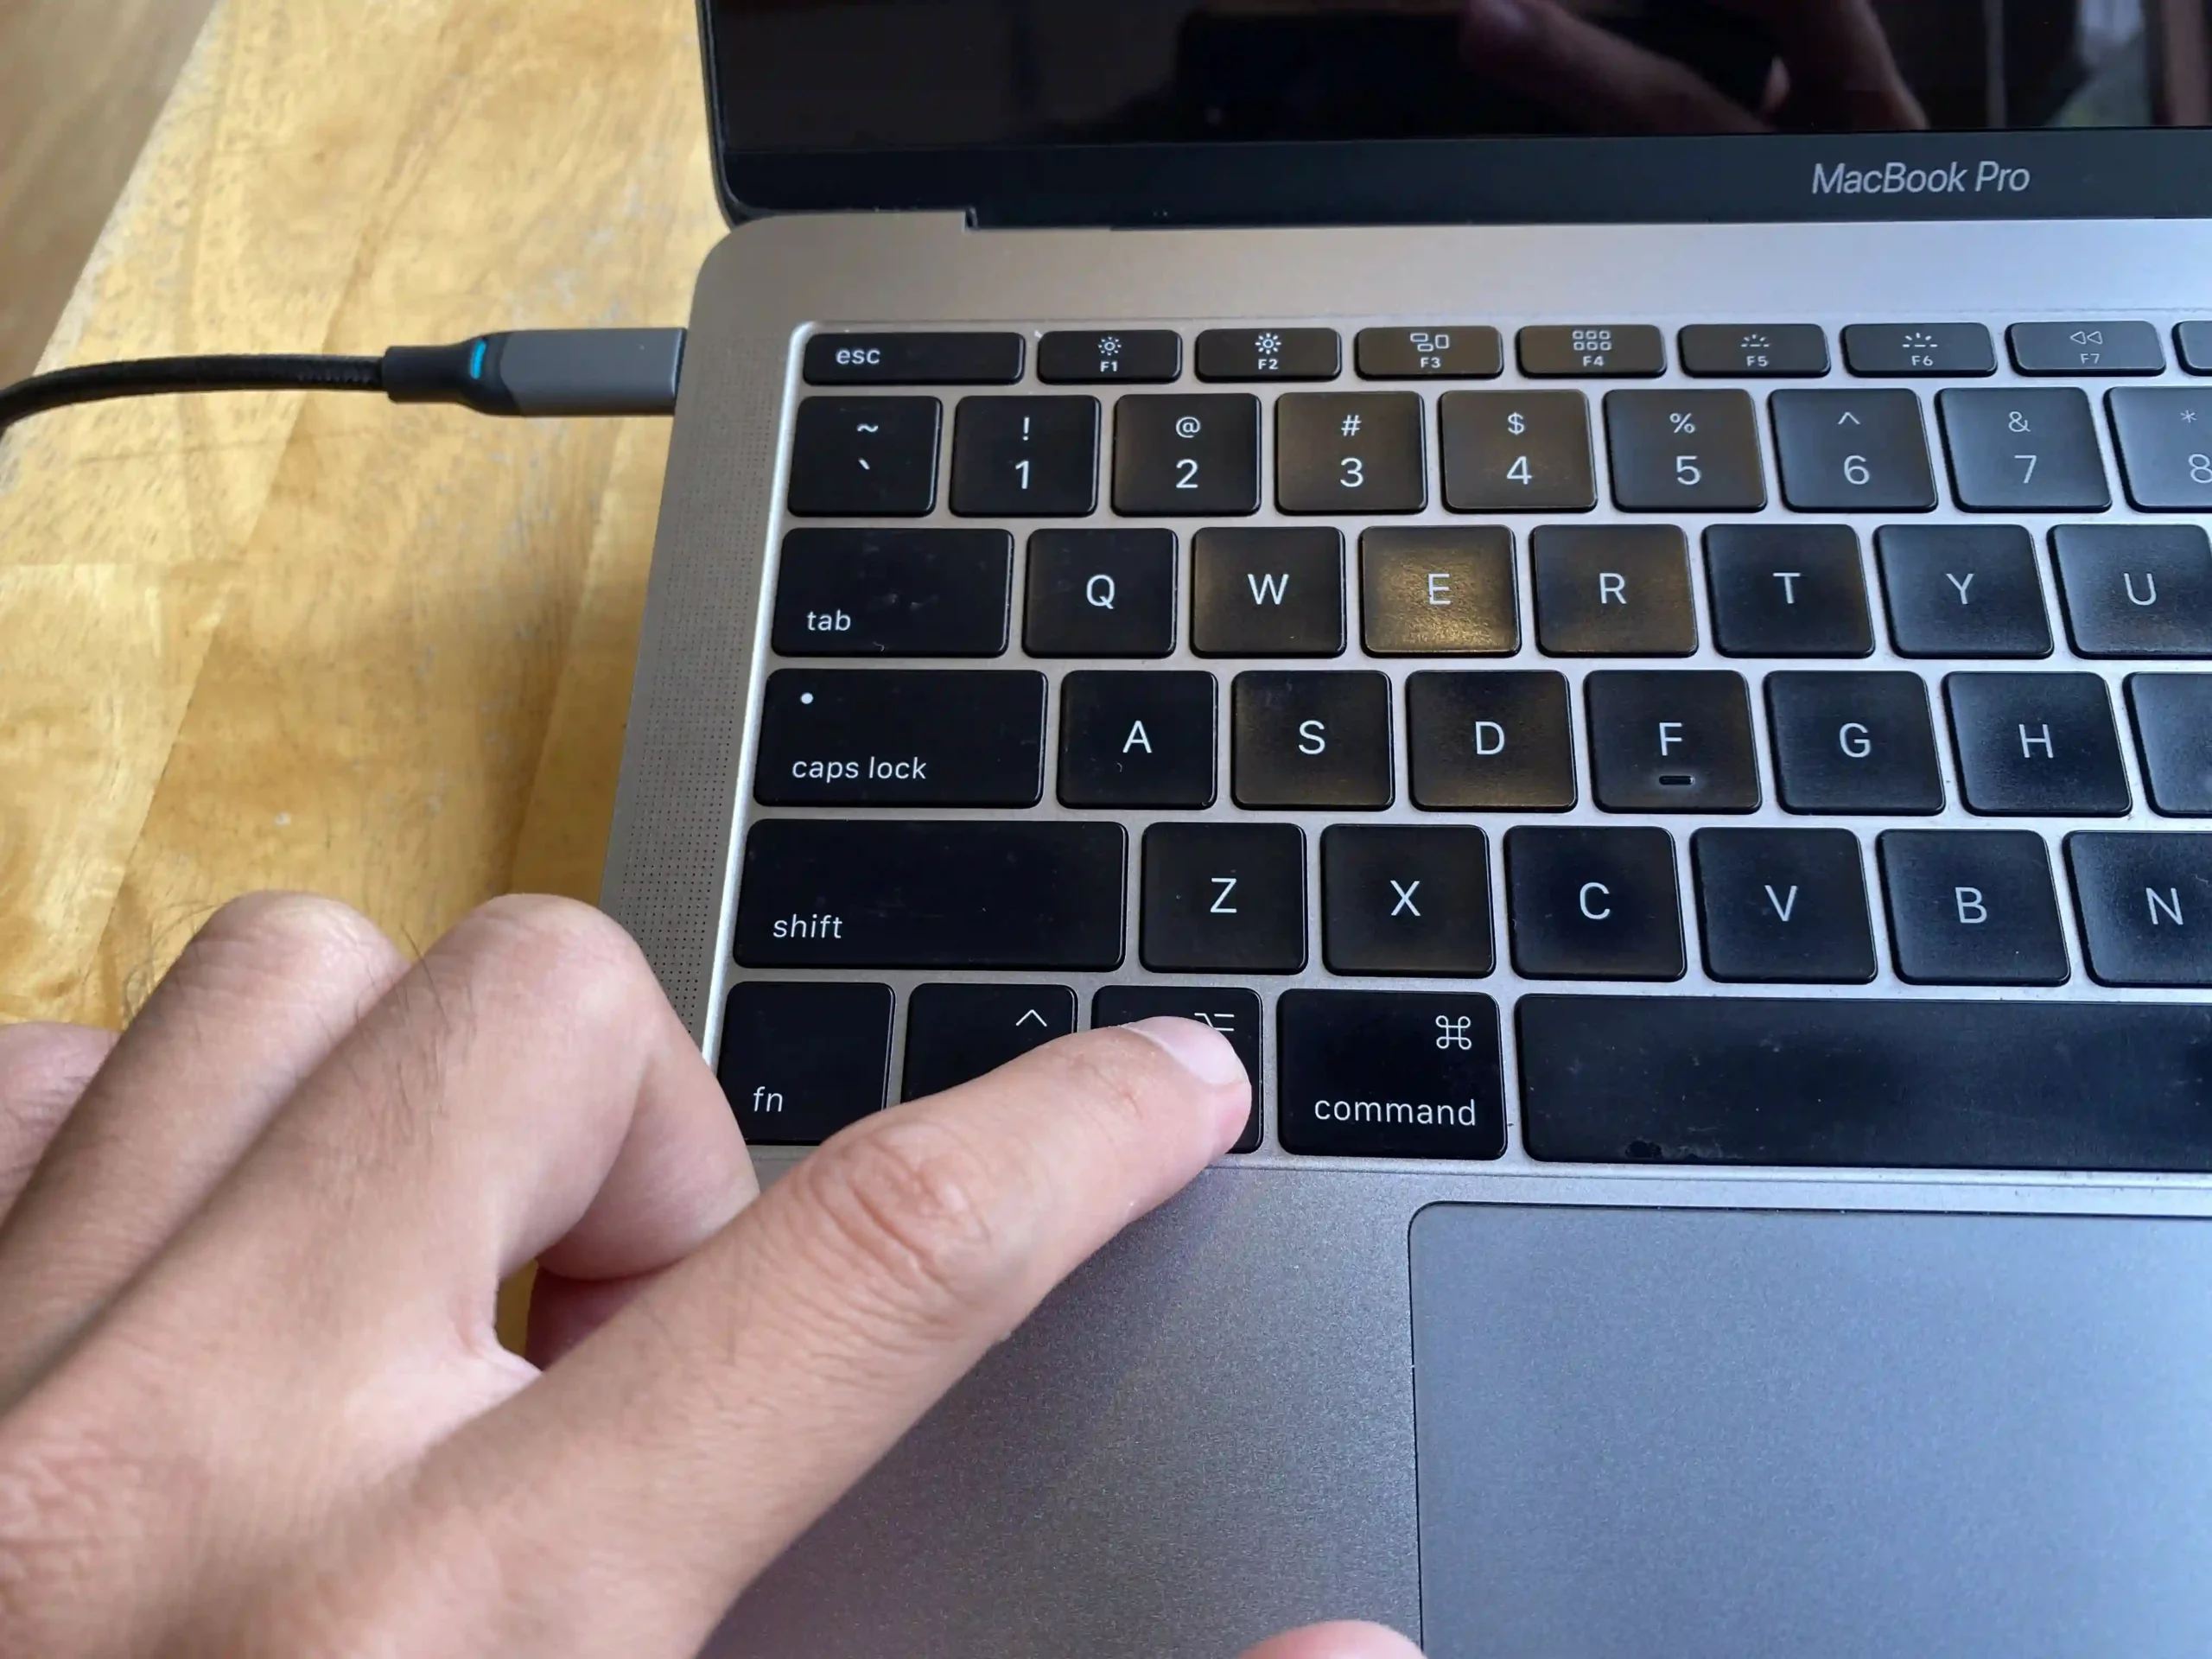
2. Press and hold the Option key on your keyboard when you see the Apple logo. This will take you to the Startup Manager screen, where you can see all the bootable devices connected to your Mac.
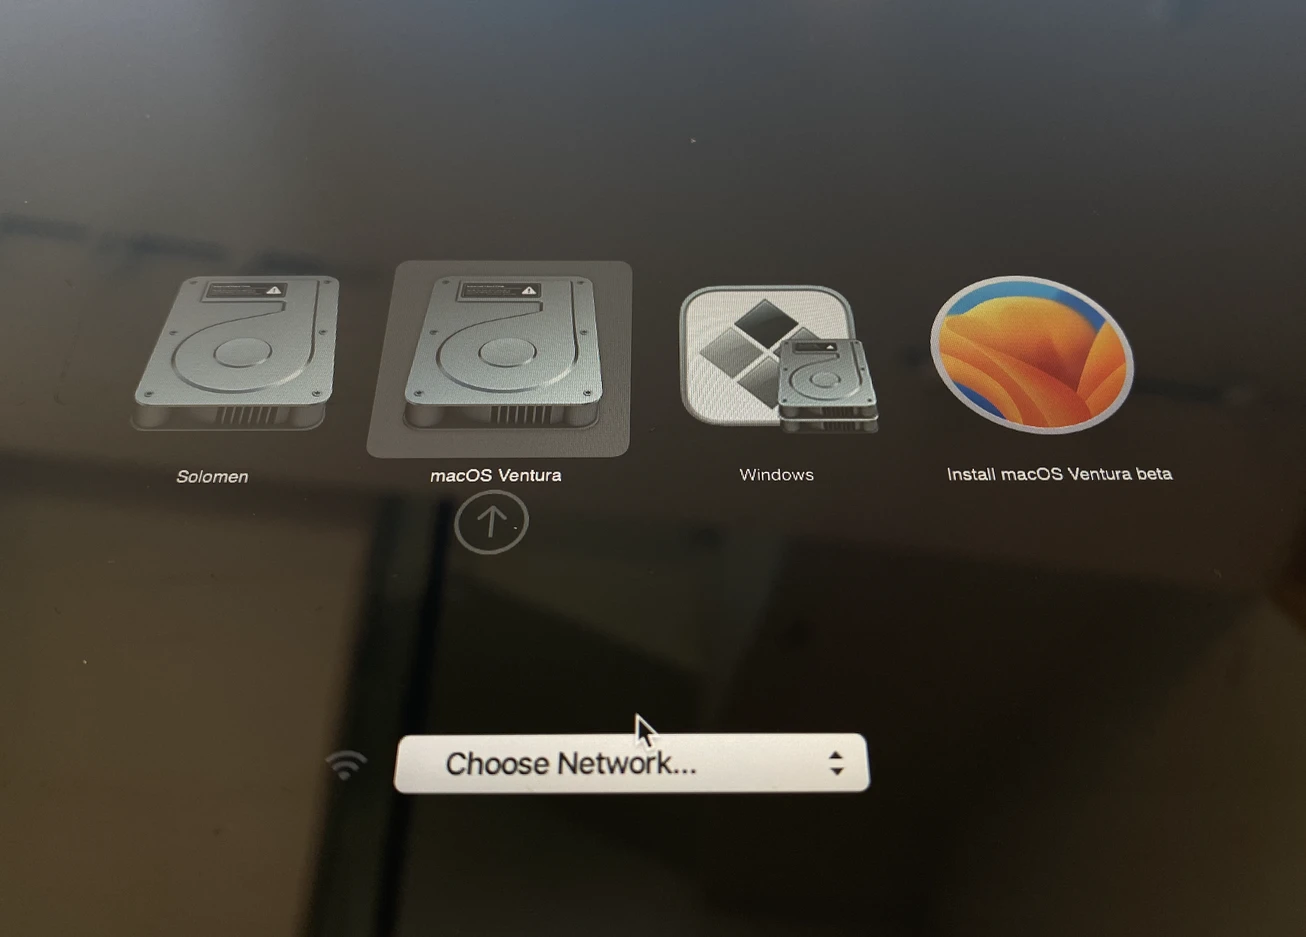
3. Select the USB drive labeled “Install macOS Ventura” and hit the Return key.
Mac with Apple silicon M-series chips
1. Connect the USB flash device to your Mac and restart your Mac.
2. Press the Power button until you see the startup options screen.
3. Select the USB flash drive labeled “Install macOS Ventura” and press the Return key to boot into it.
How To Install macOS Ventura From The USB Installer
You will see the Welcome screen once you have booted into the USB installer. Click on the “Continue” button to begin the installation process. The installation process will now begin.
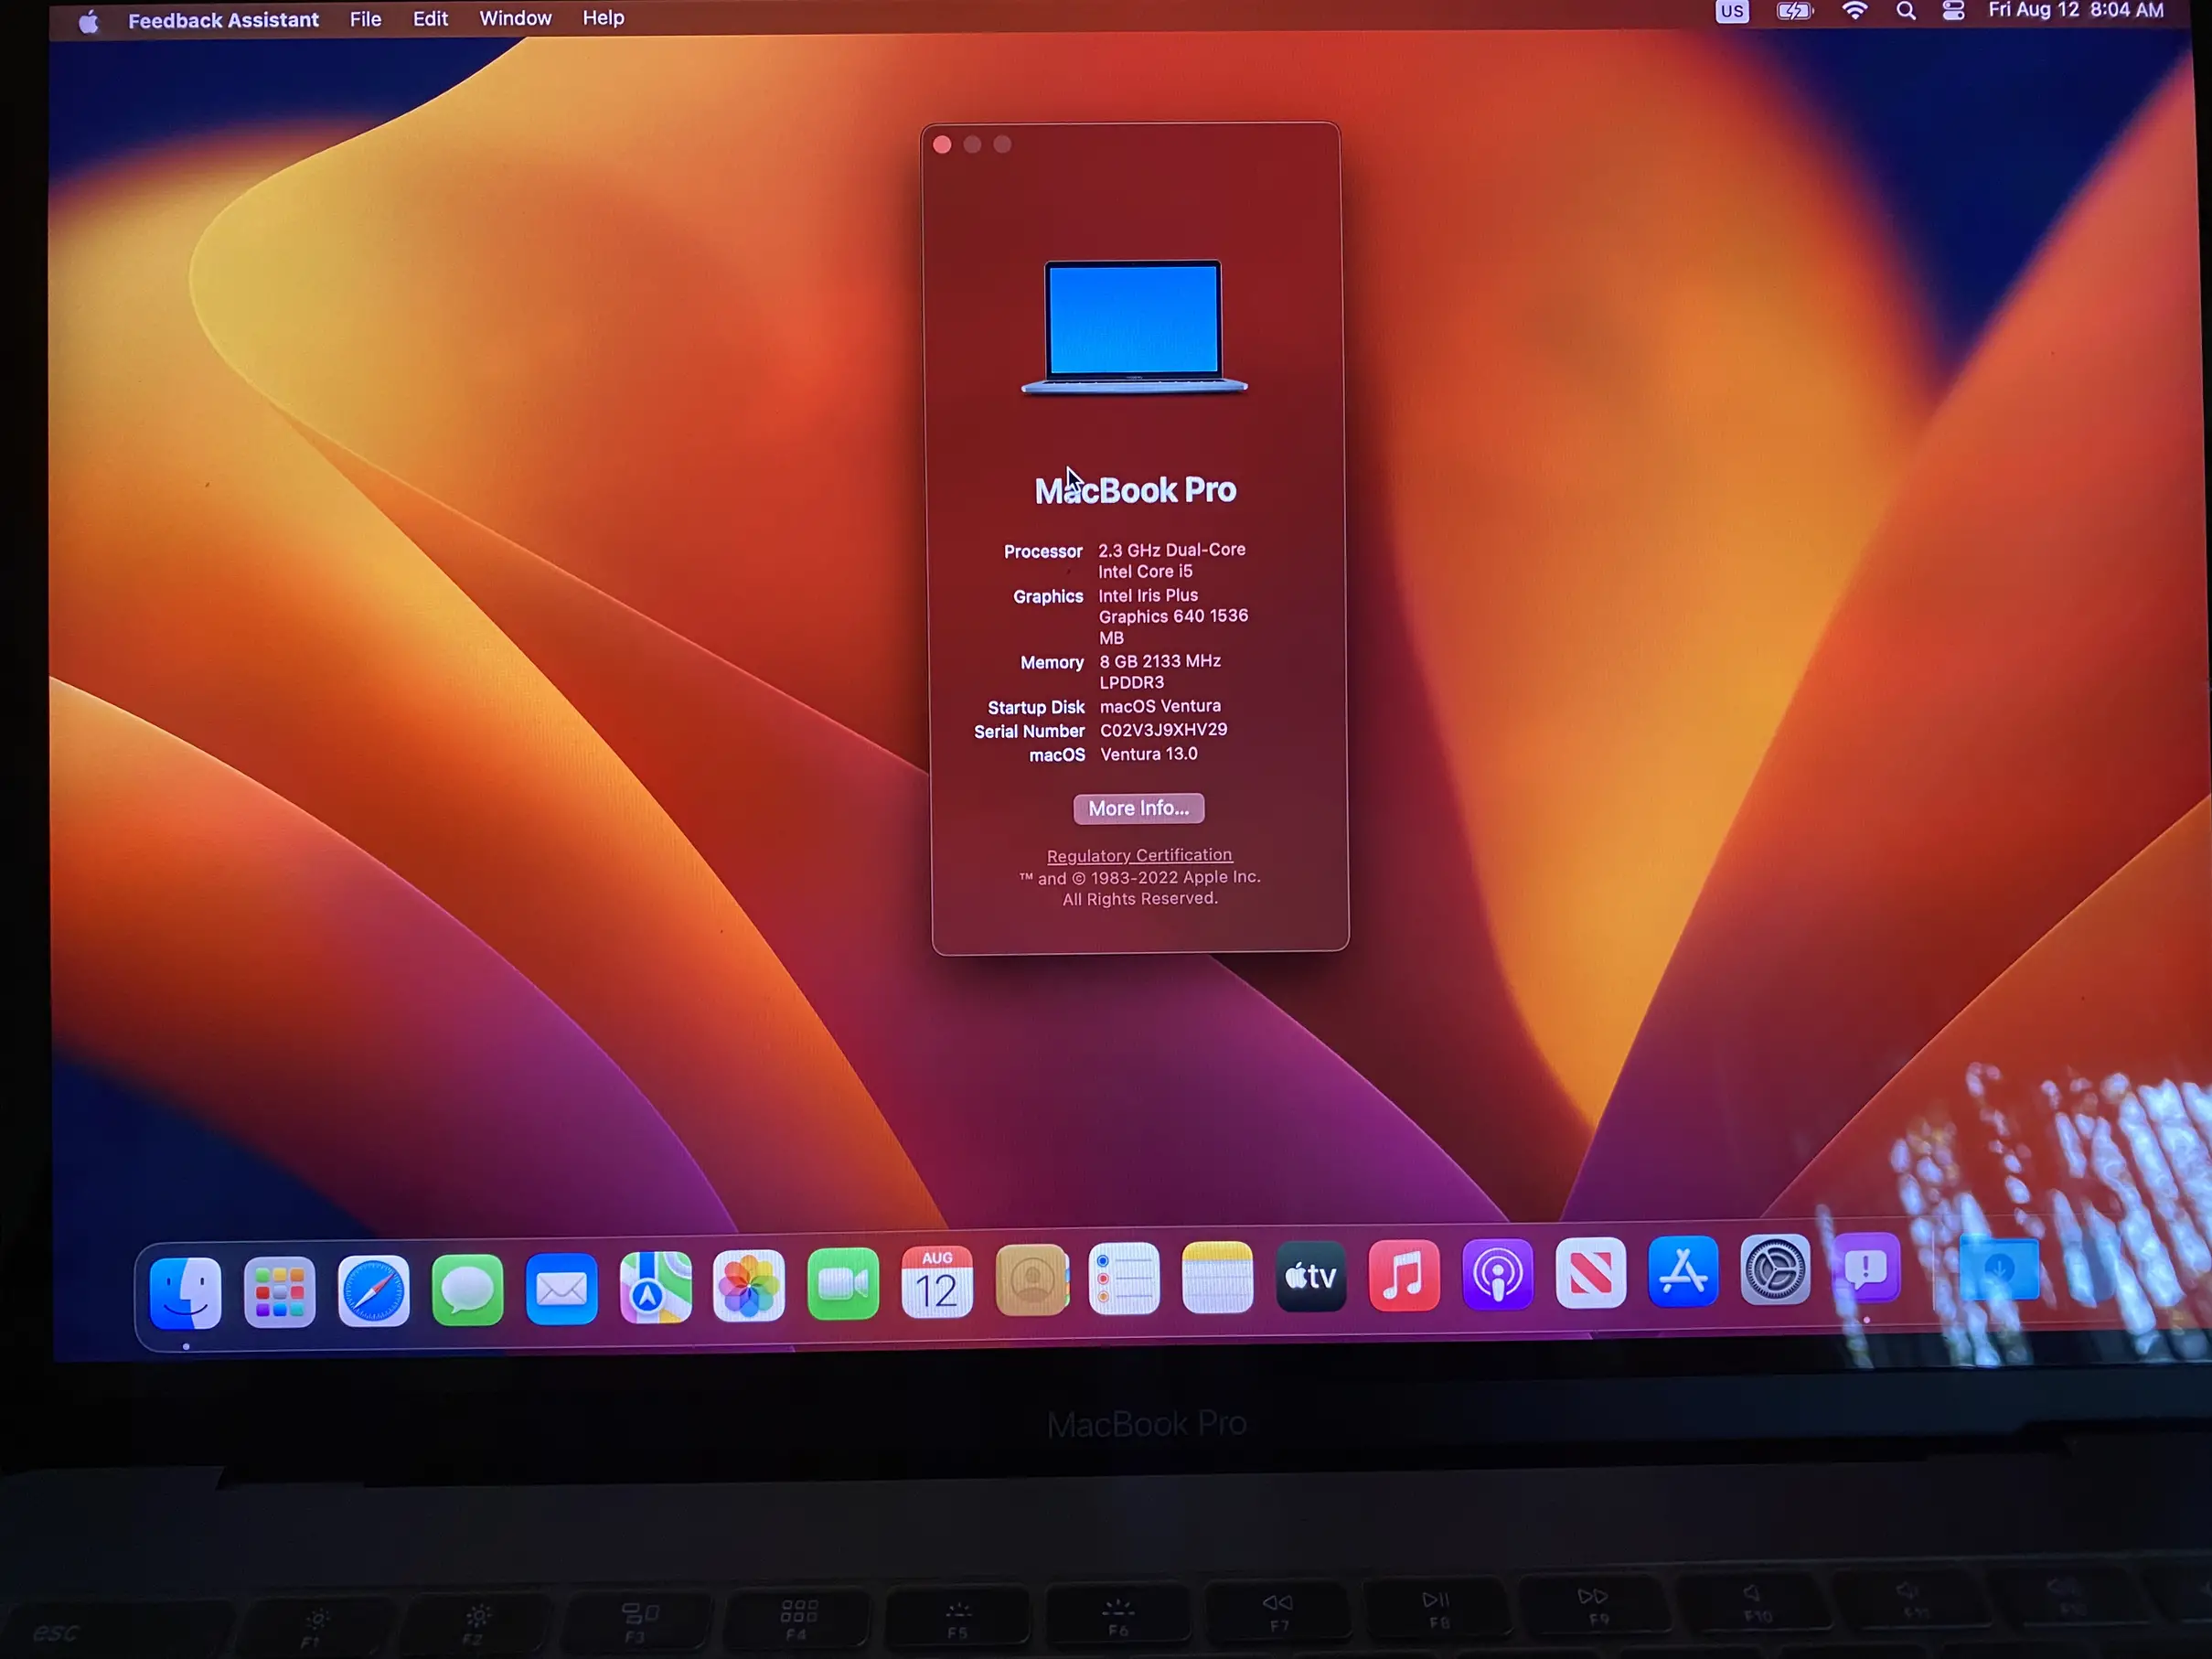
It will take some time, so be patient and do not interrupt it. Once the installation is complete, your Mac will restart, and you will see the new macOS Ventura desktop.
Conclusion
In this article, we have shown you how to create a bootable USB installer for macOS Ventura. We hope this guide has been helpful and you are now running the latest macOS version on your Mac. Please let us know in the comment section below if you have any questions or comments. Thank you for reading!
Solomen is the founder of MrHow.io, and he is happiest when working with technology and able to help others. In his free time, he often listens to Baroque music, swims or runs. Feel free to contact him on social media!