If you don’t like something on your Mac or if you don’t want to preserve something on your and to reclaim the space used by that thing, what you can do is send that item to the Trash. The Trash is an area on your Mac that stores all of your deleted files for you if you would ever like to recover them.
To send an item to the Trash, all you need to do is right-click on the item and select Move to Trash and the selected item will be moved from its original location to the Trash on your Mac. This does not mean the file has been permanently removed from your Mac.
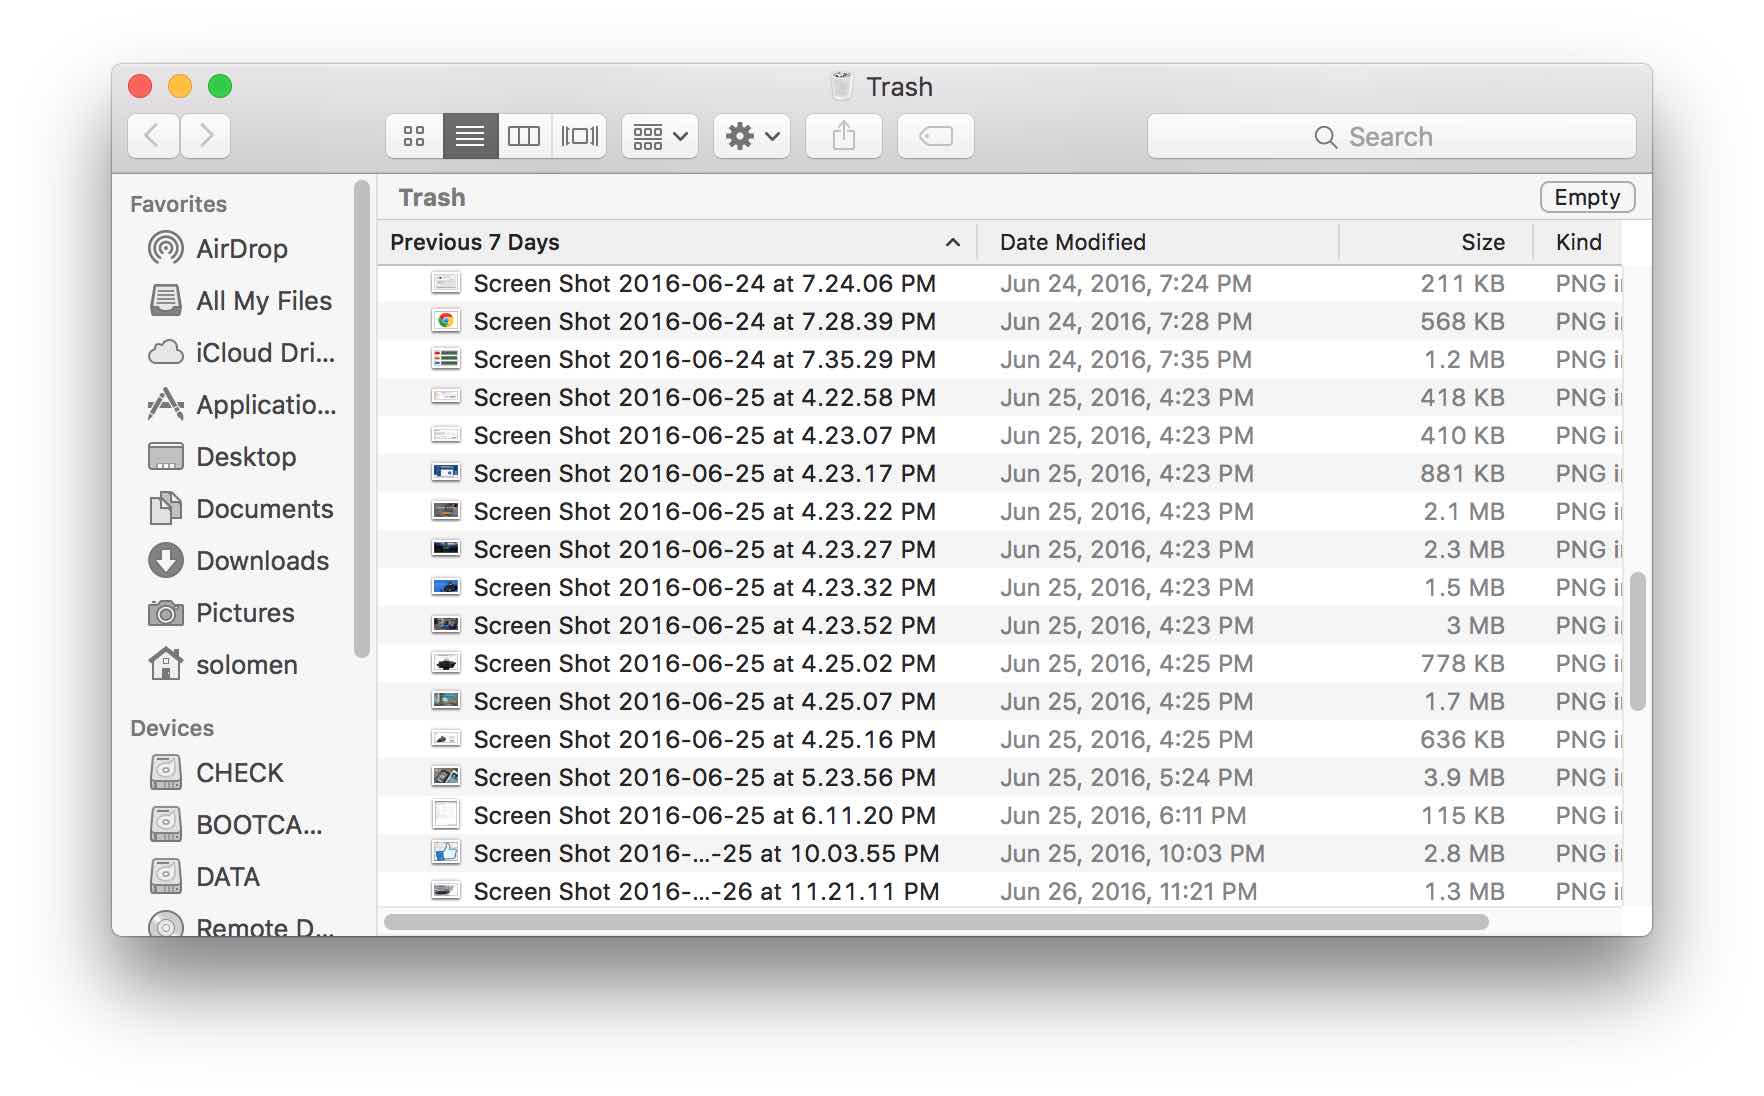
Eventually, you’ll notice that the Trash on your Mac is filled with so many files, and maybe, you want to get back one file from there as it was important. Amidst thousands of files, it’s really difficult to find that single file that you actually want to recover.
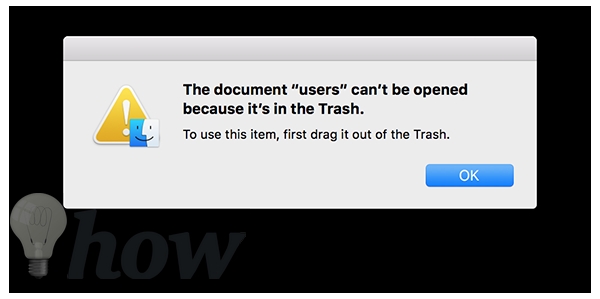
You can just double-click on a file but that throws the following error which tells you to first move the item out of the Trash and only then will you be able to access the file.
So, how do you go about previewing a file before you restore it in the Trash? Well, there’s a way that won’t require you to restore all of those unwanted files and it’ll help you get the exact file you want. Here’s how:
Previewing Files in the Trash on a Mac
You don’t need an app to do the task as it can be done right on your Mac without any third-party tools.
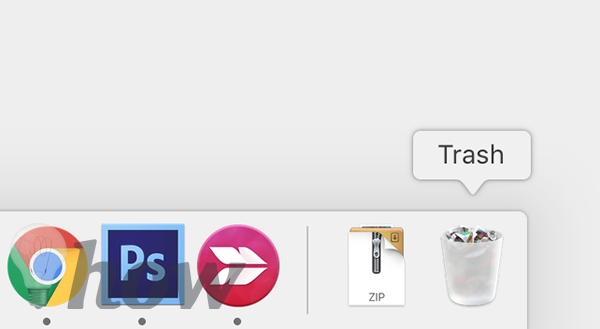
1. Just click on the Trash icon in your Dock to launch the Trash where all of your deleted files are located.
2. When the Trash launches, select the file you wish to preview by single-clicking on it. Make sure you don’t do double-click on it or it’ll throw you an error.
3. Now that you’ve selected a file for preview, just press the Spacebar key on your keyboard to preview the file.
4. You should be able to see the contents of the file without actually having to move it out of the Trash. You can preview the file while it’s still in the Trash.
5. Now, if you think that this is the file that you wanted, you can have it moved out of the Trash by right-clicking on it and selecting Put Back.
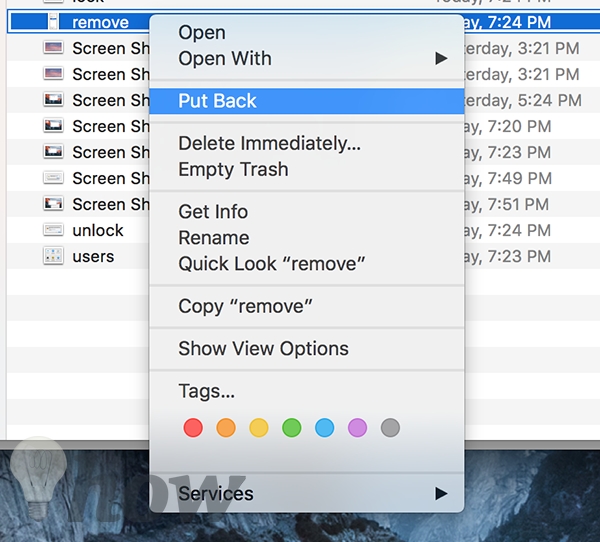
It’ll place the file back at its original location and it will no longer appear in the Trash.
It happens to us many times that we need access to a file but it’s been moved to the Trash. And it’s a hassle to go in there and recover each and every file there from seeing if that’s the one you wanted. With the Preview option as described below, you can preview a file before you decide to put it back on your Mac.
Not only images, but the method works for other file types as well. I did it with a file created in TextEdit and it worked like a charm. So, you can say that it works for most file types that exist on your Mac.
Solomen is the founder of MrHow.io, and he is happiest when working with technology and able to help others. In his free time, he often listens to Baroque music, swims or runs. Feel free to contact him on social media!