These days, it’s almost impossible to get by with just one email address. Most people have around four. One for personal use, for emailing friends and family; one for professional use, designated to them by their school or workplace; one for signing up to various internet services; and the iCloud email address that nobody really uses that often.
Juggling multiple inboxes on an iOS device can be challenging, but this post will teach you how to organize them just the way you like, so you can maximize productivity while on the go.
Adding Mailboxes to iOS
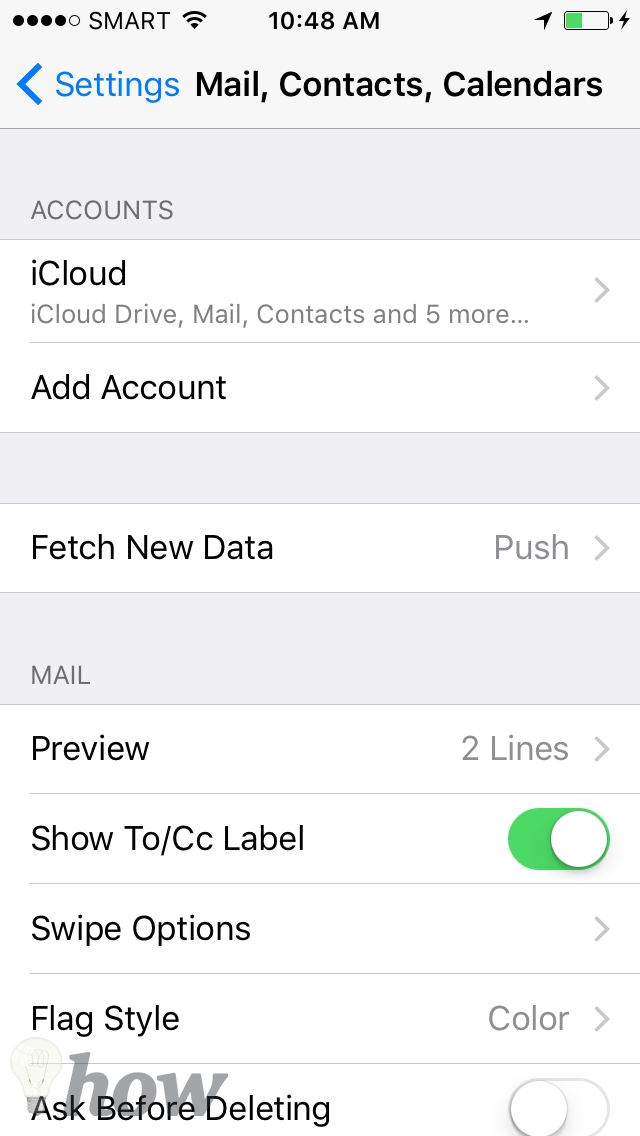
From your home screen, navigate to Settings >> Mail, Contacts, Calendars. The default iCloud mailbox will remain here by default as long as you are logged in to your iOS device with your Apple ID.
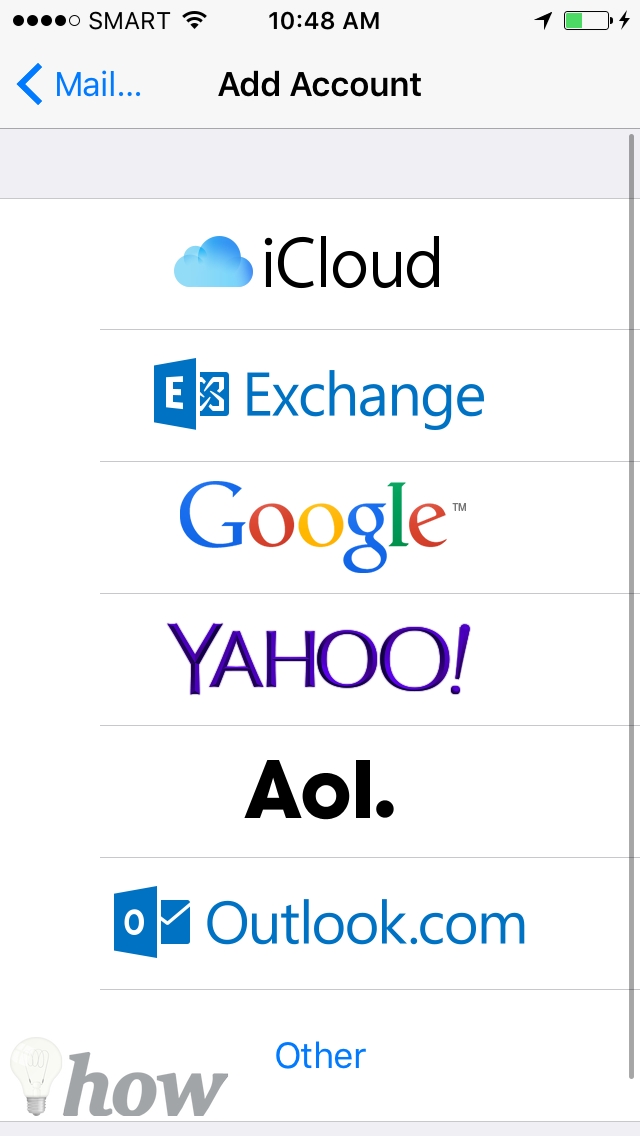
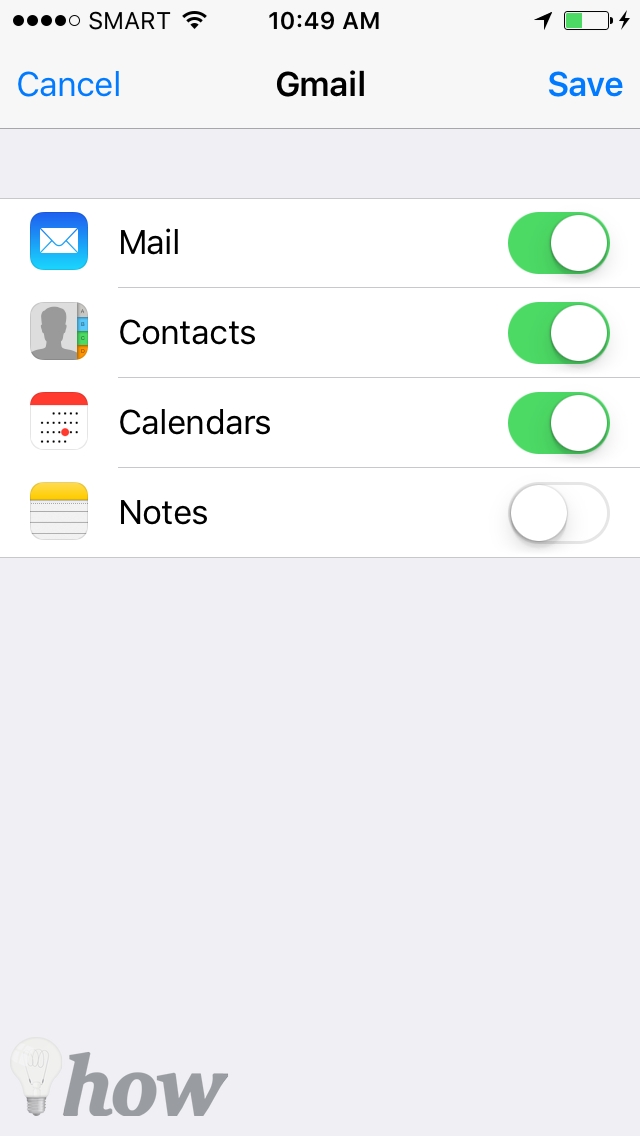
Tap “Add Account,” and select your email provider from the list given. Enter your username and password when prompted. On the next screen, you will select which kinds of personal data you want to be synced between your email provider and Apple device.
Read also: How To Change Your Gmail Email Signature On Android
Mail is enabled by default so that you can send and receive emails from the iOS Mail app. If you are adding a school or work email account, enabling Contacts and Calendars will transfer and sync the entire preloaded contacts database and institutional calendar to your device; whether you see this as helpful information or simply clutter is up to you.
With regard to Notes, it’s best to leave this unsynced so that all your Notes stay within your iCloud account and don’t get misplaced. When you’re happy with the settings, tap “Save.” The next screen should look like this:
Customizing Mailboxes Labels
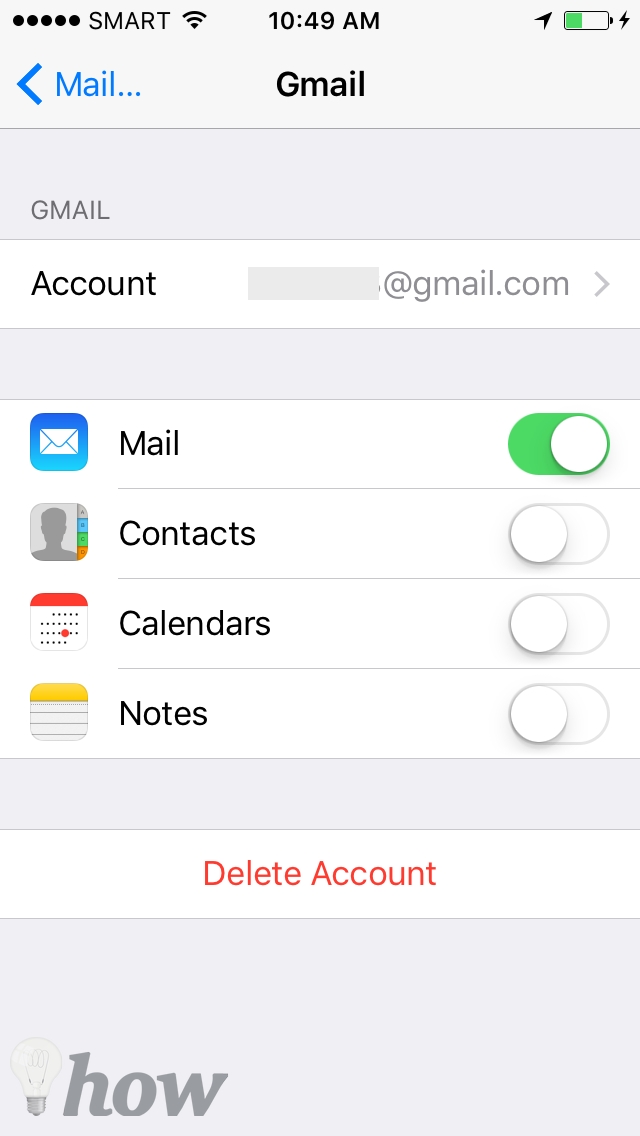
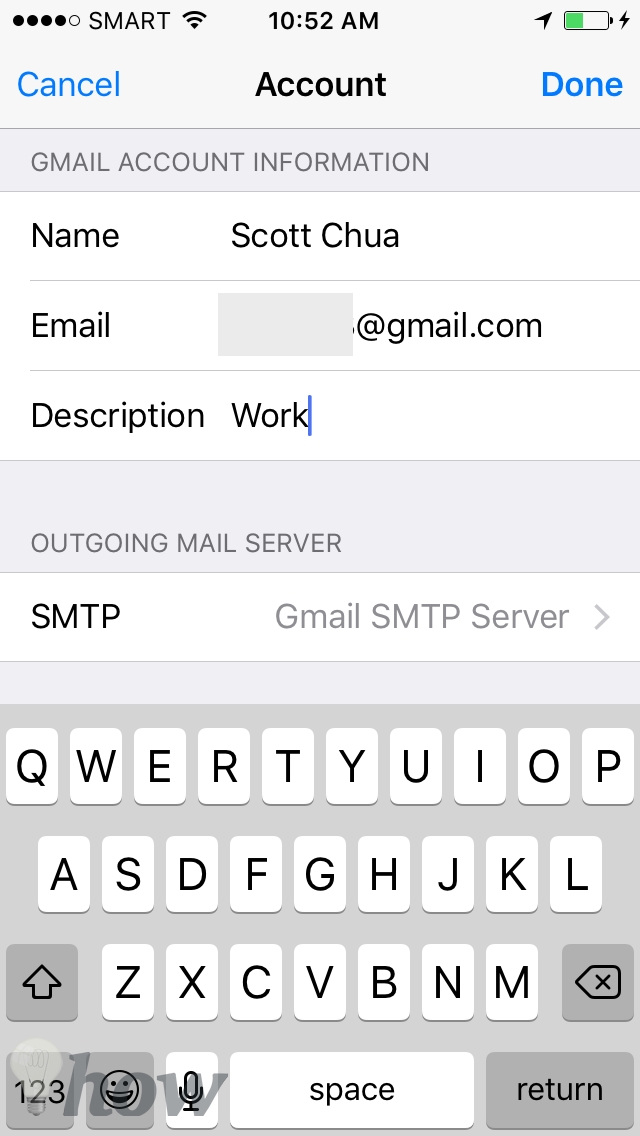
Without leaving Settings, tap on “Account.” Here you can edit the Name you want to use in your outgoing emails. For instance, you might want to send emails as “Mr Chua” to email your boss from your work email, but as “Dad” to email your kids from your personal account.
Here you can also change the Description of the email to make it easier to tell them apart within the Mail app. In the example below, I labeled this email account “Work.” Also, this Description is only visible to you, so don’t worry about offending the people you an email. When you’re finished editing, tap “Done.”
Arranging Your Mailboxes
Exit Settings and go to the Mail app. This screen is divided into two. The upper half are shortcuts to the inboxes of your different accounts—iCloud, Work, Personal—as well as some “smart mailboxes” Apple provides, like VIP, Flagged, Unread, and others.
These smart mailboxes collate emails from your different accounts and put them in one place. For instance, the Unread smart mailbox groups together every unread email across your multiple accounts so you can read them all without jumping from folder to folder.
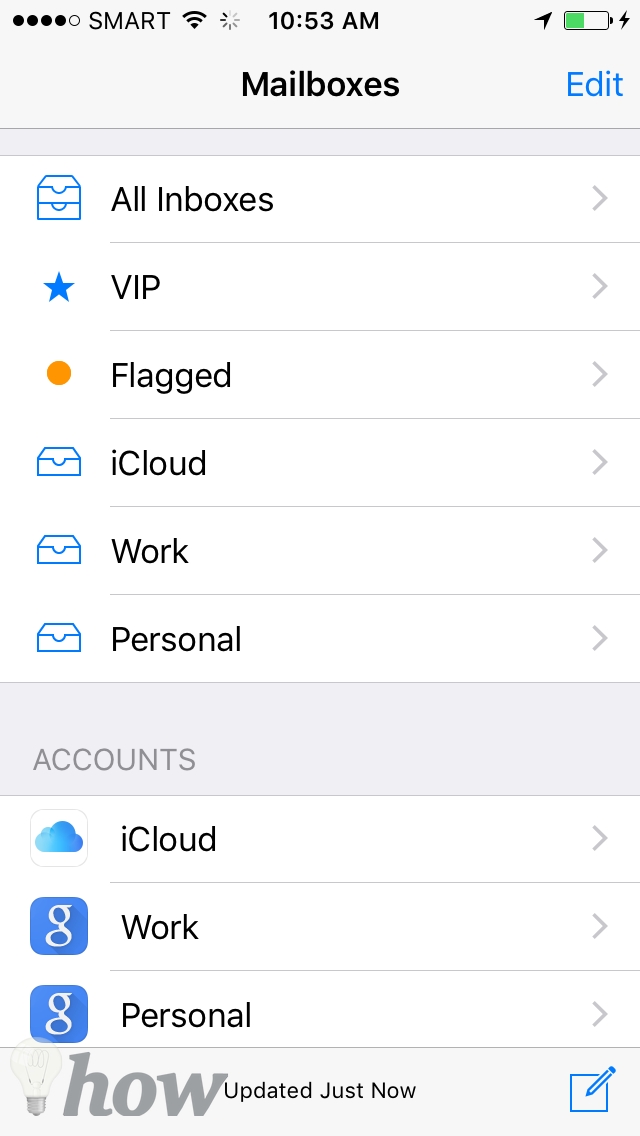
The second list in Mail shows all the accounts you added to the iOS device. Tapping them doesn’t jump straight to the inbox, but rather provides access to Outbox, Drafts, Junk, and other mail folders.
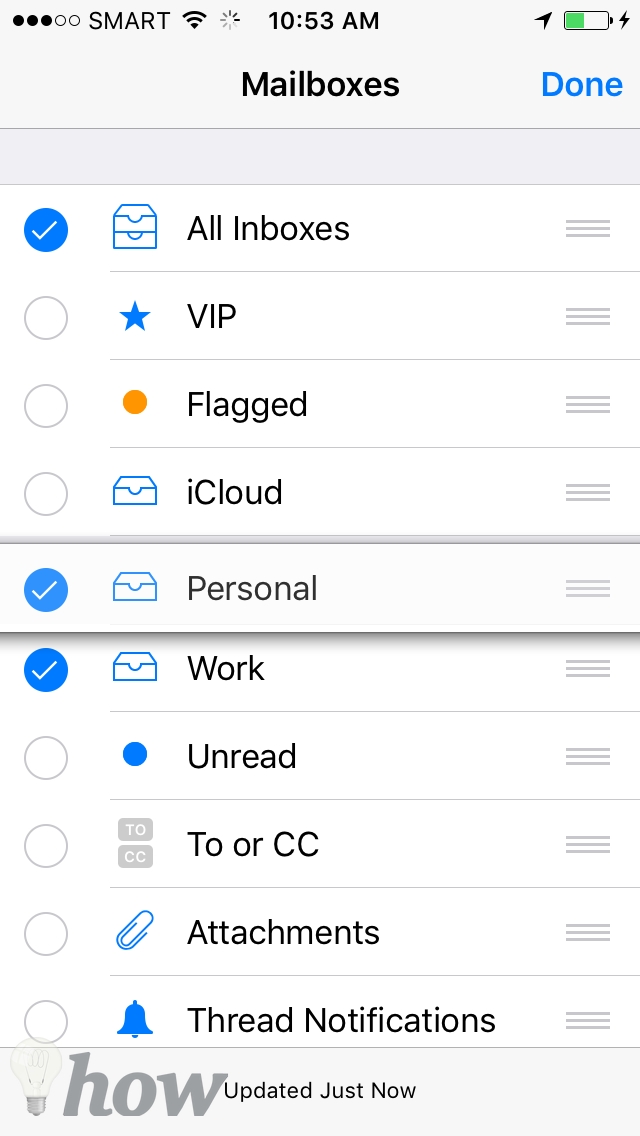
Tap “Edit” in the upper right corner. The list of inboxes and Smart Mailboxes is editable; you can select the ones you want quick access to, and leave the other mailboxes unticked. Leaving an email account unticked doesn’t remove it from the Mail app; you can still find it in the second list below.
You can rearrange the order of the mailboxes by tapping and holding the three grey lines on the right side of each mailbox, and dragging this up or down.
Adjusting Email Notifications
What if you want to be notified of emails from one account, but not from another? Apple allows notification settings for each email account to be customized separately.
Open Settings > Notifications > Mail. This screen shows all the mailboxes present on your iOS device. Tap an account name to edit its notification settings.
Read also: How to Turn Off Facebook Notifications
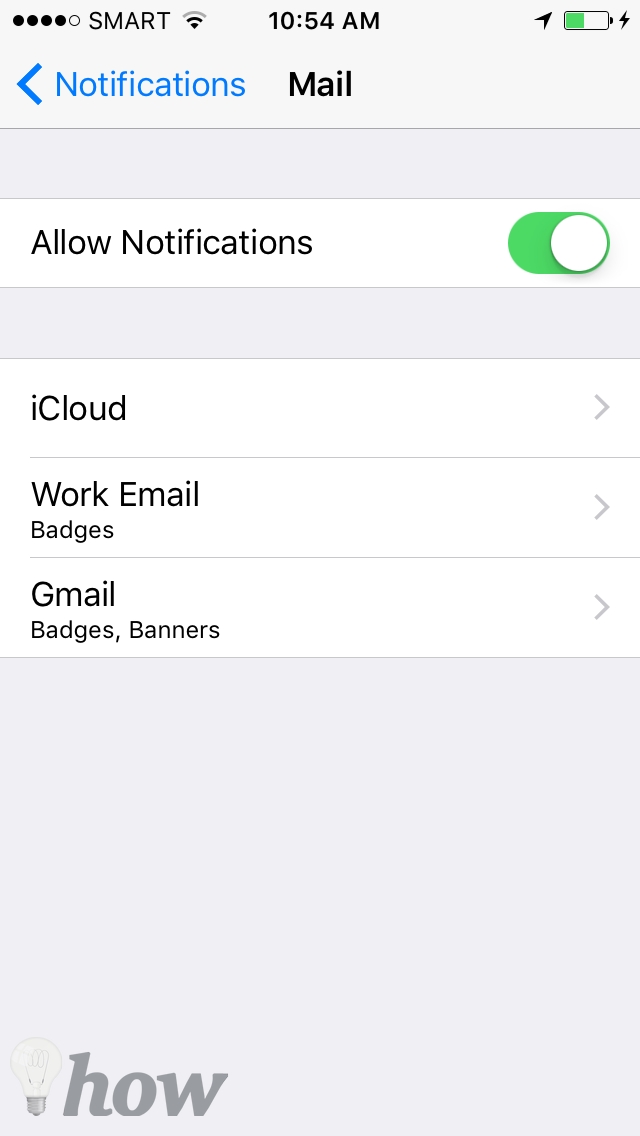
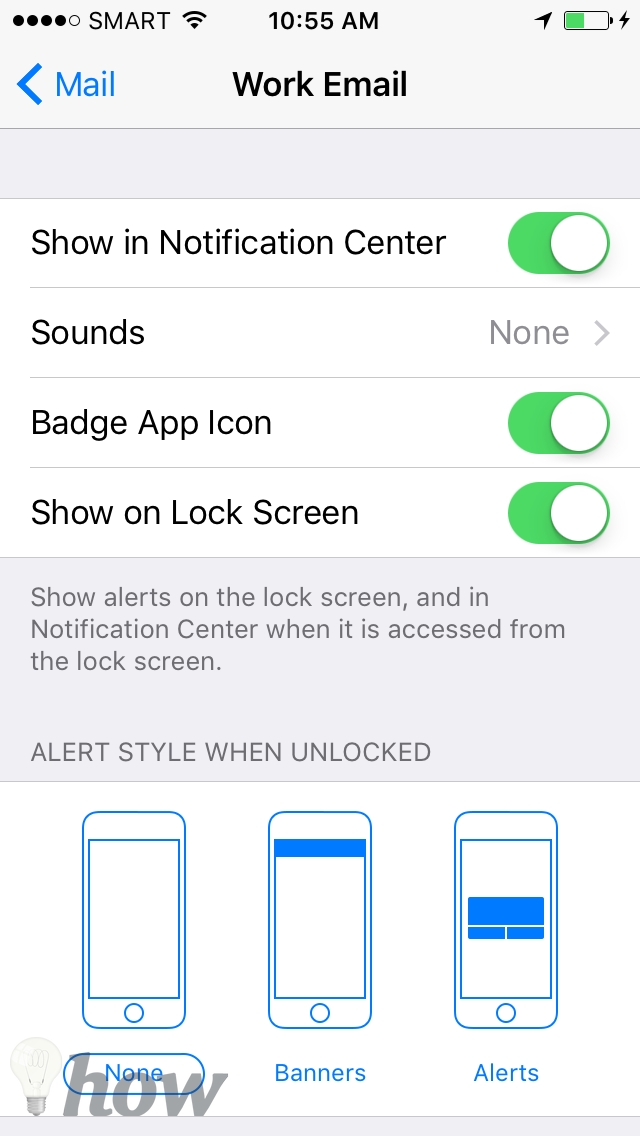
Here are the different settings you can adjust:
- “Show in Notification Center” will make unread emails visible when you swipe down from the top of the screen to reveal Notification Center.
- “Sounds” allows you to choose a tone or vibration pattern to alert you to new emails.
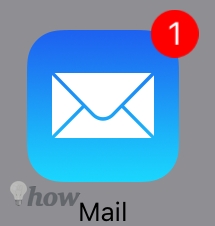
- Enabling “Badge App Icon” means that new emails will cause a red numbered badge to appear on the Mail home screen icon.
- “Show on Lock Screen” means that emails’ subject lines and previews will be visible on the lock screen. If your emails are confidential, disabling this is a good idea.
- “Alert Style When Unlocked” determines how you get notified of emails if they arrive while you’re using your device. Banners appear at the top of the screen, then go away by themselves after a while. Alerts appear in the middle of the screen and require you to tap the dialog box to make it go away.
Conclusion
Taking time to go through these settings and options now makes reading your emails much more organized and convenient in the future. What other email productivity tips and tricks do you know? Sound off in the comments below!
Read more like this
- How To Use The Gmail App For All of Your Email Accounts
- How to Take a Screenshot on iPhone
- How to Free Up Space on iPhone
