Installing or changing the fonts can help you for making an excellent logo design, as well as provide a more valuable and customized feel to the type of work. Forget logos, even changing the default fonts on your macOS can create a unique everyday computing experience.
For example, Powerpoint, you can make amazing customized paper goods, or create a design beautiful Photo cover for your Facebook. Find out how to install type sets once they’re downloaded using your MacBook. This article, I want to show you how to install fonts on Macbook what basic level installing fonts.
How to install the new fonts on Mac
Turn off all applications
Microsoft Word, Powerpoint, Photoshop, Illustrator… everything you are opening, turn it off. Because, when you reopen, the new fonts can be installed and available to use on these applications. It may not appear in your software from font menus if the program is opening during font installation.
Download fonts and locate the font folder
The first, you need to download the font style from the website (such as Dafont.com, Fontfabric.com,…). Then, launch the folder where it’s located. The font sets are downloaded as .zip or .rar files.
Therefore, you may need to unzip all of them. They are going to either be with format: TrueType (. ttf), OpenType (. otf), or PostScript Type 1 (. ps1)…
Double-click on the font to install
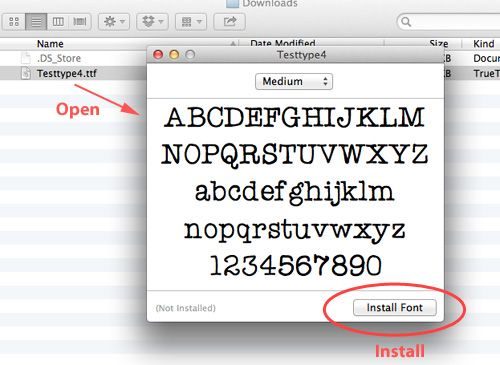
Clicking on the font file which you want to install on your Mac, then an application should be automatically opened. You can discover a dialog box with a preview of the font. Just click on “Install Font” button to install the font.
Drag and drop the files font to suitable Folder.
If you’ve downloaded a font with the different type (bold, italic, extra bold, etc.), then make sure to get all the files. Pick fonts you need, and drop it inside the Font Book interface. You can be accessed it within the Applications folder, or quickly type “Font Book” into Spotlight to find it.
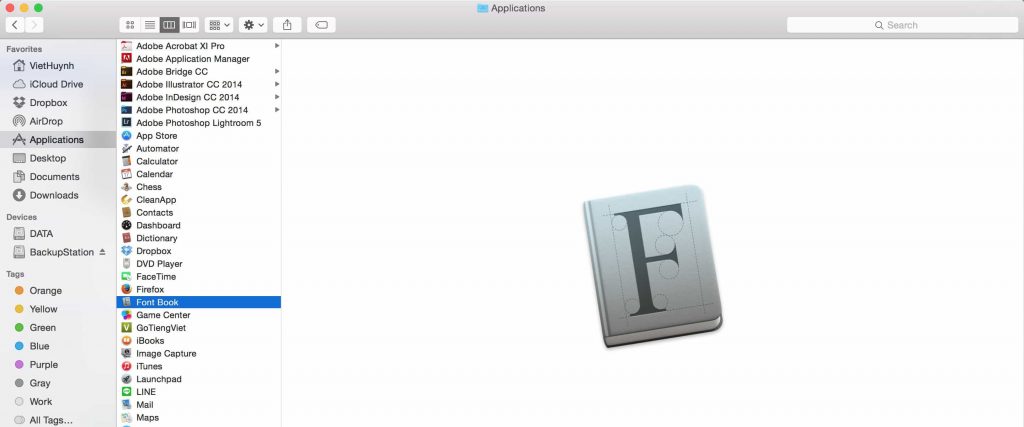
Find the Font Book via Applications
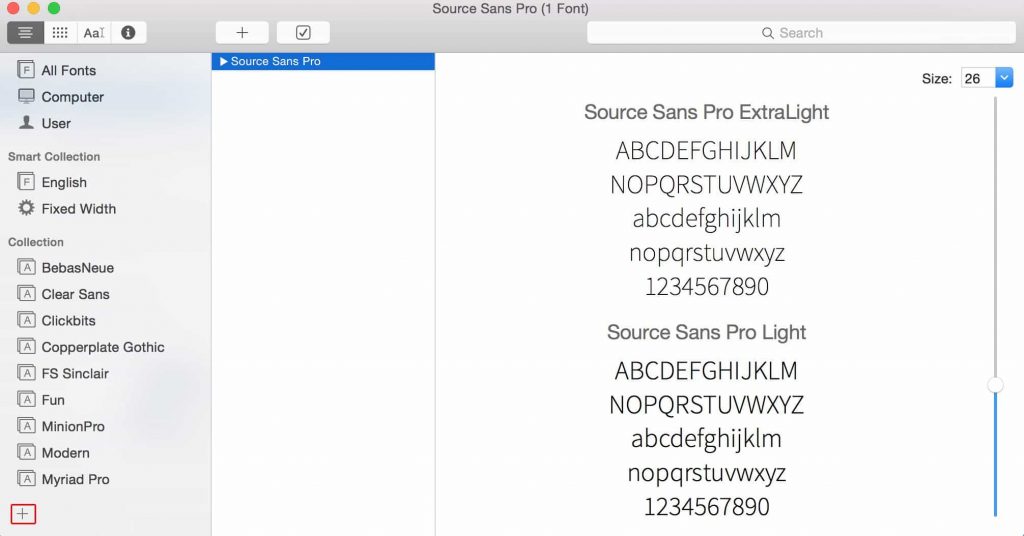
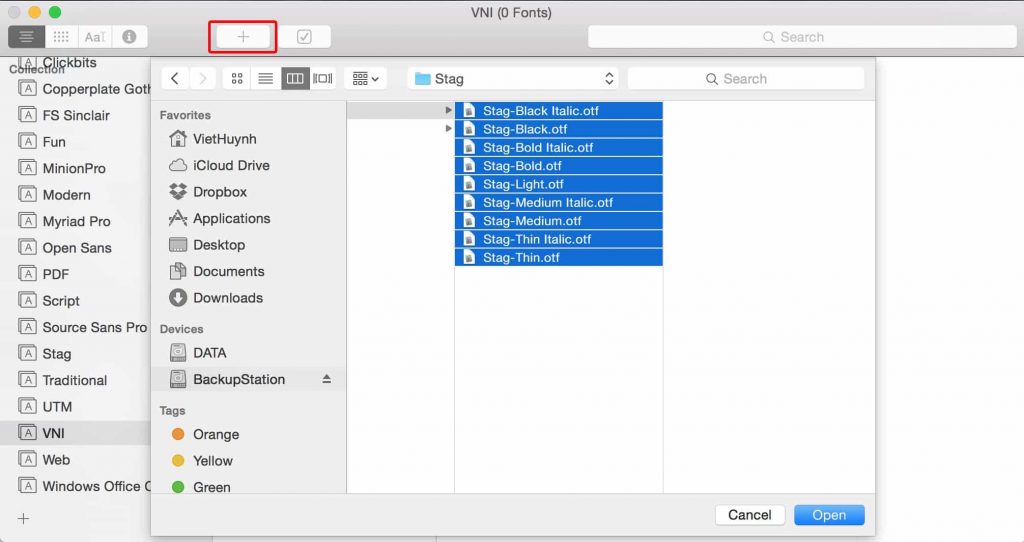
Click on (+) and set id for new Font Folder
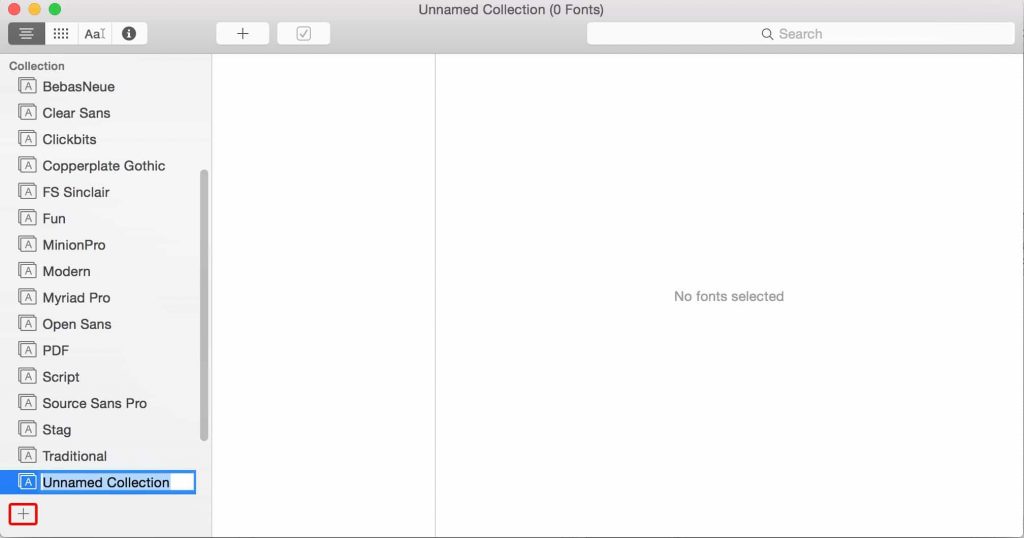
Click on (+) sign and add all files fonts of the Folder that you’ve recent downloaded and unzipped. Or you can Drag and Drop the font into here.
Reopen your applications
The new fonts should be applied and available to go! For example, if you have Word open and you’ve just installed a new font on Mac, you can quickly go back into Word and select the new font.
