Most people these days are using bright screens for hours on end. Whether it’s for work or for pleasure, staring at a bright screen can be damaging to your eyes in the long run. Staring at a bright light source causes what is called eye fatigue, which can lead to eye strain and even temporary blindness.
There are a few things you can do to help reduce eye fatigue when using a bright screen.
- The first is to take breaks often. When you’re working, take a break every 30-40 minutes to look away from your screen and focus on something else. Get up and walk around, or just stare off into space for a bit.
- Another thing you can do is adjust the brightness of your screen. You don’t need your screen to be as bright as possible to see it clearly.
- Finally, consider using a dark mode on your devices. A lot of operating systems and programs now have a dark mode that makes the screen less bright and easier on the eyes.
Today, we’re going to show you how to enable dark mode on your Mac. This will work for all versions of macOS, including Mojave, Catalina, Big Sur, Catalina, Monterey, Ventura and above.
How To Enable Dark Mode On Your Mac
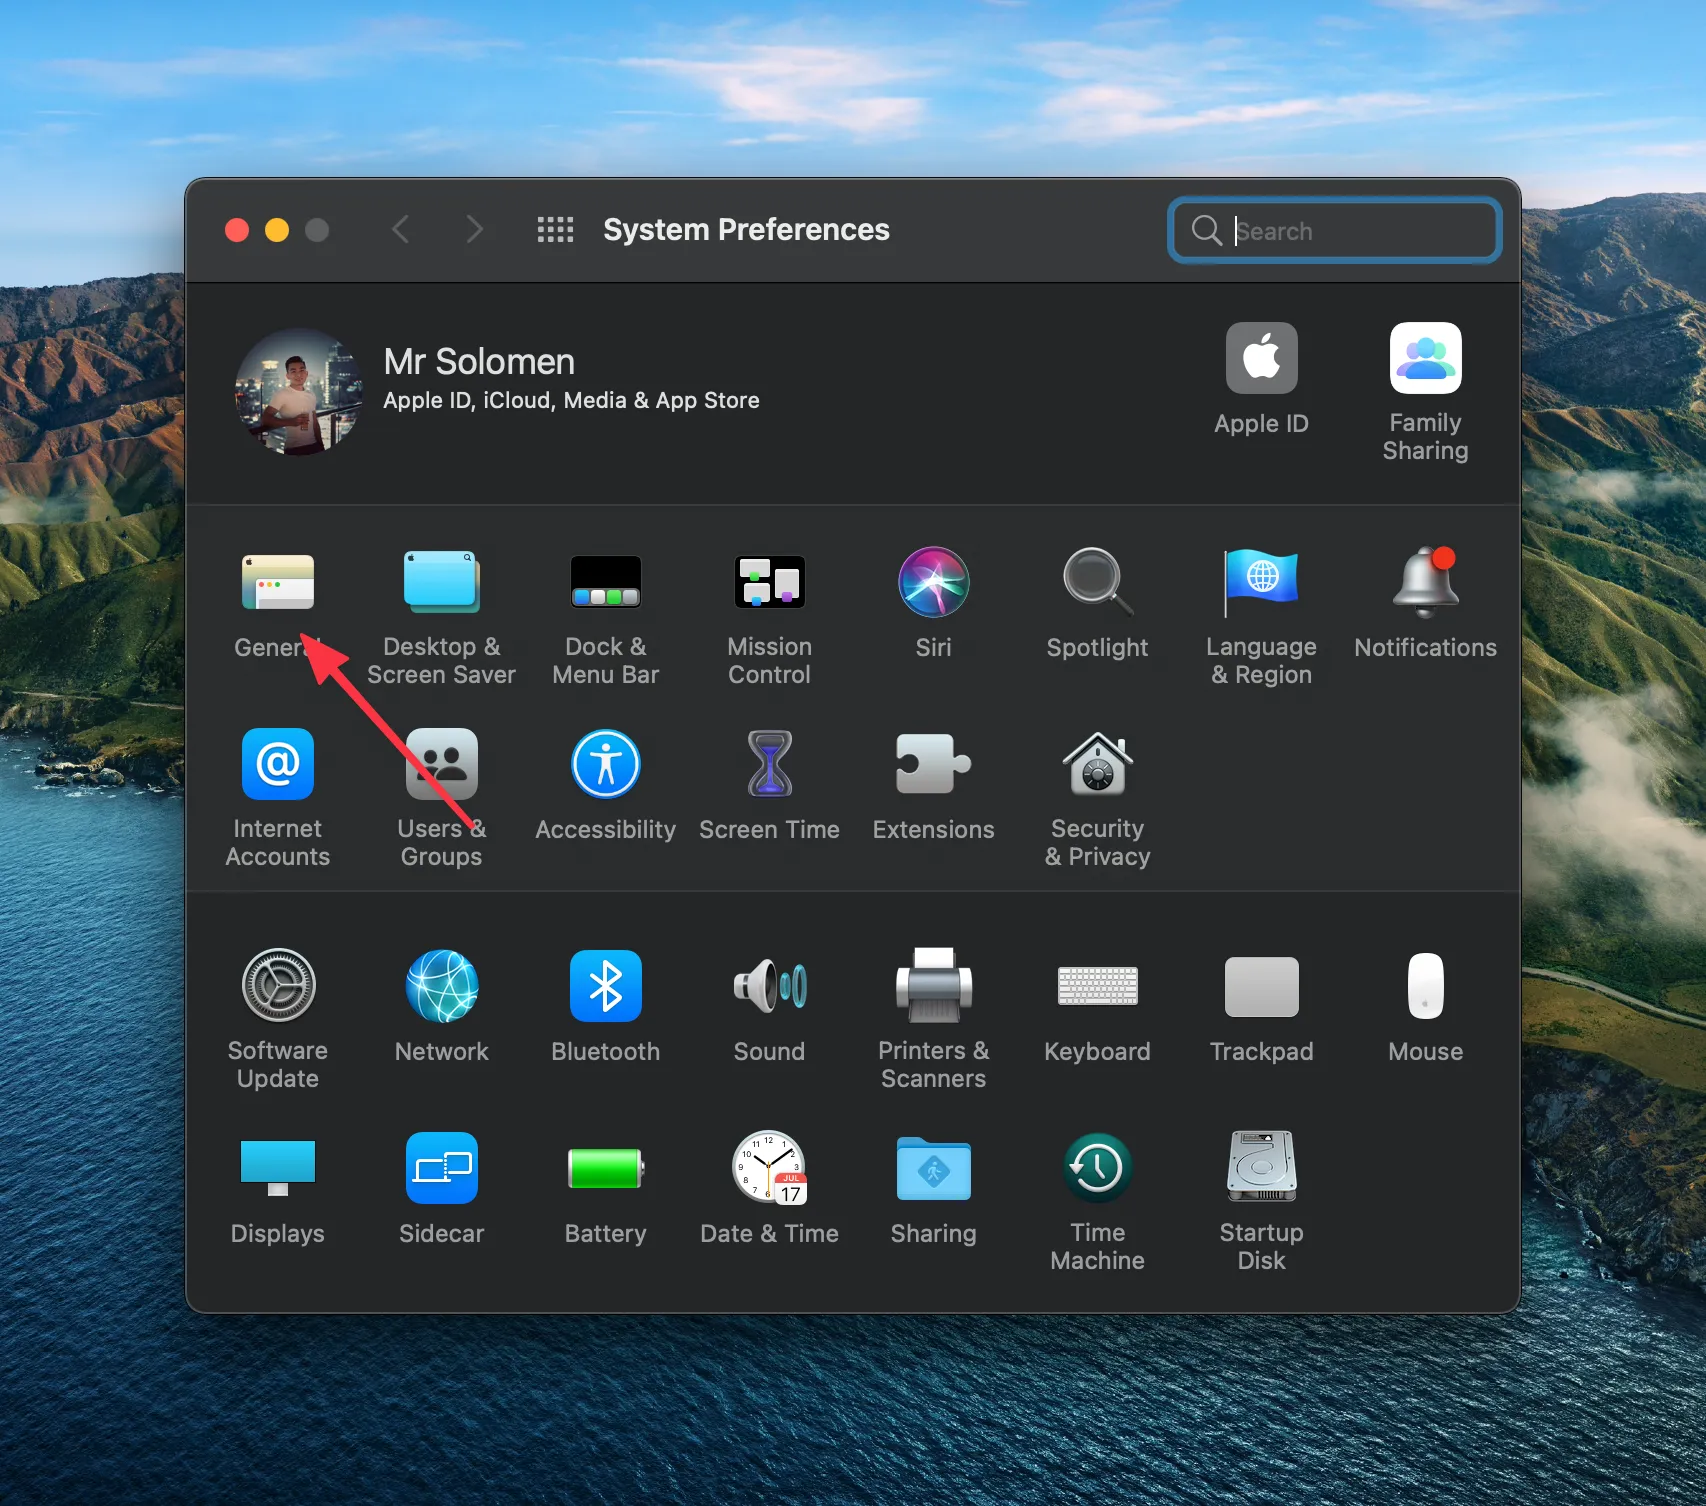
1. Click the Apple logo in the top-left corner of your screen.
2. Click “System Preferences.”
3. Click “General.”
4. In the “Appearance” section, select “Dark.”
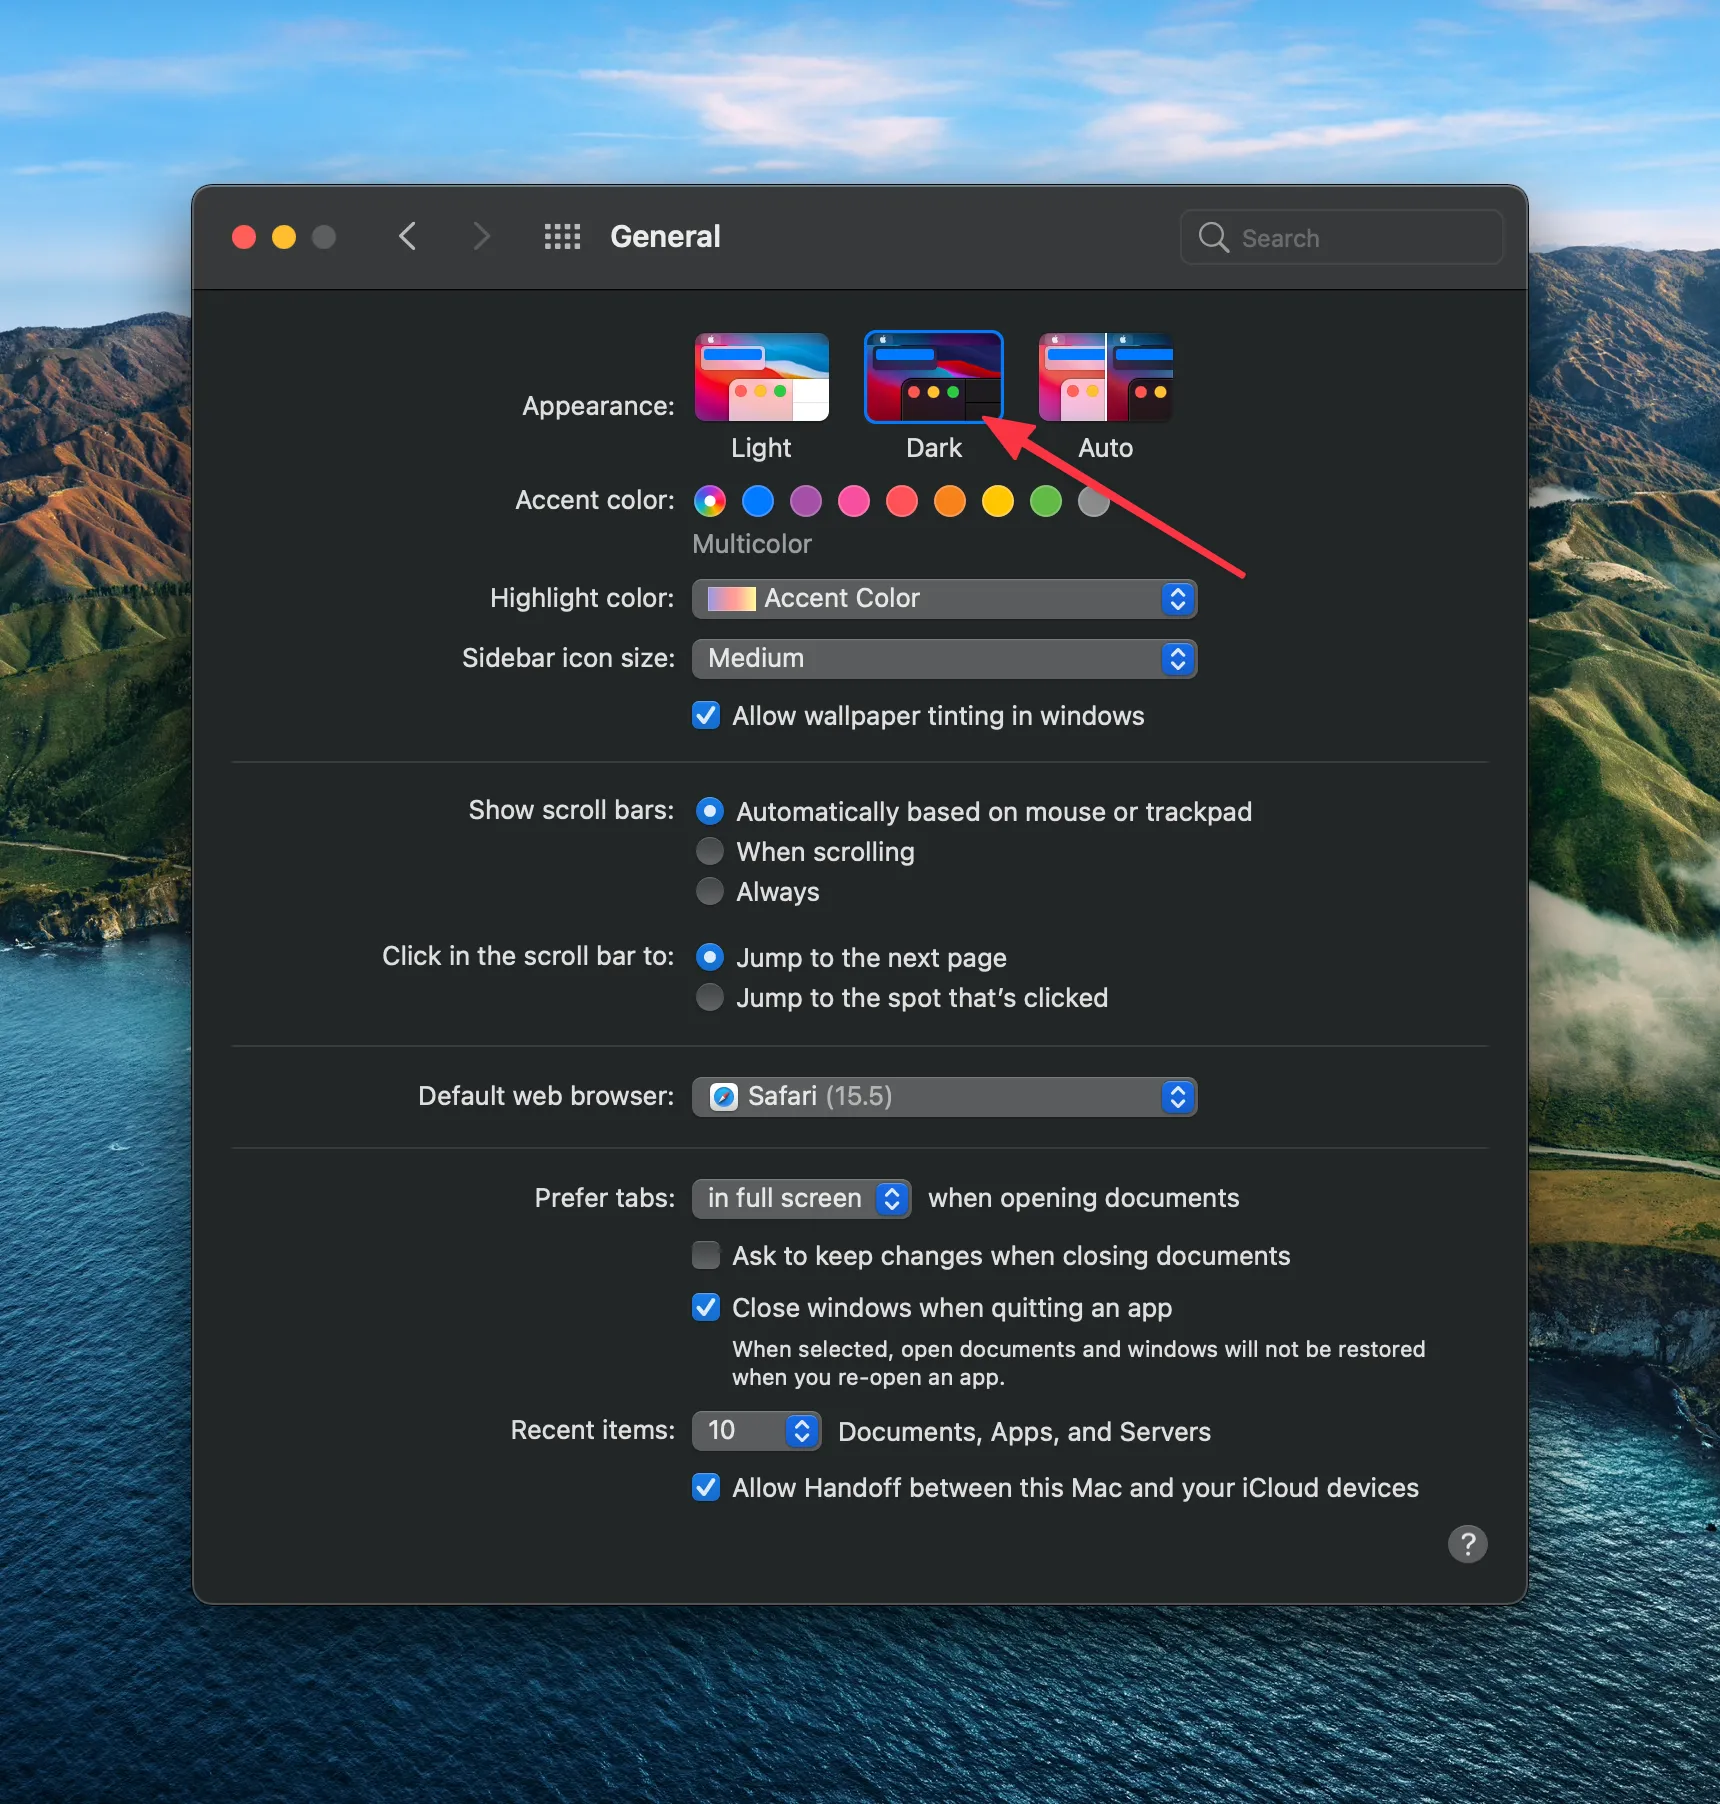
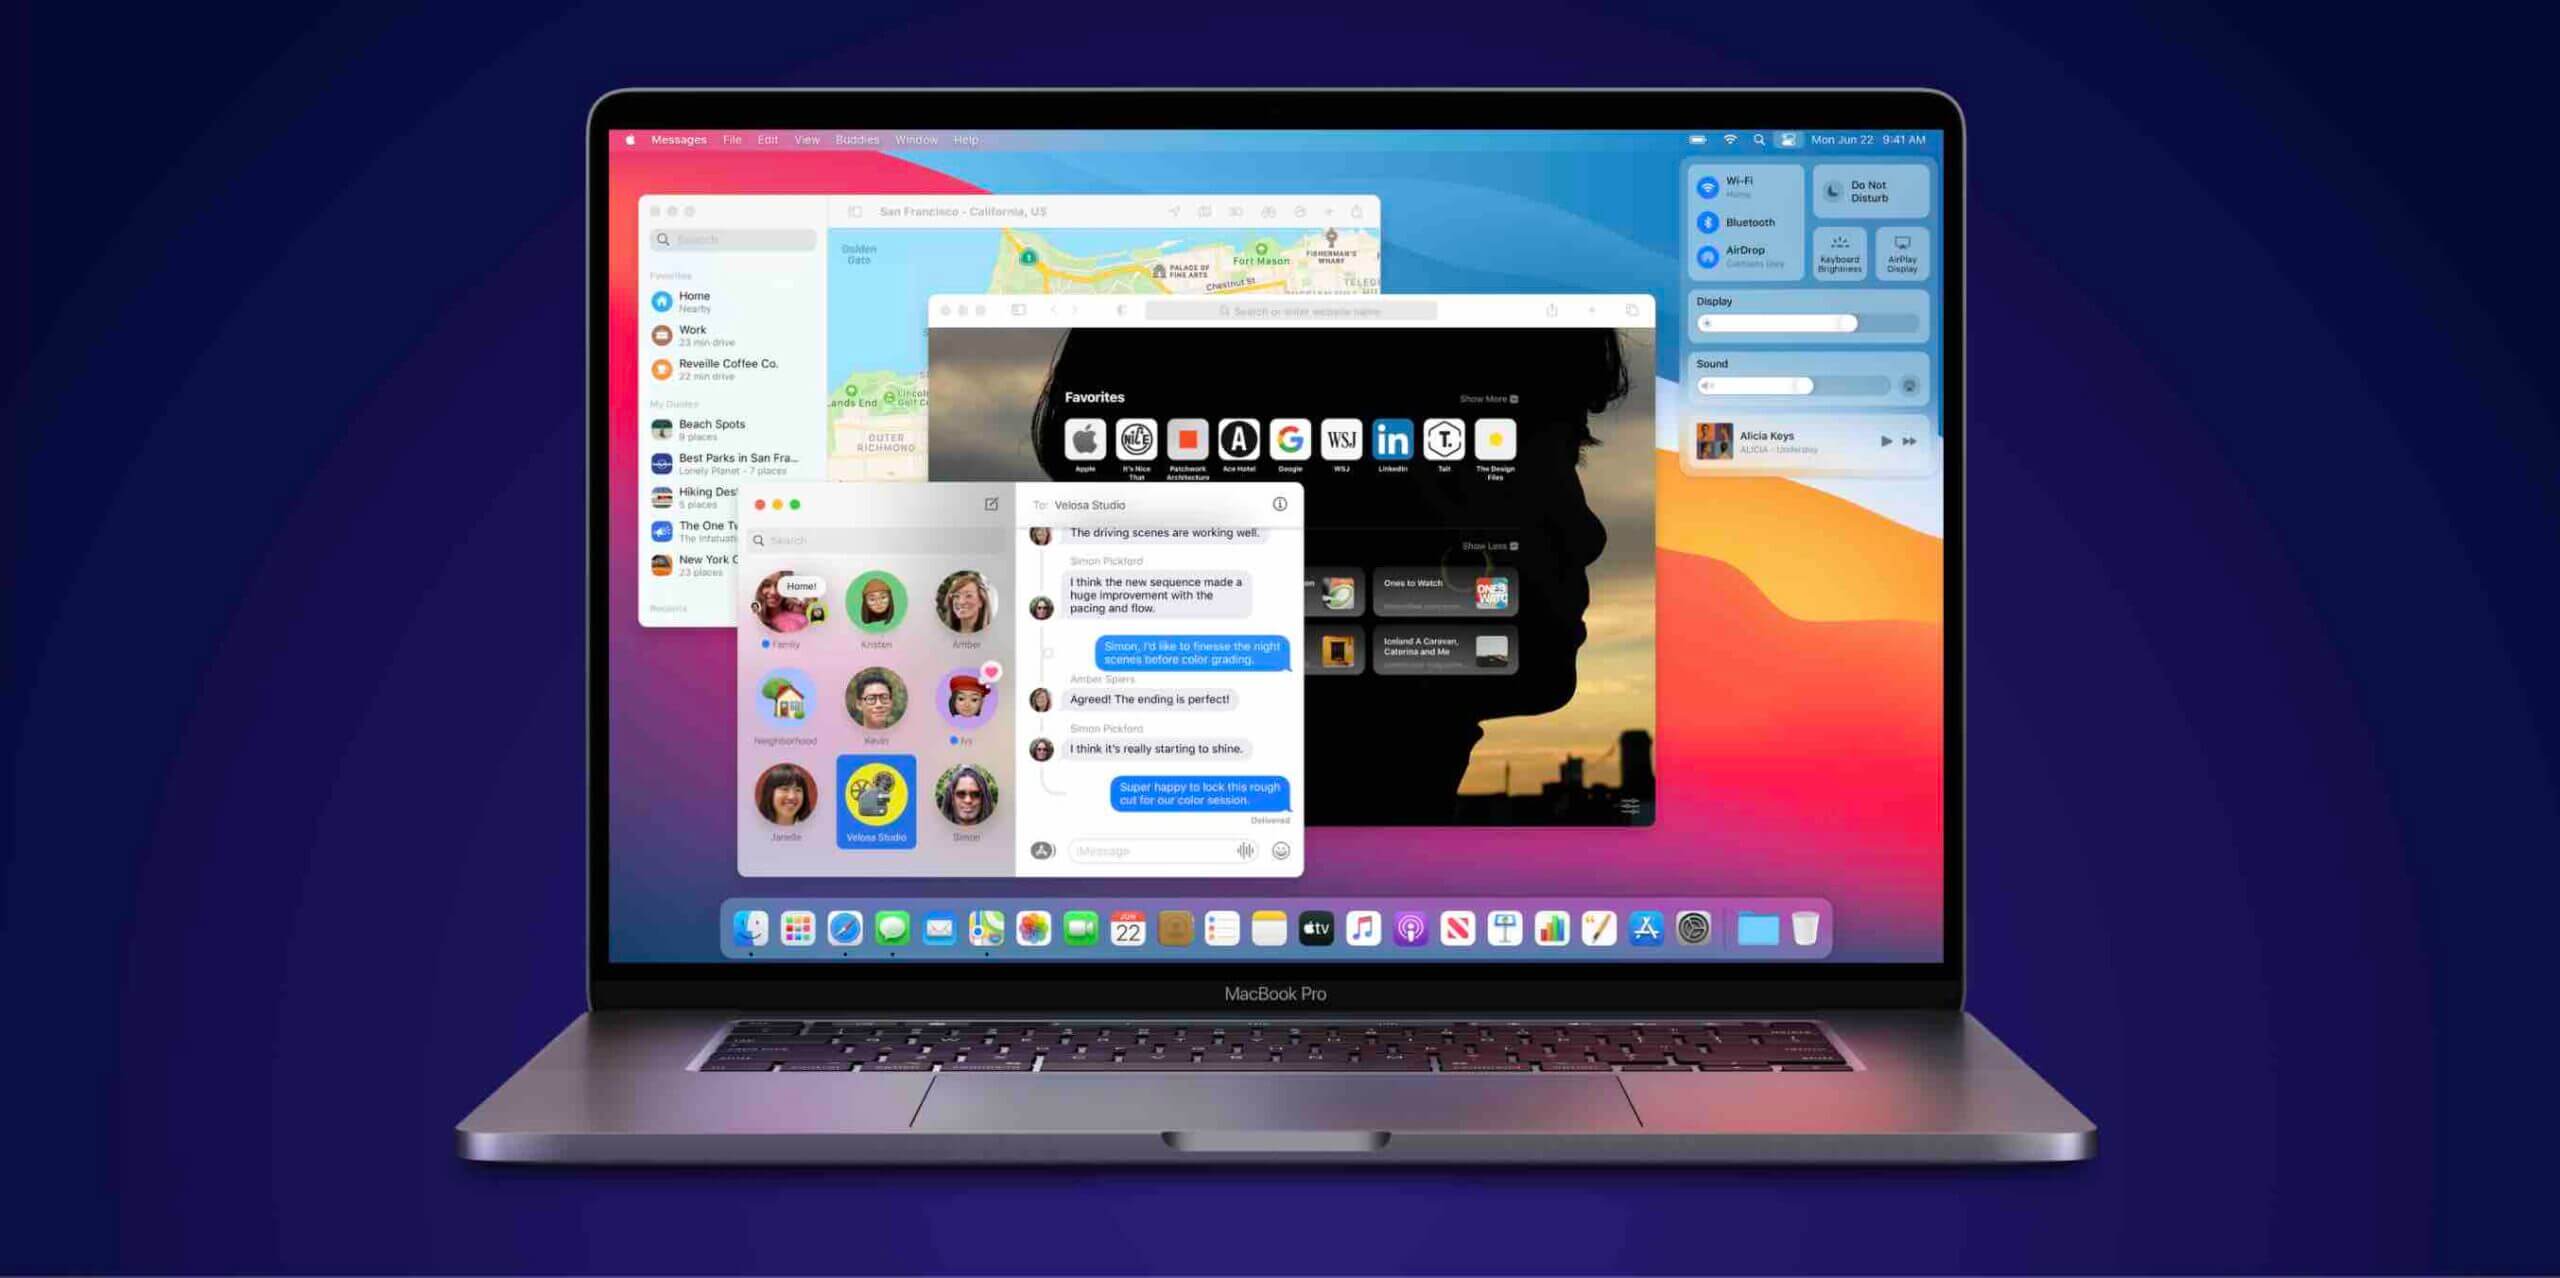
Now you will see that all of your menus and interface elements are darker.
With an Auto option, your Mac will automatically switch to Dark Mode at nightfall and back to Light Mode in the morning.
Note:
Darkmode is only available on macOS Mojave or newer versions.
When using Safari to browse the web in Dark Mode, some websites that are optimized for it may appear with a dark background.
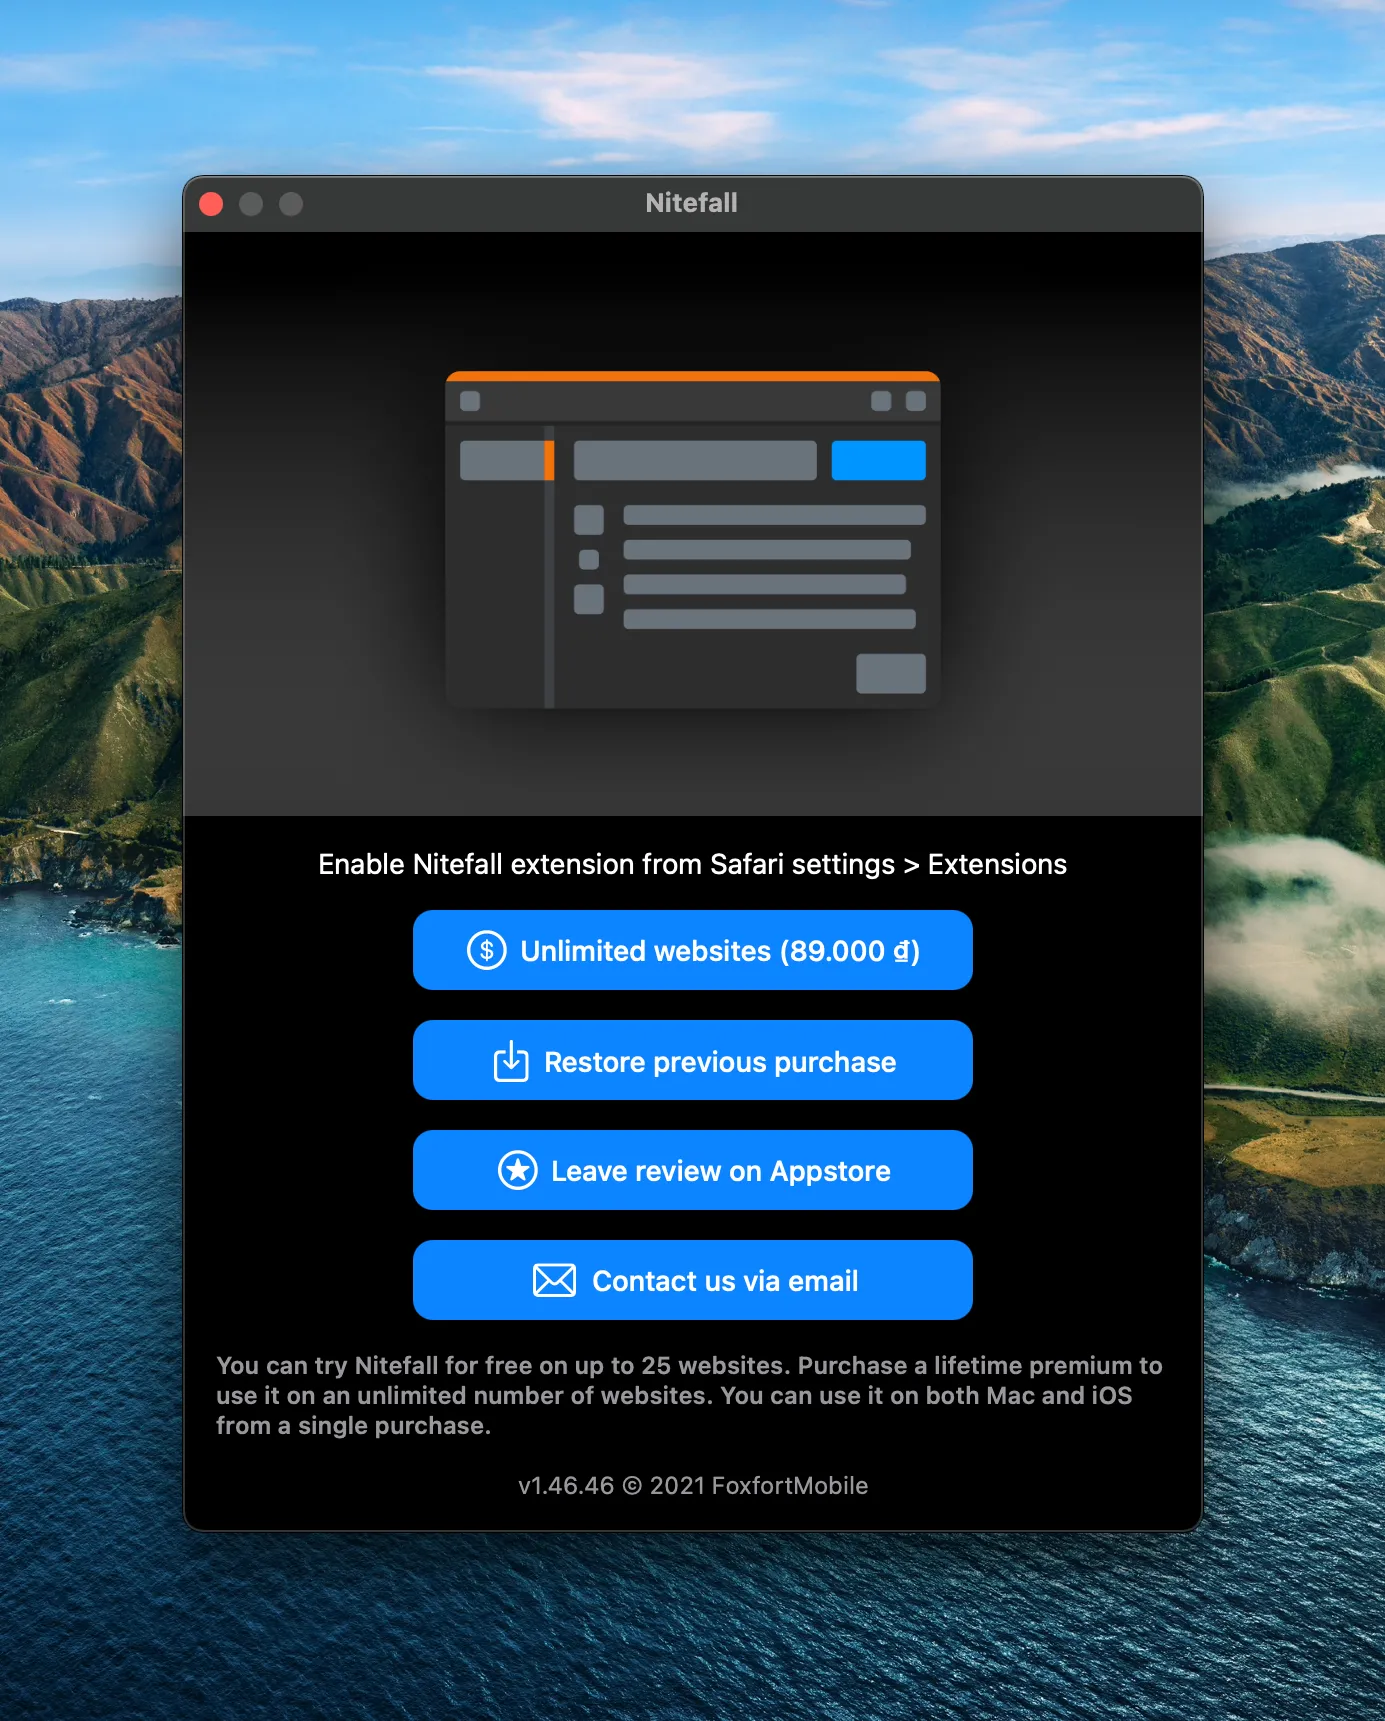
Some may not, and will appear with a white background. You can force all websites to load with a dark background by using an extension such as “Nitefall: Dark mode for Safari.”
How to use Nitefall: Dark mode for Safari
With this extension, you can force all websites to load with a dark background. This extension allows us to use free for 25 websites, if you need more you can subscribe to Nitefall premium for around $3 which gives you access to use the extension on an unlimited number of websites.
Here is how to install and use this extenion:
1. Download and install the “Nitefall” extension from the Safari Extensions or your can click here.
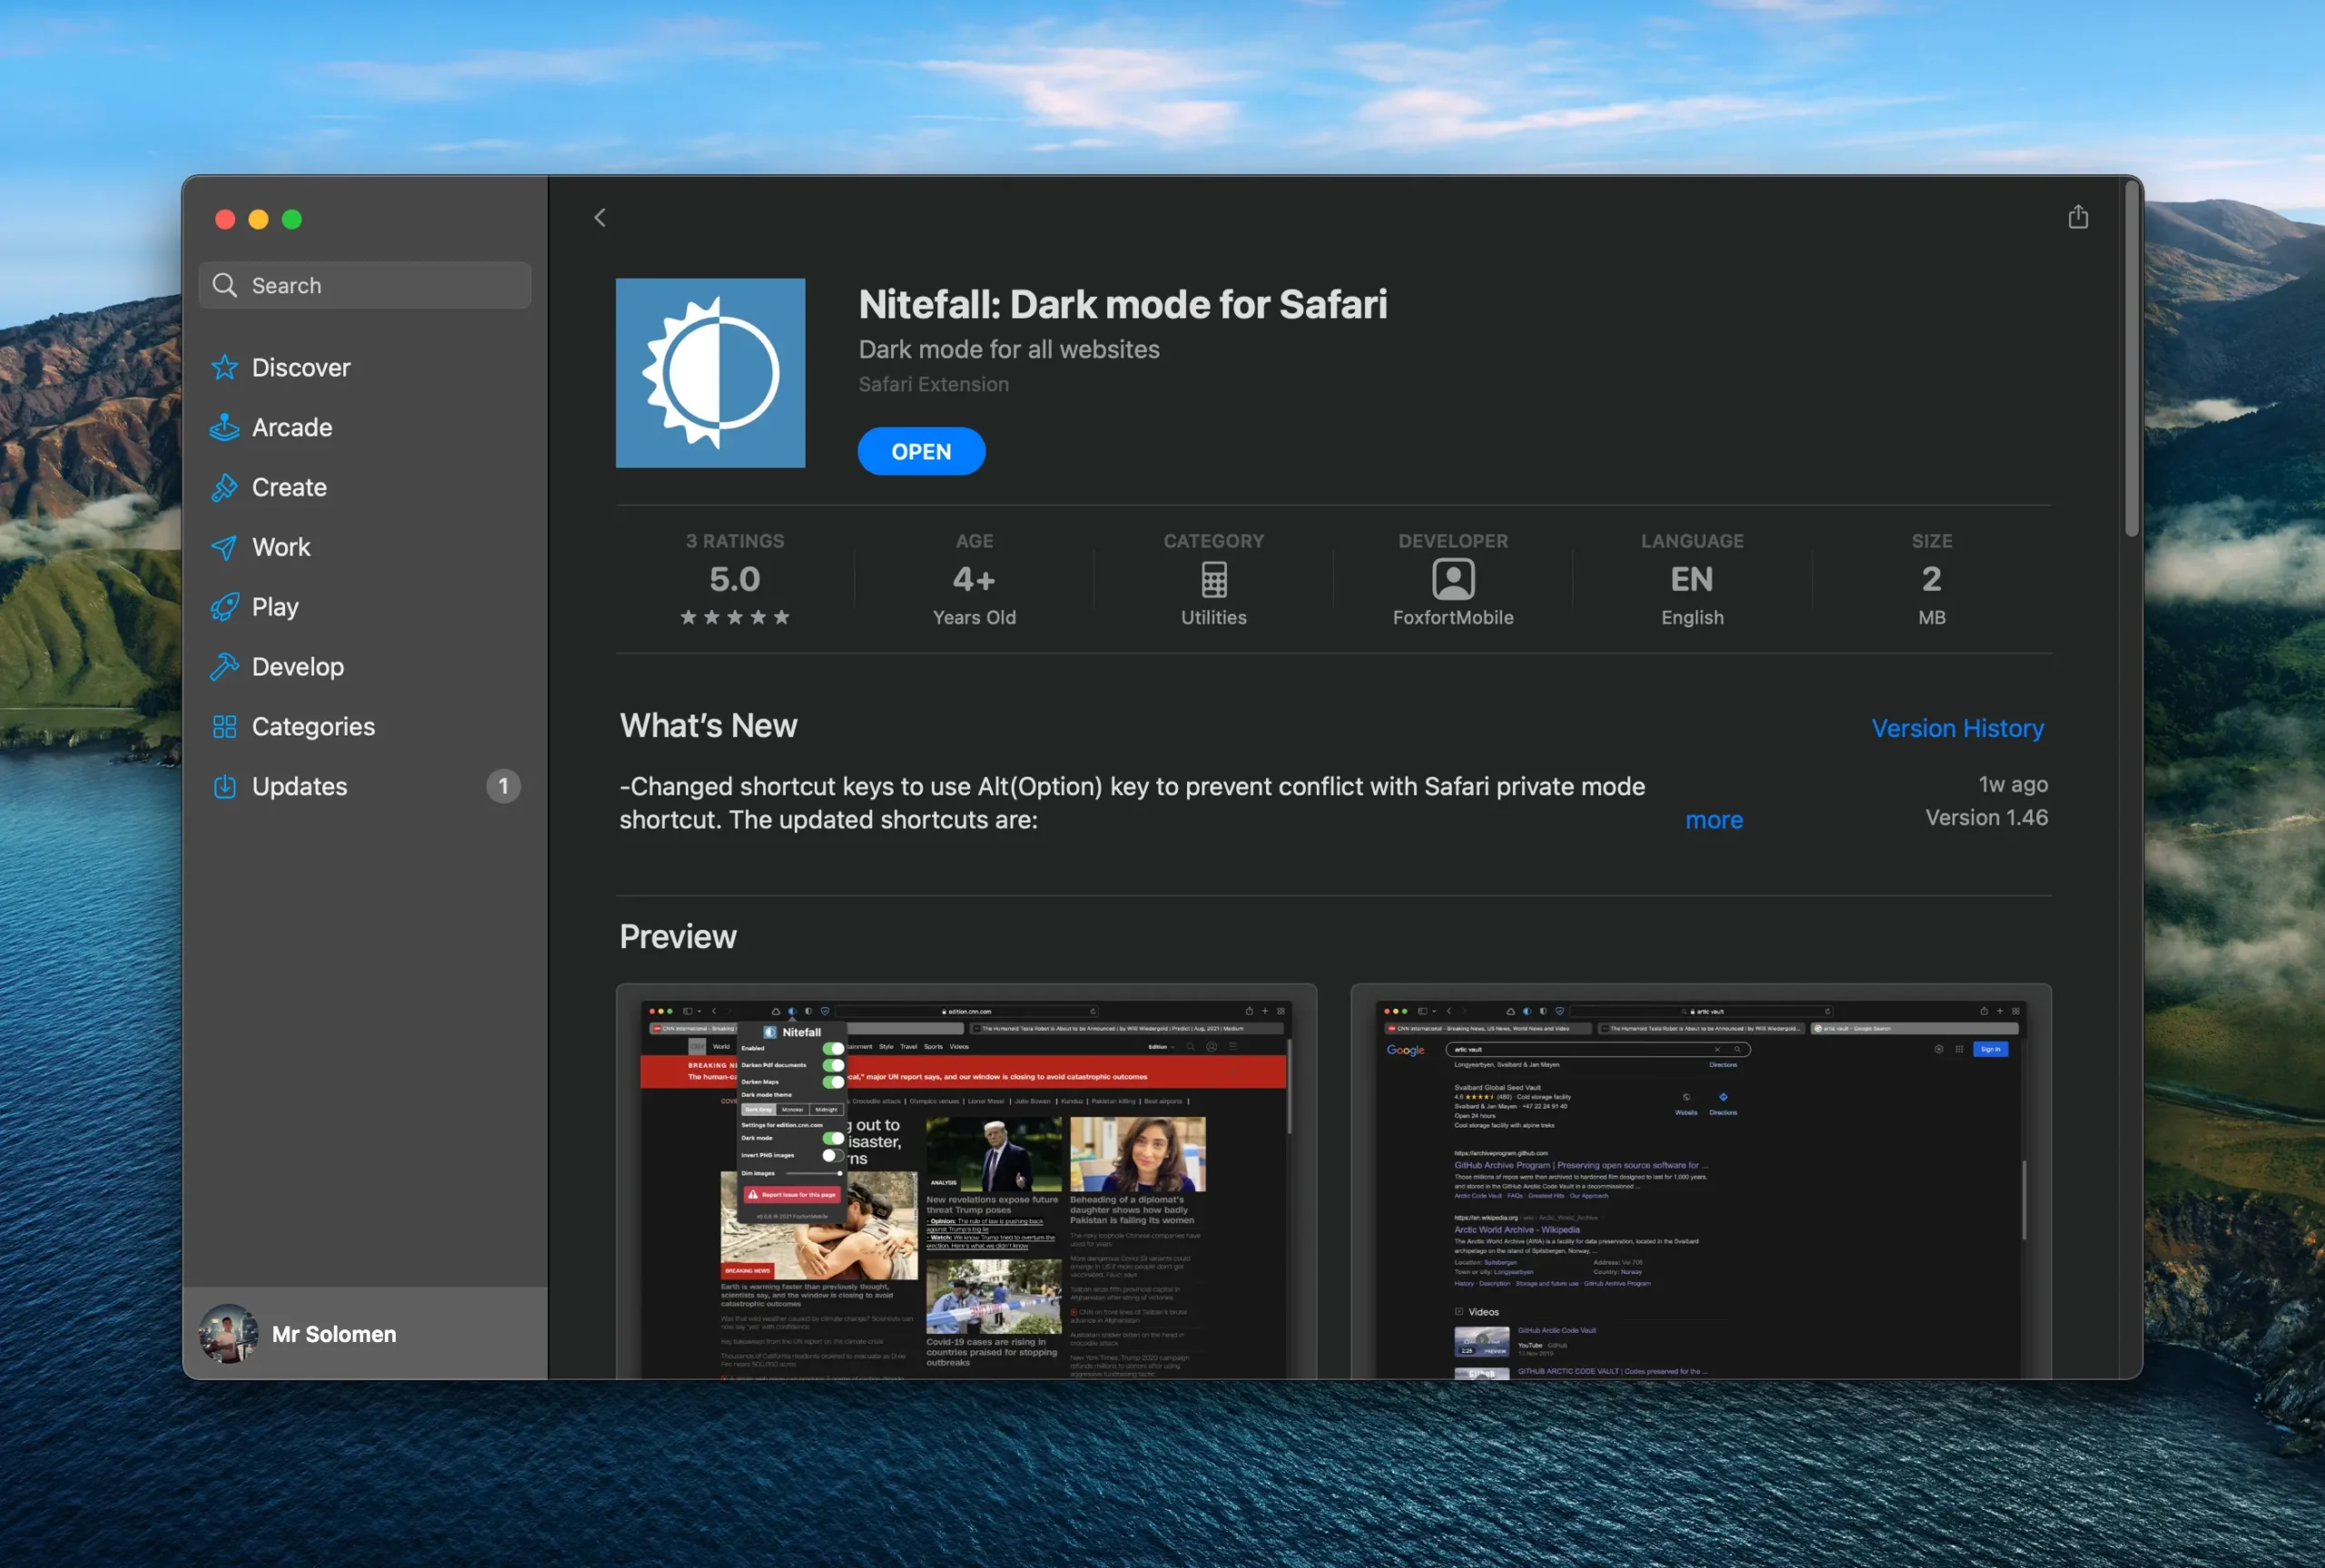
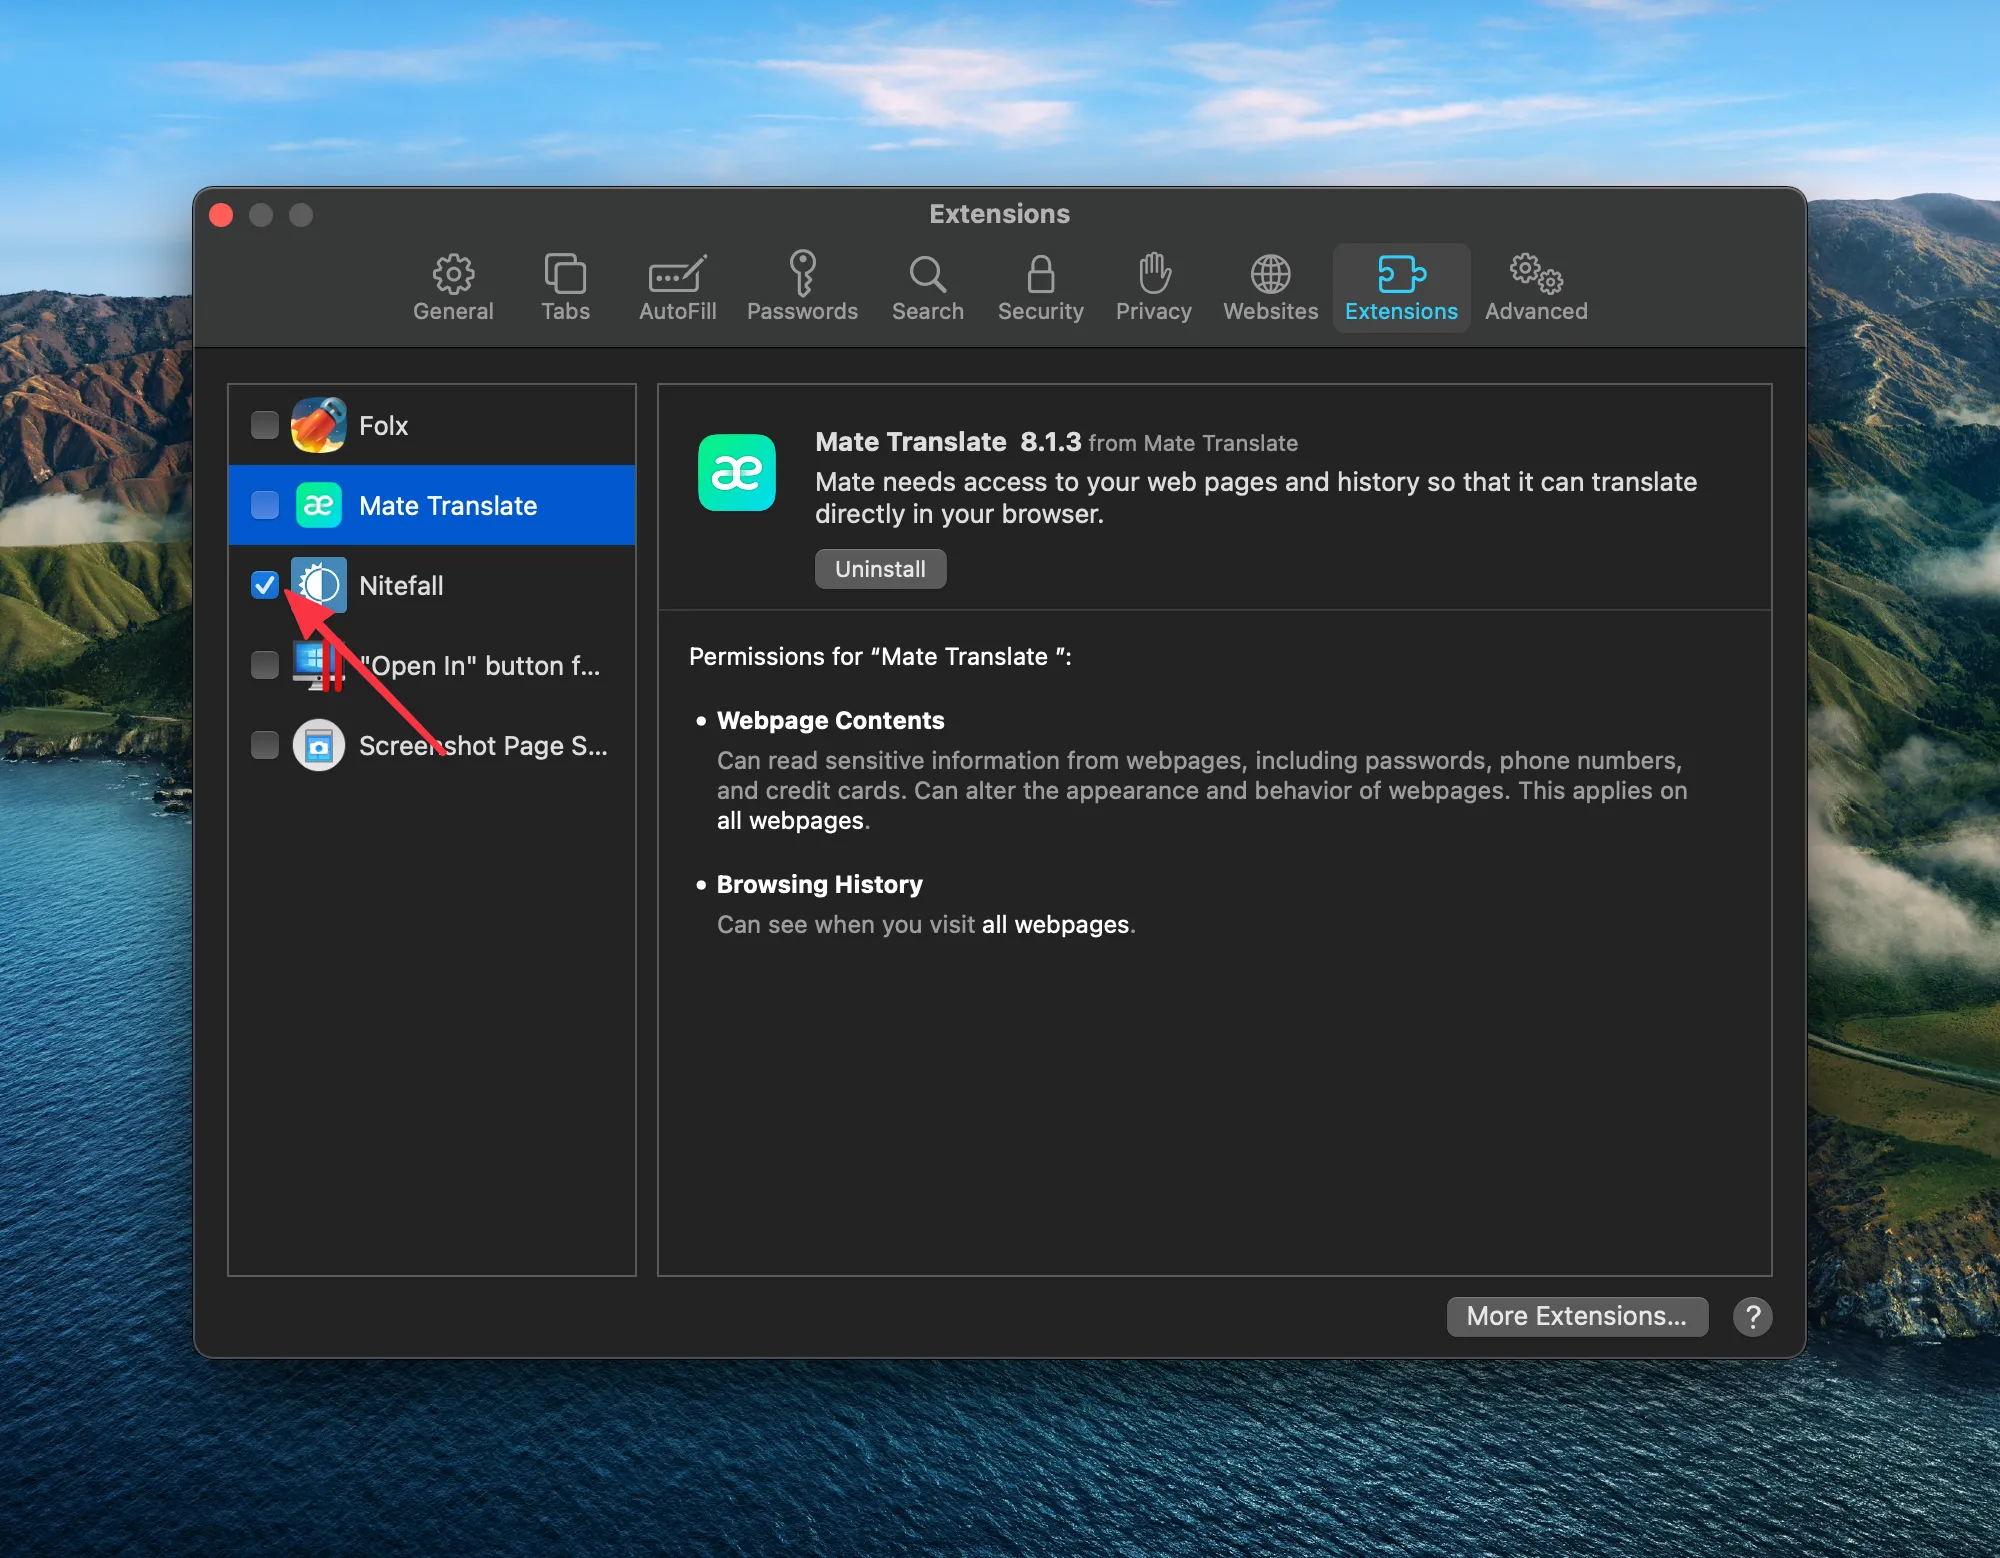
2. Once you have installed the extension, click on Safari > Preferences… > Extension.
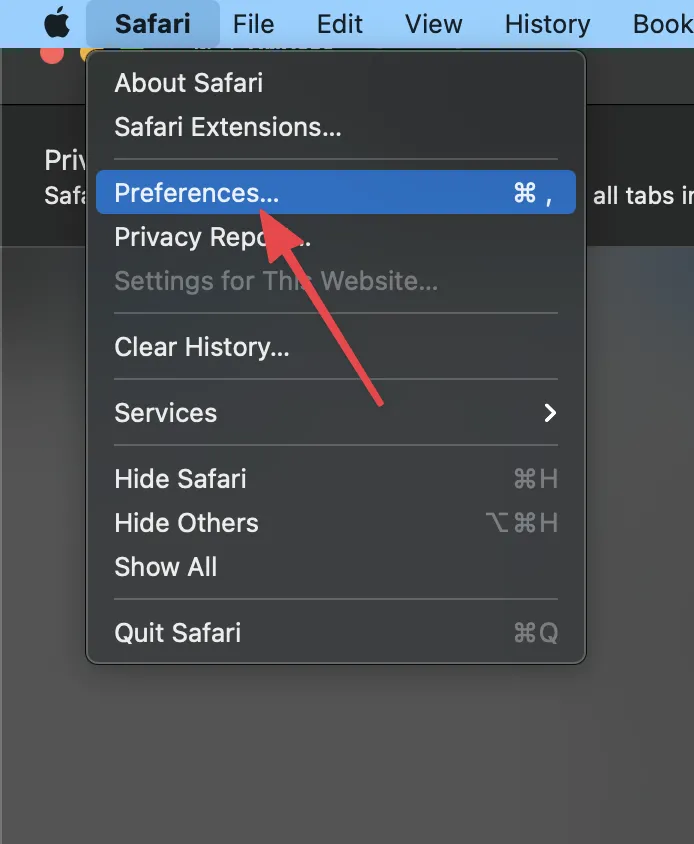
3. Click on the box next to “Nitefall” to enable the extension.
4. That’s it! Now, you will see a new icon appearing in your toolbar, which is next to a URL address on the right.

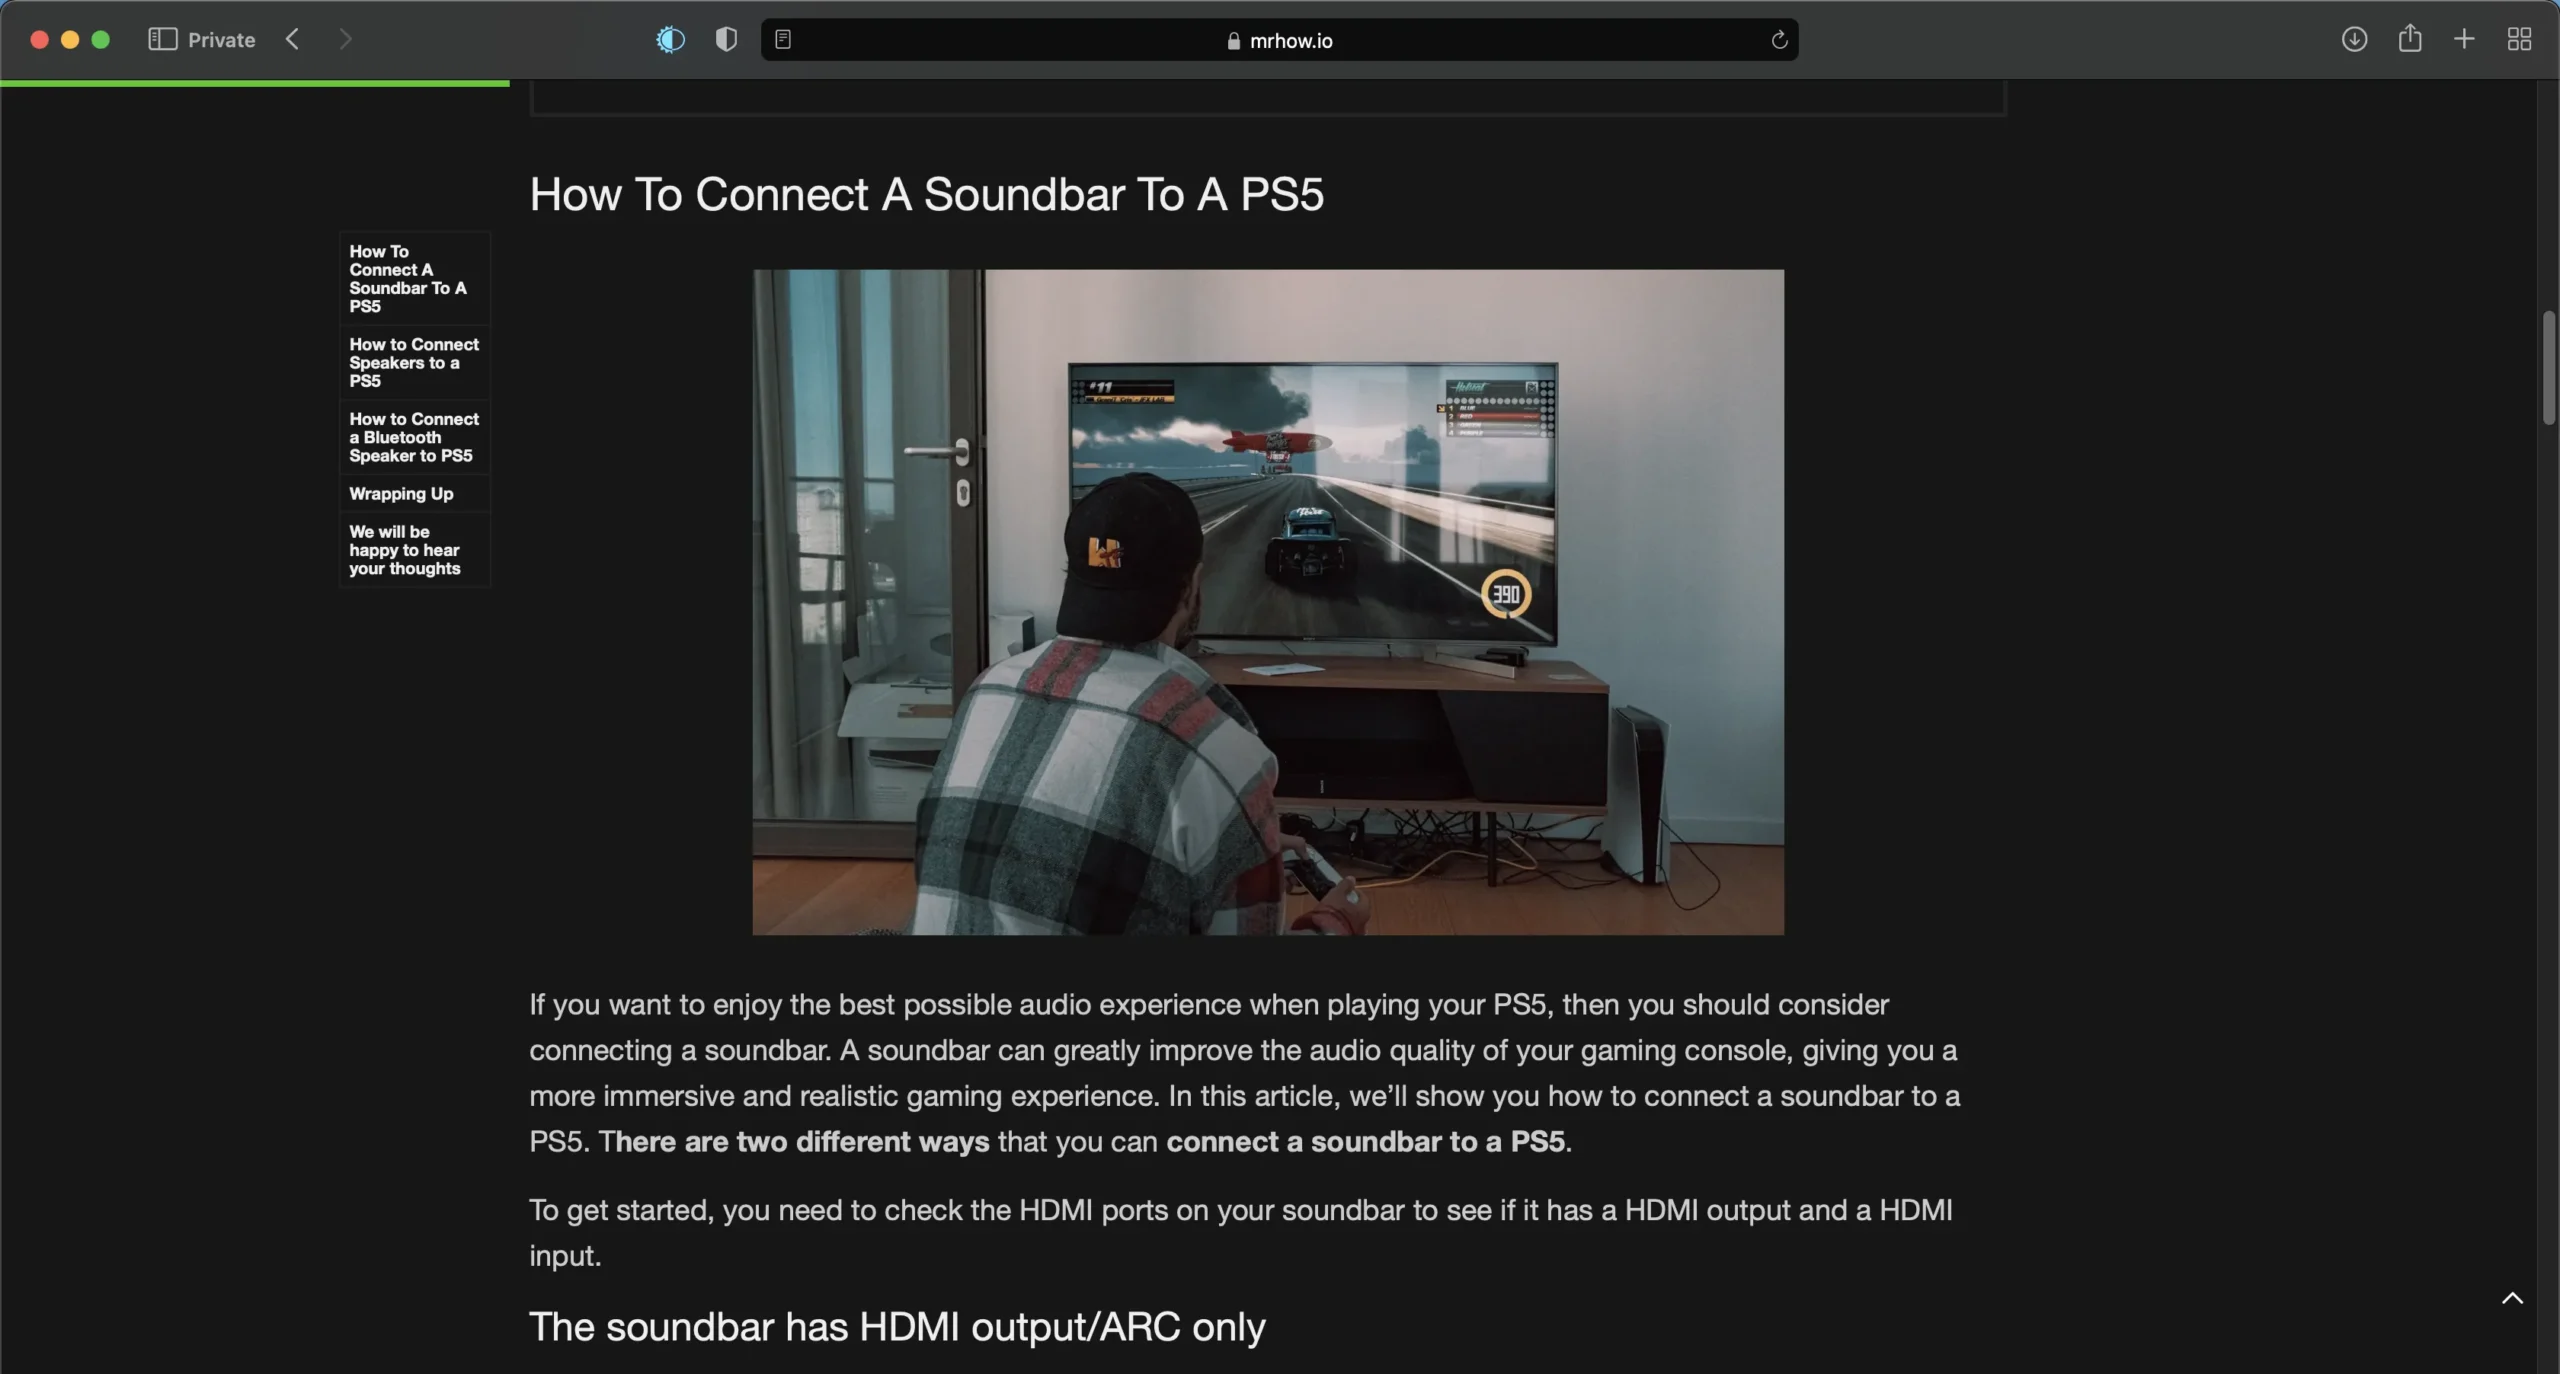
The result.
If you want to disable the extension, simply follow the steps above and uncheck the box next to “Nitefall.” and then go to Safari Extension to uninstall it.
There are many other dark mode extensions available for Safari, so be sure to try out a few and see which one you like the best!
Light and Dark Modes: How to Swich Modes on Your Mac
Select the Control Center on the Menu Bar at the top-right corner. Then select the Right arrow next to “Display.”
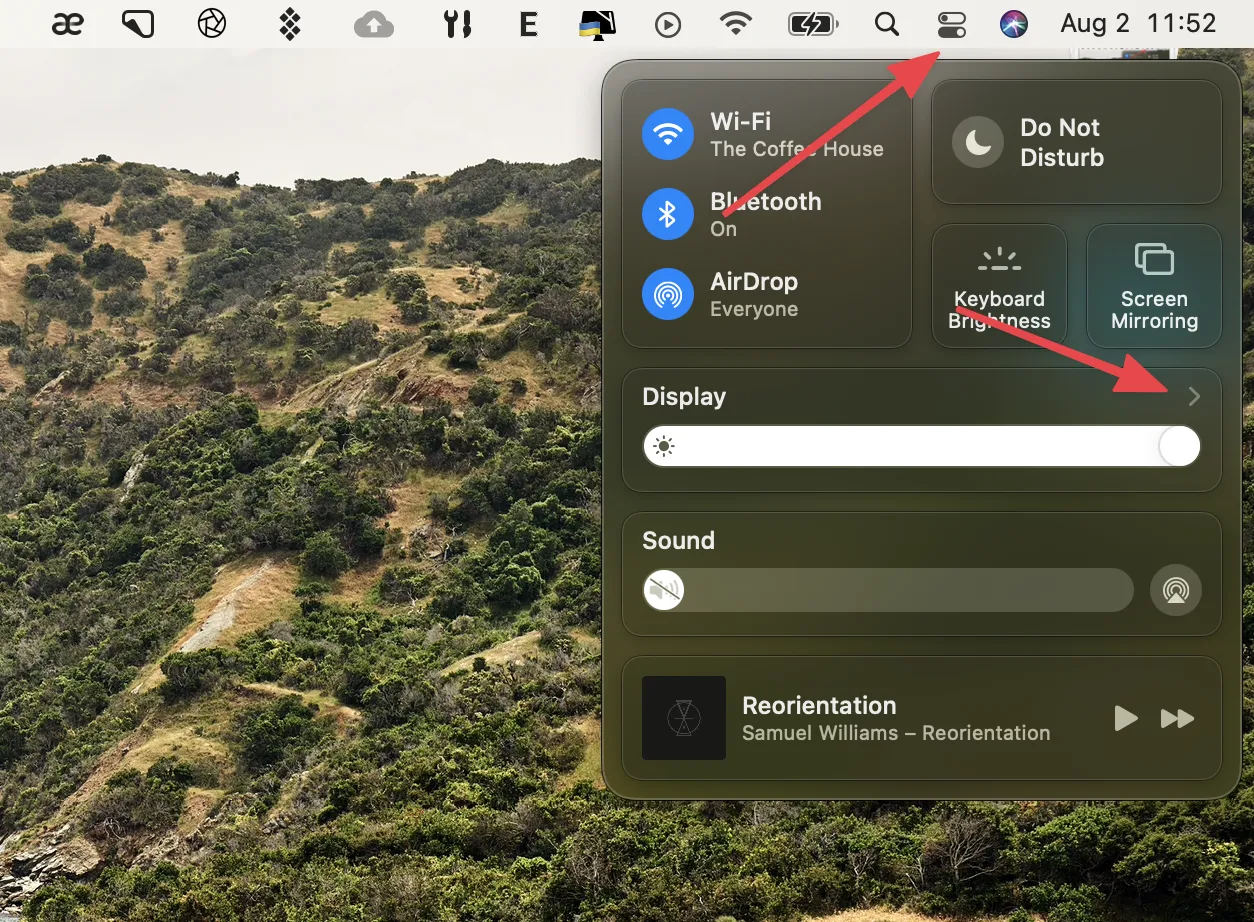
Now, just choose option you want: Dark Mode and Night Shift.
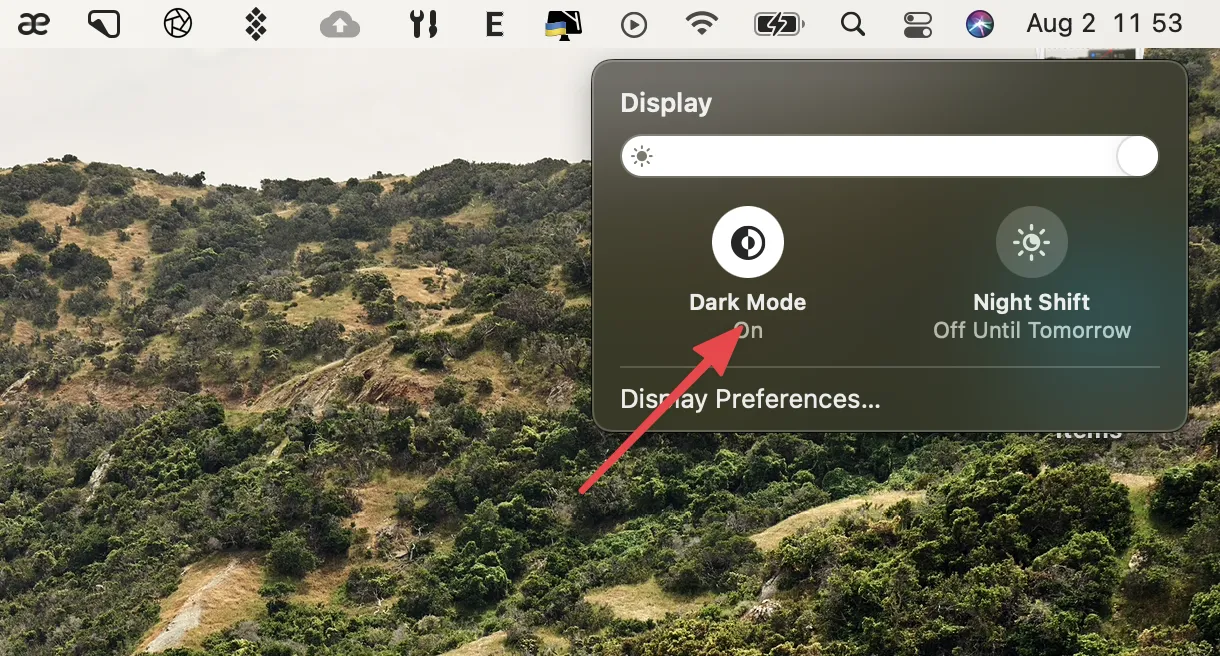
Once you click on Dark Mode option, it will turn the interface to dark, and all your open apps will have a dark theme. Click on it again, it will turn off the dark mode and your interface will go back to light.
What is Night Shift on macOS?
Night Shift is a feature on macOS that helps reduce eye fatigue by automatically adjusting the color of your screen to be warmer at night or cooler during the daytime.This is helpful for people who use their Macs in a dark environment, as it makes the screen less bright. To enable Night Shift on your Mac:
1. Click the Apple logo in the top-left corner of your screen.
2. Click “System Preferences.”
3. Click “Display.”
4. In the “Night Shift” section, select “Schedule.”

5. Choose Custom or Senset to Sunrise. If you choose “Custom” and then choose the times you want it to be active.
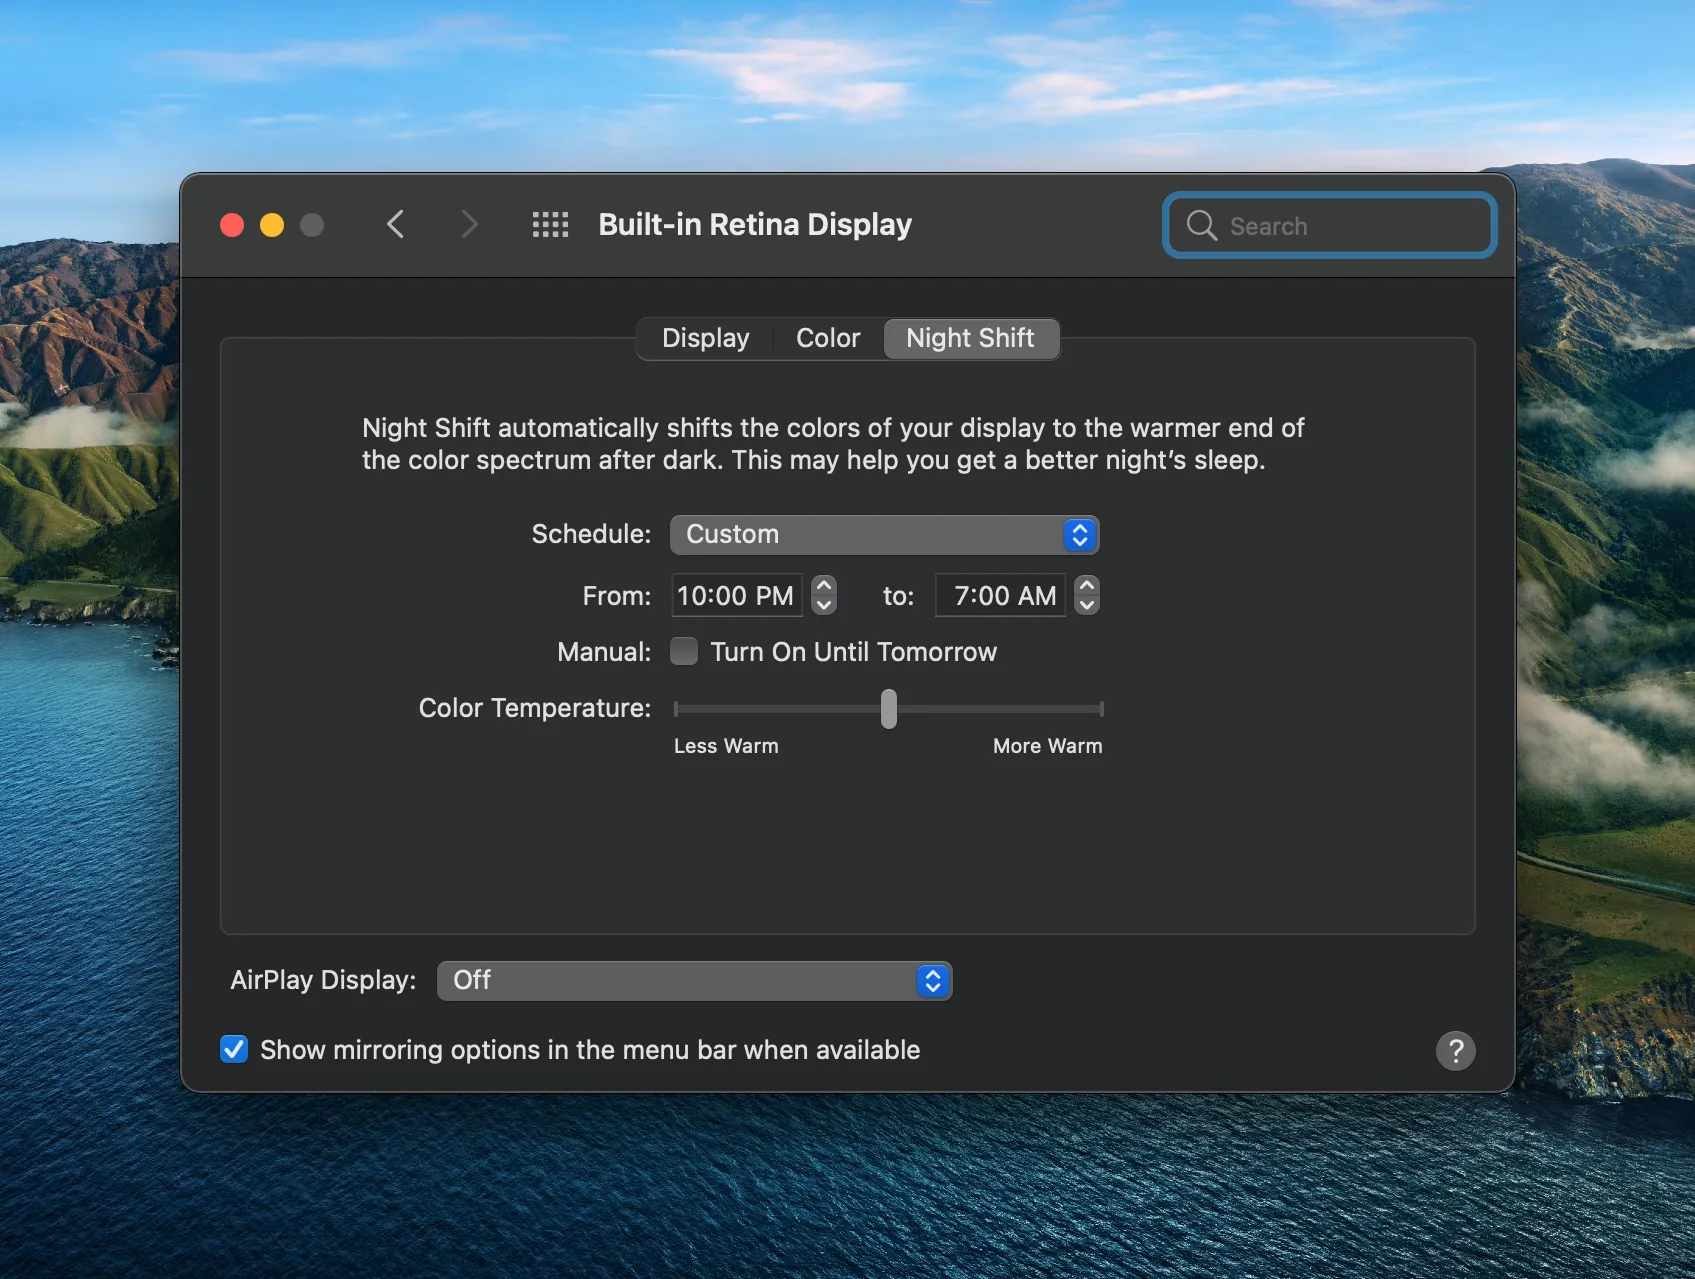
If you want to make your device warmer or cooler, just drag the “Temperature” slider to the left or right. You can set a schedule or turn it on manually from here.
You can also enable Night Shift quickly by clicking the button in the Control Center, select the small arrow next to Display, and choose Night Shift.
Wrapping Up
There you have it! Now you know how to enable dark mode on your Mac. This can help reduce eye fatigue, especially if you’re working in a dim environment. If you want to take things a step further, you can also enable Night Shift to automatically adjust the color of your screen to be warmer at night.
We hope this article has been helpful. If you have any questions or comments, please feel free to leave them below. And if you want more helpful tips and tricks, be sure to check out our website or subscribe to our YouTube channel!
Solomen is the founder of MrHow.io, and he is happiest when working with technology and able to help others. In his free time, he often listens to Baroque music, swims or runs. Feel free to contact him on social media!