Regular cleanup is a must for all laptop users, yet this task is usually ignored. Have you ever felt frustrated when your Mac was slowing down and crashing all the time? If yes, don’t worry, it is a problem that most people encounter once in a while. Removing all the unnecessary files and apps seems the best solution to this issue.
Your Mac will then return to its normal state with fast speed and high performance. However, you might feel lost as you have no idea how to clean your Mac thoroughly. In what way? I have divided the whole process into six easy-to-follow steps, so when it comes to speeding up your Mac, you will be completely prepared.
What Does It Mean To Clean A Laptop?
It means both physically and internally cleaning. People often think of cleaning a laptop as sweeping the screen and the keyboard. It is not just that. Wiping the surface will help your Mac look clean, but tidying up the inner part (hardware, software, etc.) will make your Mac run like new.
How To Clean Up Your Mac In 6 Easy Steps
Step 1: Tidy up the desktop
Most laptop users believe that nowhere is better to store important files than desktop, which is always at the ready. Eventually, your desktop background will be filled with these files, making it harder for you to look for them.
Instead of keeping every file on desktop, sorting them into separate folders would be a better choice. Click any black space → New folder → Enter → Give it a name → Drag categorized items into that folder.
Extra tips: Your Mac can help you automatically group specified files. Follow these actions: Click any blank space → Group St by → Choose options (Name, kind, date modified, date created, size, tags).
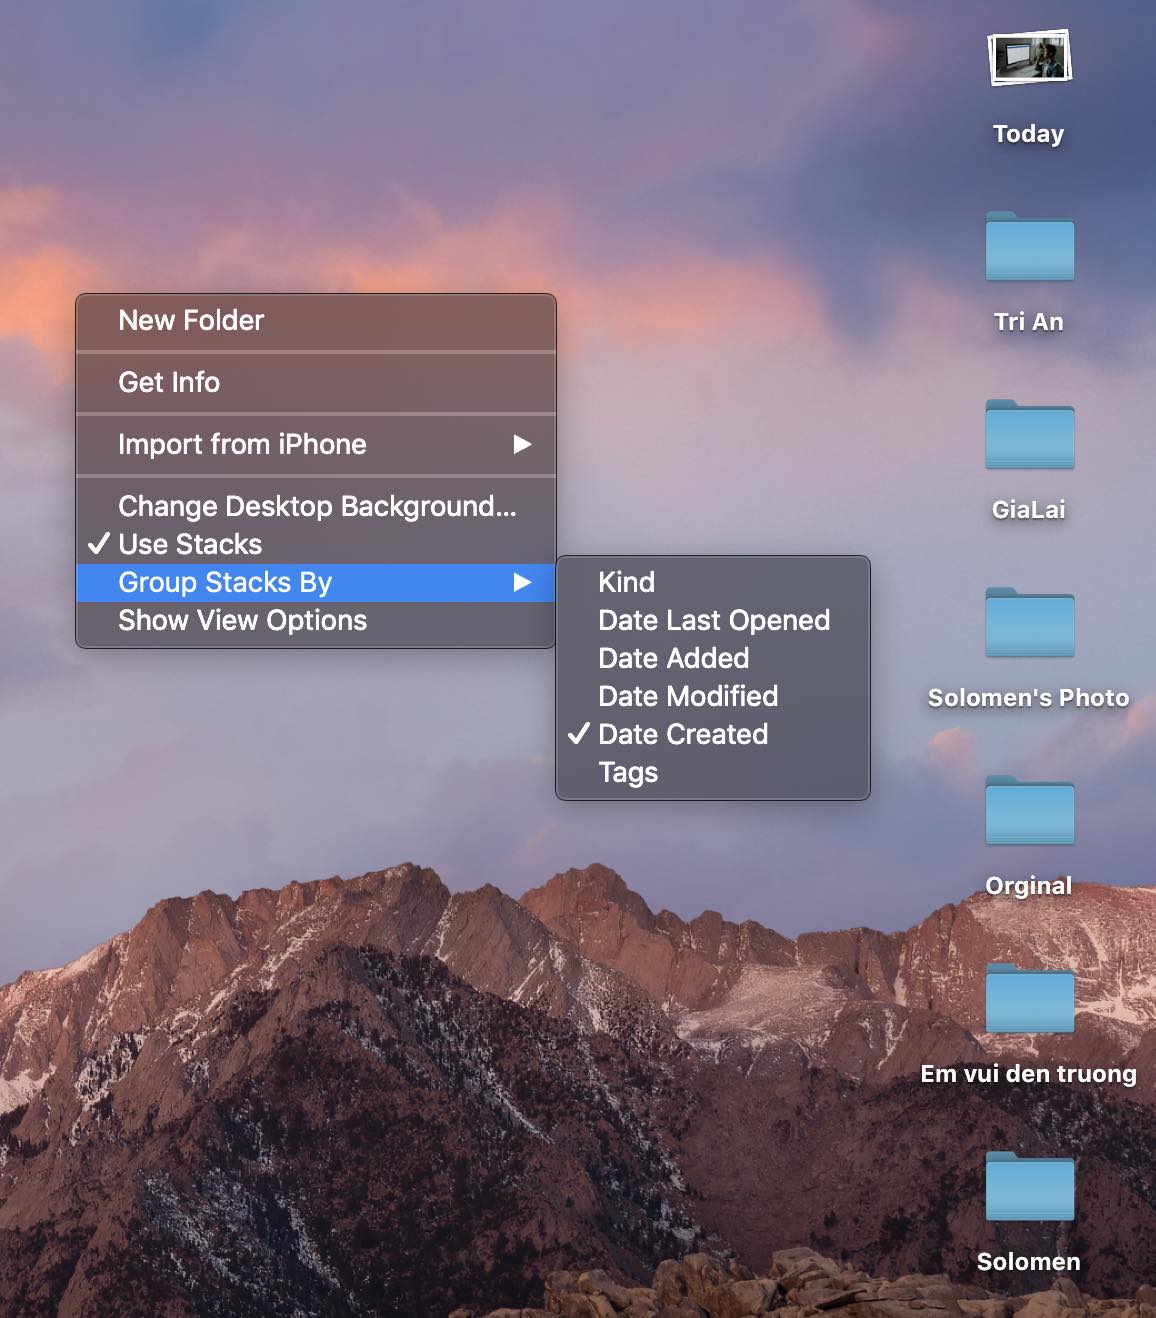
There you go. A neatly organized desktop appears.
Step 2: Delete old files, uninstall old Mac apps
In this step, you need to find old and unnecessary files or apps that take up a lot of your storage. Removing all of them will work wonders for your laptop: it frees your space.
Here are the detailed steps. Take a look at the Applications and Downloads folders. Remove all the files and old apps that you no longer need. Move them to the Trash bin to save your disk space.

Some apps have related files that come along with them when you download. If you move them to Trash bin, they are not entirely deleted. In this case, you may need another app to clear them out totally. Check out AppZapper, AppCleaner, and other related apps for more information.
Step 3: Remove cache and operating system junk
A cache is a hardware or software component that stores data so that future requests for that data can be served faster (Wikipedia). If you want a makeover for your Mac, take out all cache files and system junk.
Then, how to remove them? Here I provide a guide for you:
► For Safari:
Safari → Develop → Empty caches.
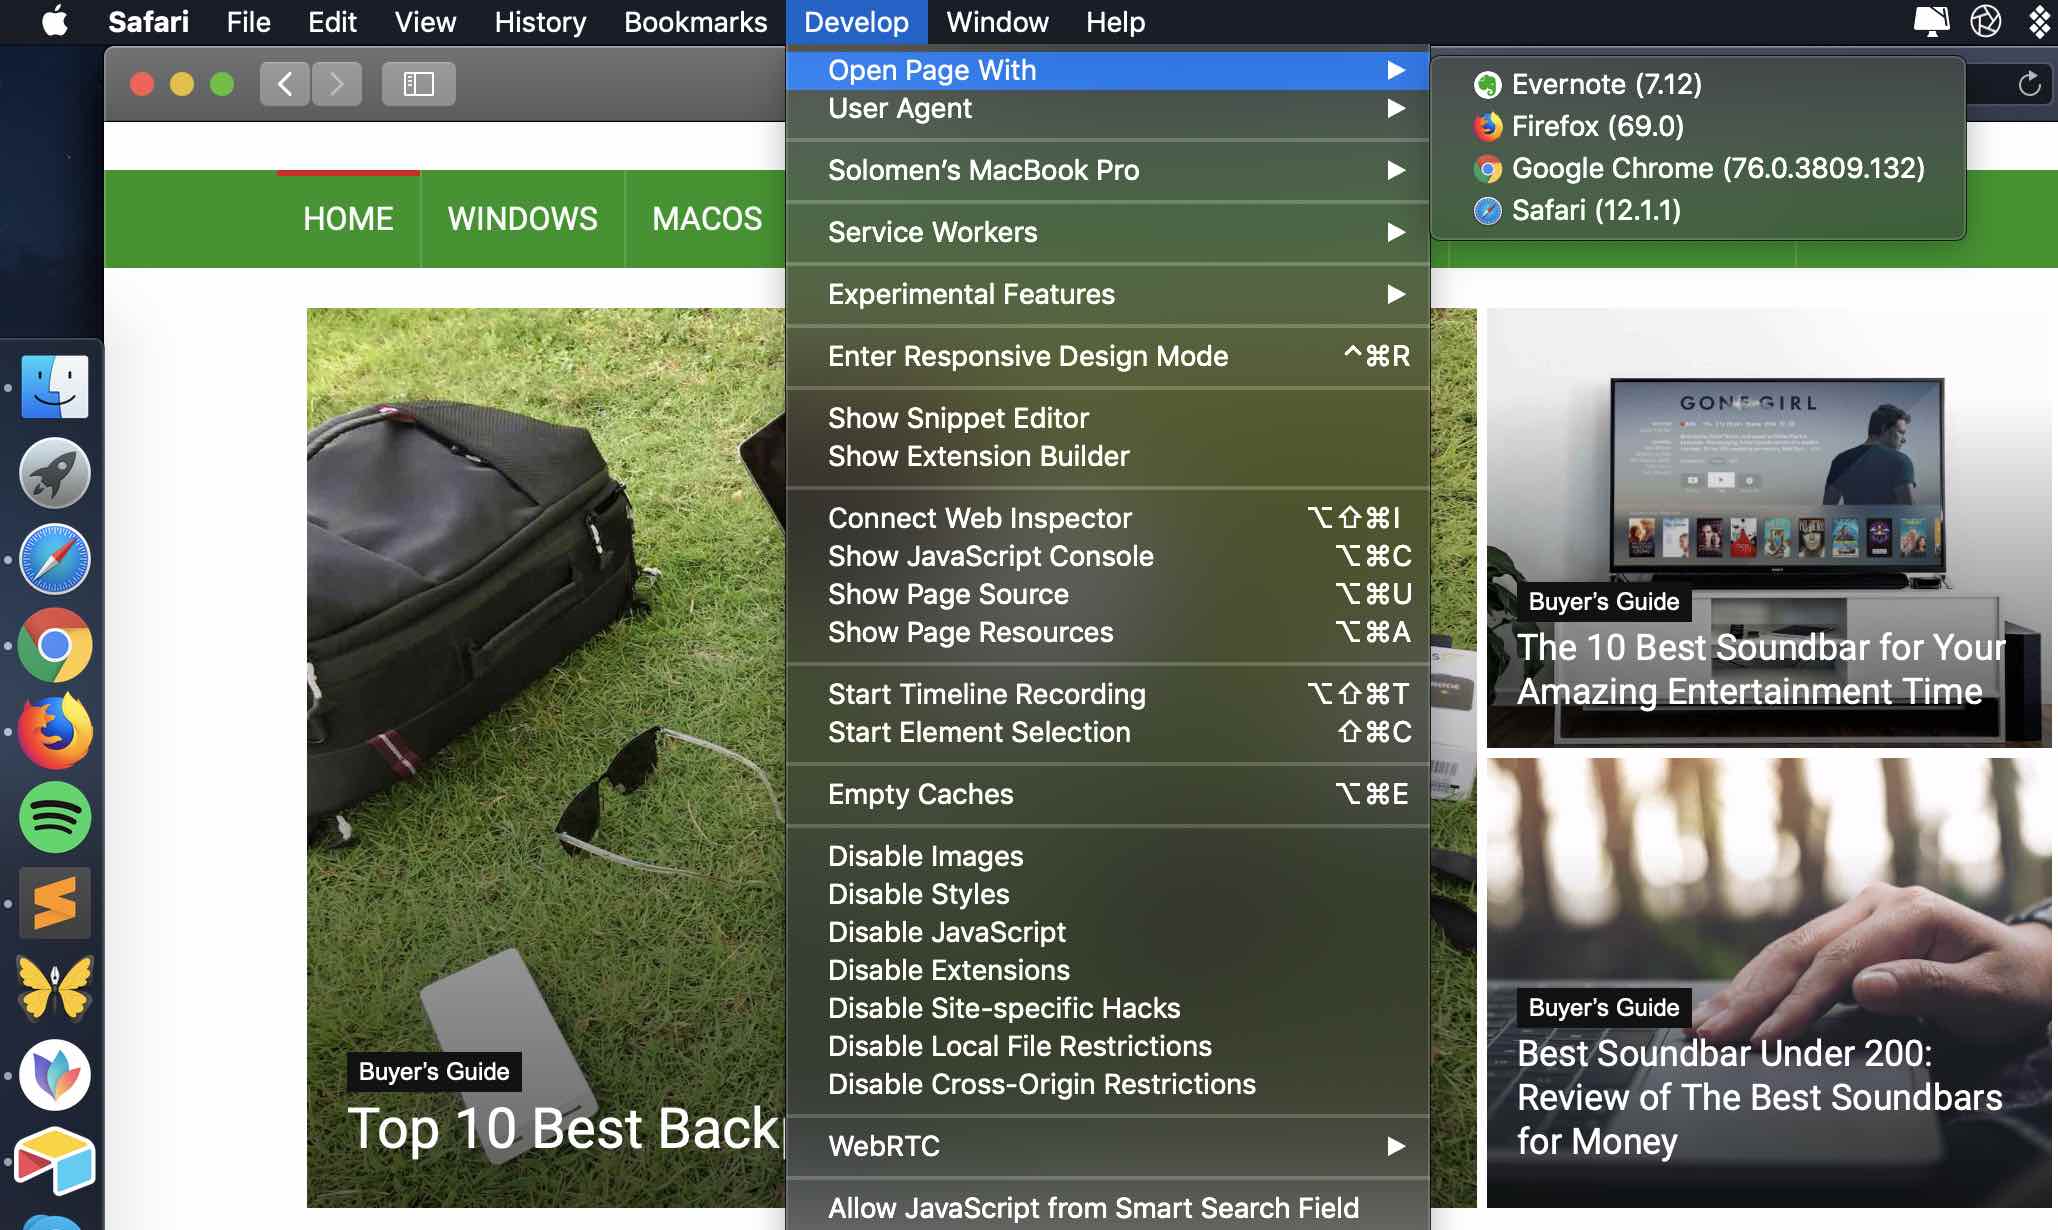
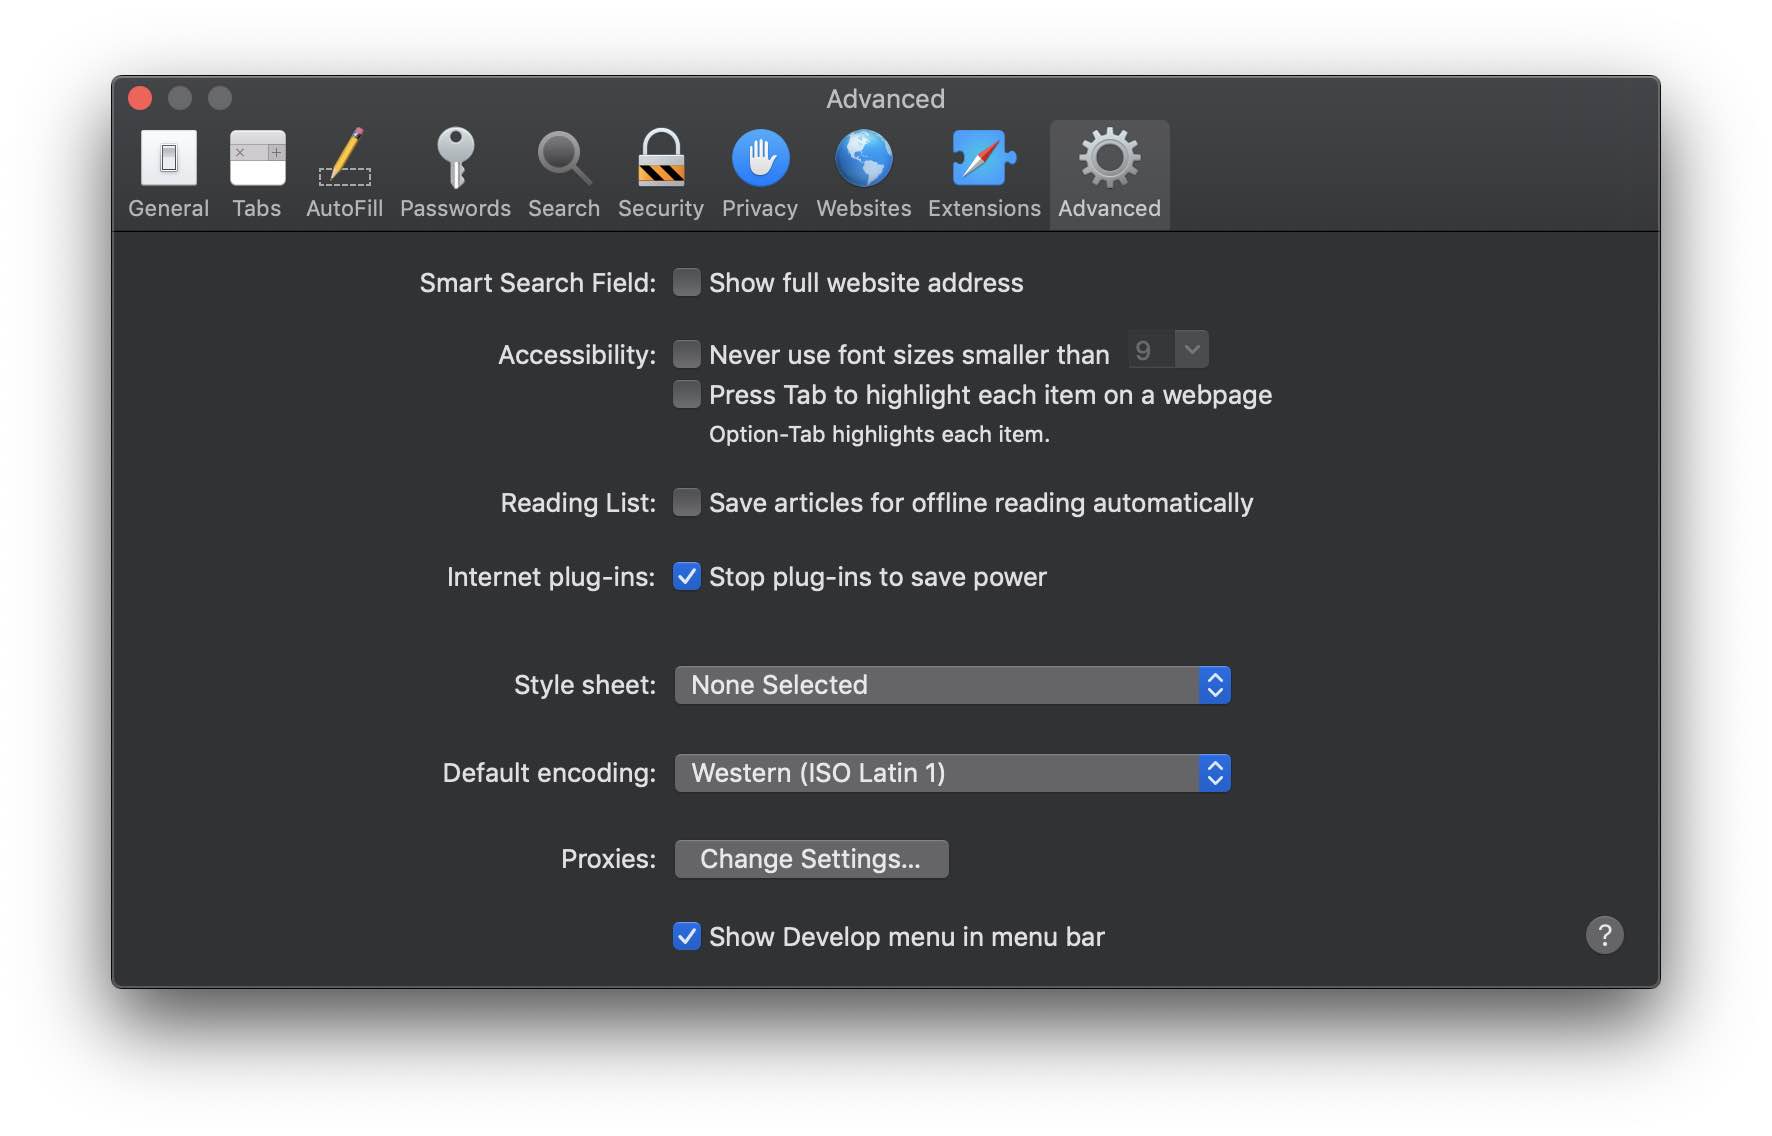
Note: If you don’t see Develop from the menu, check the image below.
► For Chrome:
Google Chrome → Settings → History → Clear browsing data (including browsing history and cached images and files)
► For Firefox:
Firefox → History → Clear recent history → Time range: Everything → Details: Cache → Clear now
Quick tip: You can now use CleanMyMac X instead of doing everything manually. Take these steps: Run the cleaner → Privacy → Select items you want to delete → Remove
Step 4: Clean up old mail attachments
Don’t get surprised by the fact that your Mac automatically downloads bunches of attachments via your email messages. These include PDFs, documents, Excel files, etc. Little by little, they will end up in your Mail Downloads folder, accounting for a huge proportion of your storage.
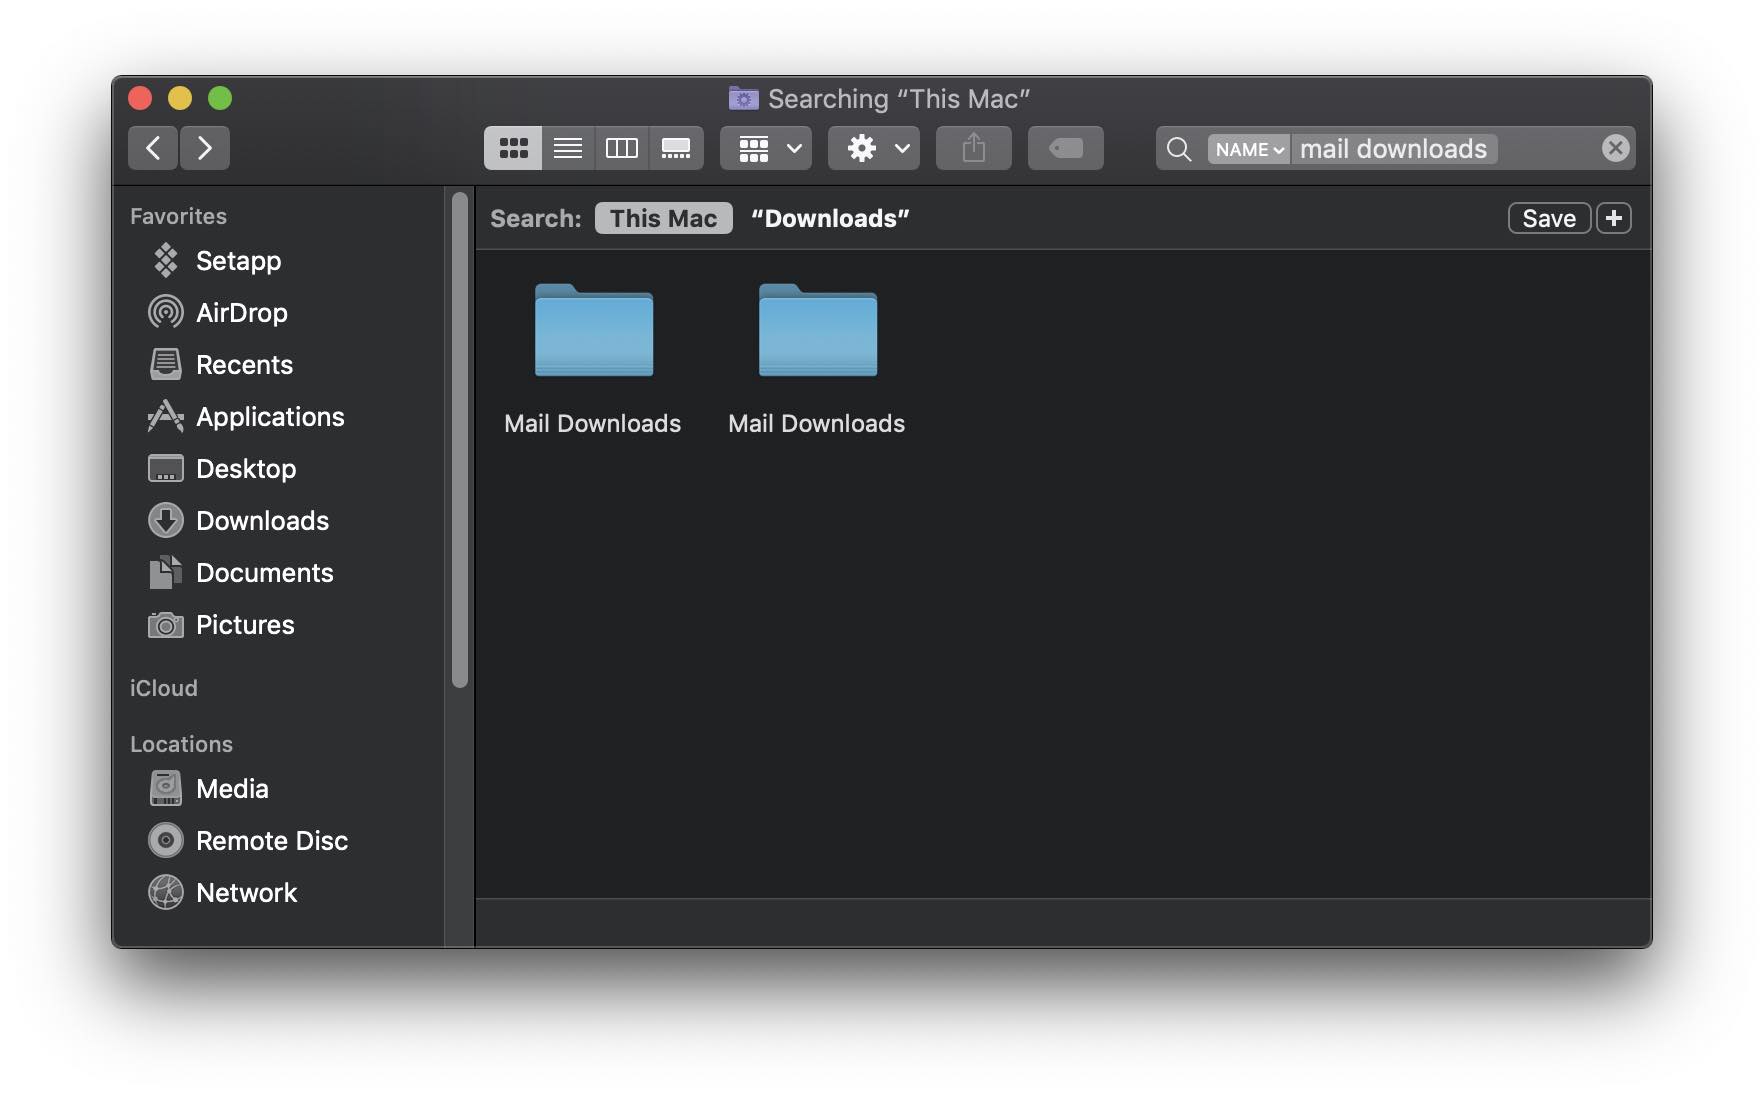
Follow the instructions here to solve this problem: Open Finder → Type “Mail Downloads” → Select the odd files → Delete them
Or, you can avoid this by preventing your Mac from downloading all attachments right from the beginning. Use these steps: Mail → Preferences → Account Information → Select “None” on Download Attachments option
It is recommended to do this task annually to make sure your Mac runs steadily.
Step 5: Install new SSD, delete software bundles
Next, upgrading your hard drive with a new SSD would help in case your Mac is starting up slowly or crashing occasionally.
These are the things you need to prepare: SATA-to-USB cable and a screwdriver. Follow https://macpaw.com/how-to/upgrade-mac-with-ssd for more detailed instructions on installing new SSD. This site provides specific steps and intuitive video to make the process much easier for you.
For the software bundles that you no longer need, go to Library → iTunes → iPhone Software Updates → Delete idle bundles. The effect of these actions on the performance of your Mac will amaze you. They are effective and, of course, time-saving.
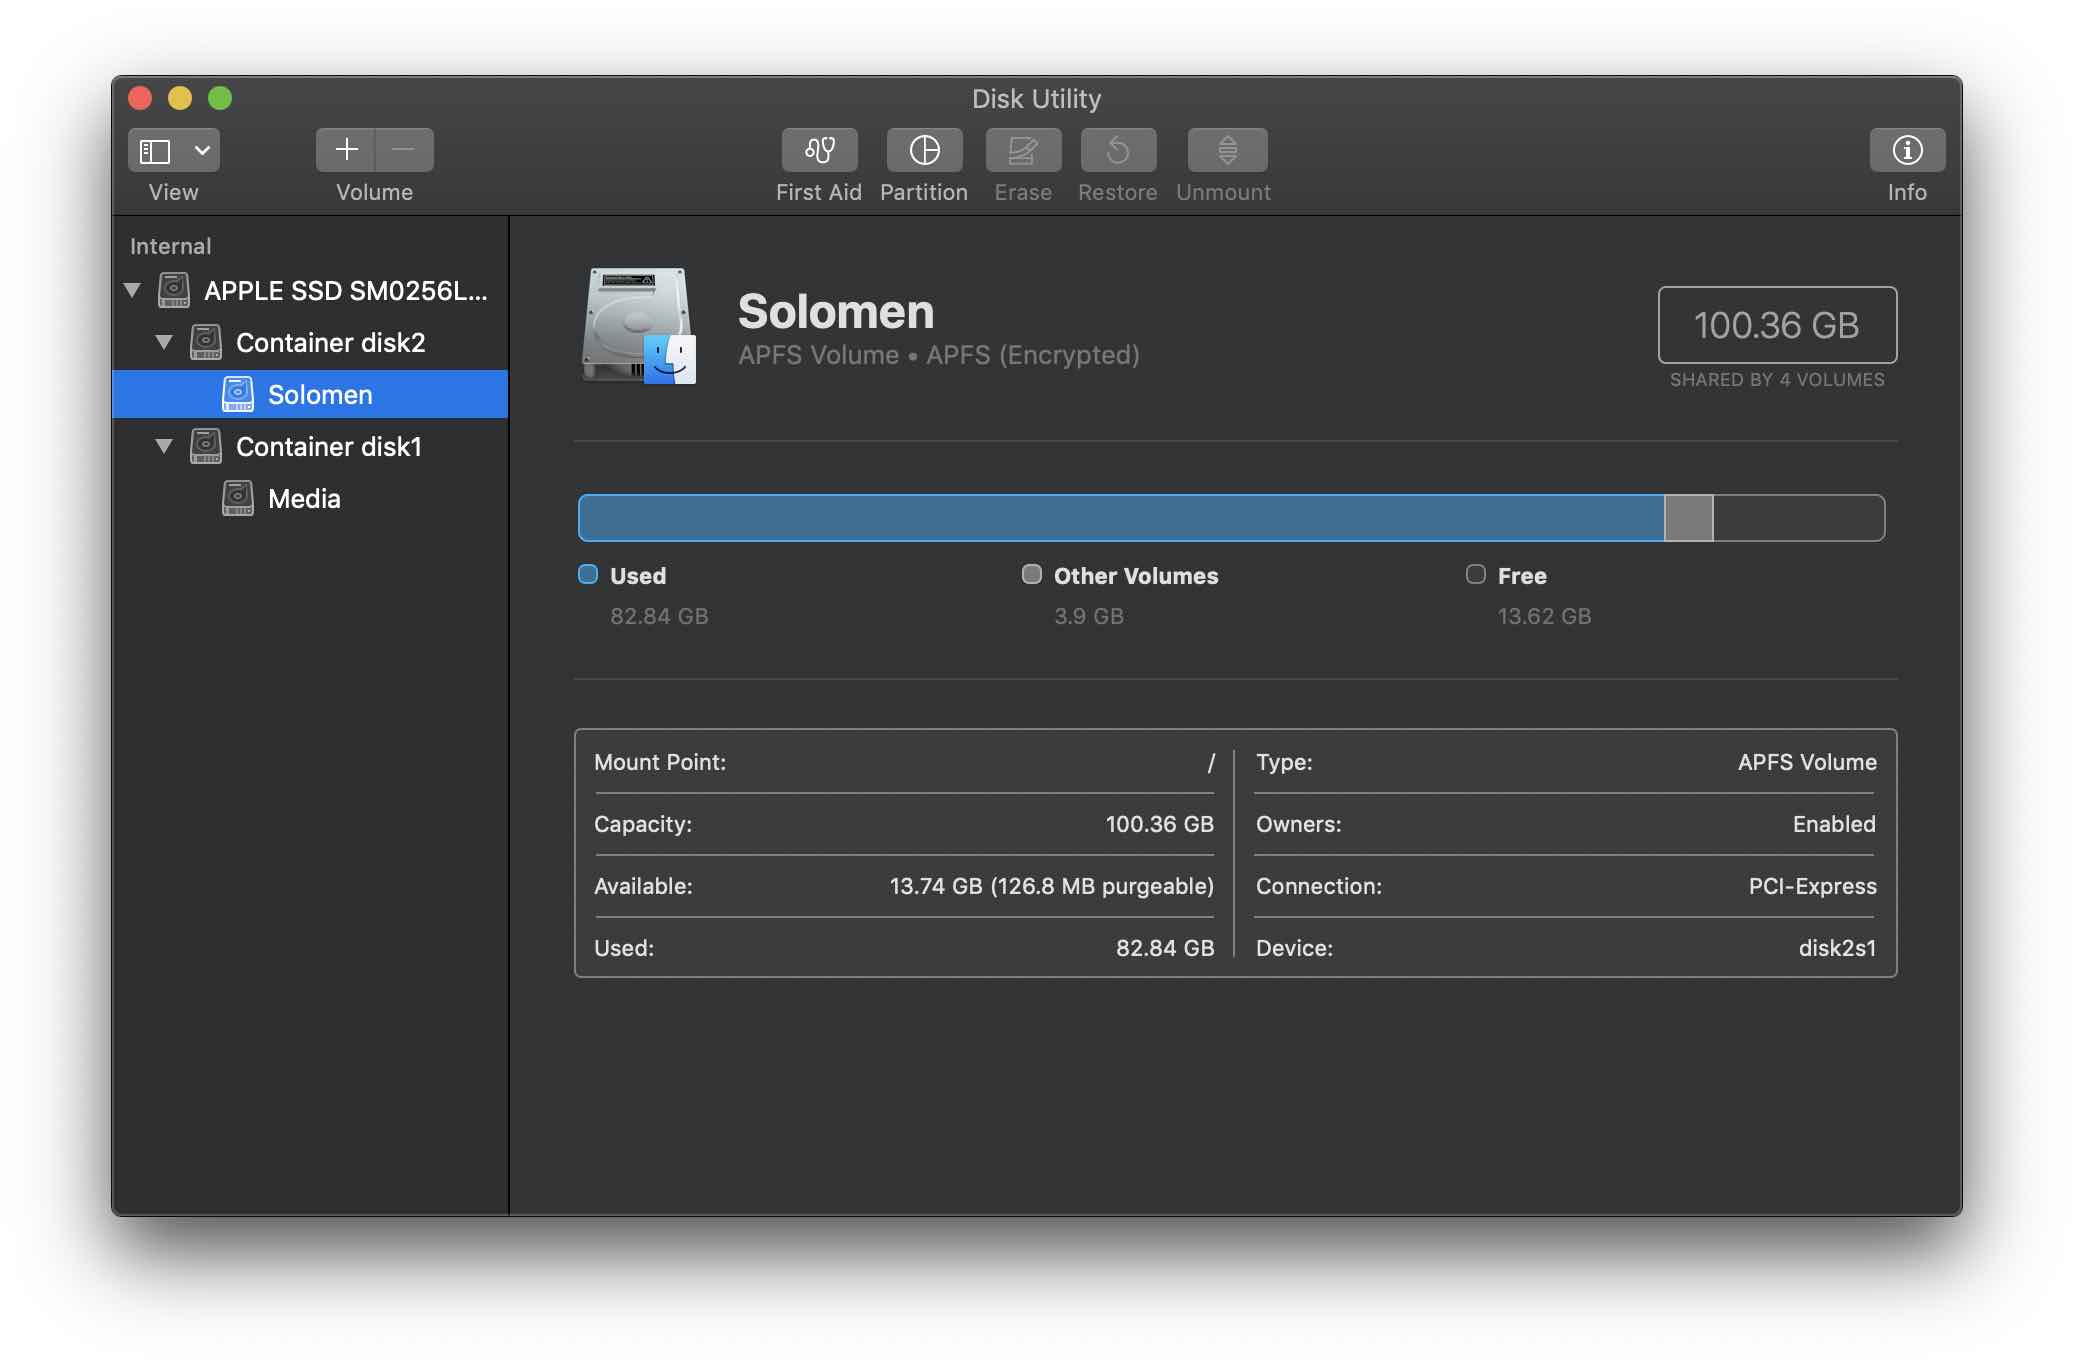
Step 6: Repair disk permissions
Finally, you may wonder what disk permissions are and how they affect your Mac. If you have an app installed, its package will include a section of the software. This serves as permissions which tell your laptop what you can do with the downloaded files. After a while, disk permissions can malfunction, causing your Mac to lag or even crash.
A simple way to fix this is to use Disk Utility. Here is the guide for you:
Macintosh HD → Applications → Utilities → Disk Utility → Click “Hard drive” → First Aid.
Done! Now enjoy your smooth and efficient Mac.
Conclusion
I hope all the steps mentioned above help you speed up your Mac. Remember to clean it up frequently with these six as-easy-as-pie actions, and you will surely be astonished by your Mac performance.
If you have any questions related to how to clean your Mac, leave your comment below, please. Thanks for reading!!!
Solomen is the founder of MrHow.io, and he is happiest when working with technology and able to help others. In his free time, he often listens to Baroque music, swims or runs. Feel free to contact him on social media!