An ISO image is a disk image of an optical disc. ISO images are mainly used to distribute software, and they are also used as a digital alternative to physical discs.
When you make an ISO image from a folder on your computer, all the files in that folder will be put into the ISO file. Creating an ISO image from a folder is also known as “burning” an ISO image.
There are many reasons to use ISO images.
- They are a great way to back up data.
- ISO images are perfect for distributing software.
- It can also be used as a digital alternative to physical discs.
For example, if you have an ISO image of a Windows installation disc, you can install Windows from that image without ever burning a physical disc. It is also the same when you want to install Windows 11 on your Mac using Boot Camp.
How to Create an ISO From a Folder on Mac
Creating an ISO image from a folder on your Mac is very easy. There are two ways to do it.
The first way is to use the Terminal. The second way is to use a third-party app. We will show you both methods.
Creating an ISO Image From a CDR File
What is a .cdr file? A .cdr file is a vector graphics file created with CorelDRAW, a vector editing and illustration program. It stores vector image data and text and object information such as fills, lines, bitmaps, and curves. CDR files can be opened with several programs, including the freeware Inkscape and CDR Viewer program.
Before we create the ISO image, we need to create a CDR file. Although macOS doesn’t support a way to create an ISO from a Folder directly, we can create a CDR file and convert it to ISO on Mac.
Converting A Folder to A CDR File on a Mac
First, you need to copy all files to a new folder, which will be the content of your CDR file. To convert a folder to a CDR file on a Mac, you can use the free application Disk Utility. Here are the steps:
1. Open Disk Utility, which is located in the Utilities folder.
2. From the File menu, select New Image > Image From Folder…
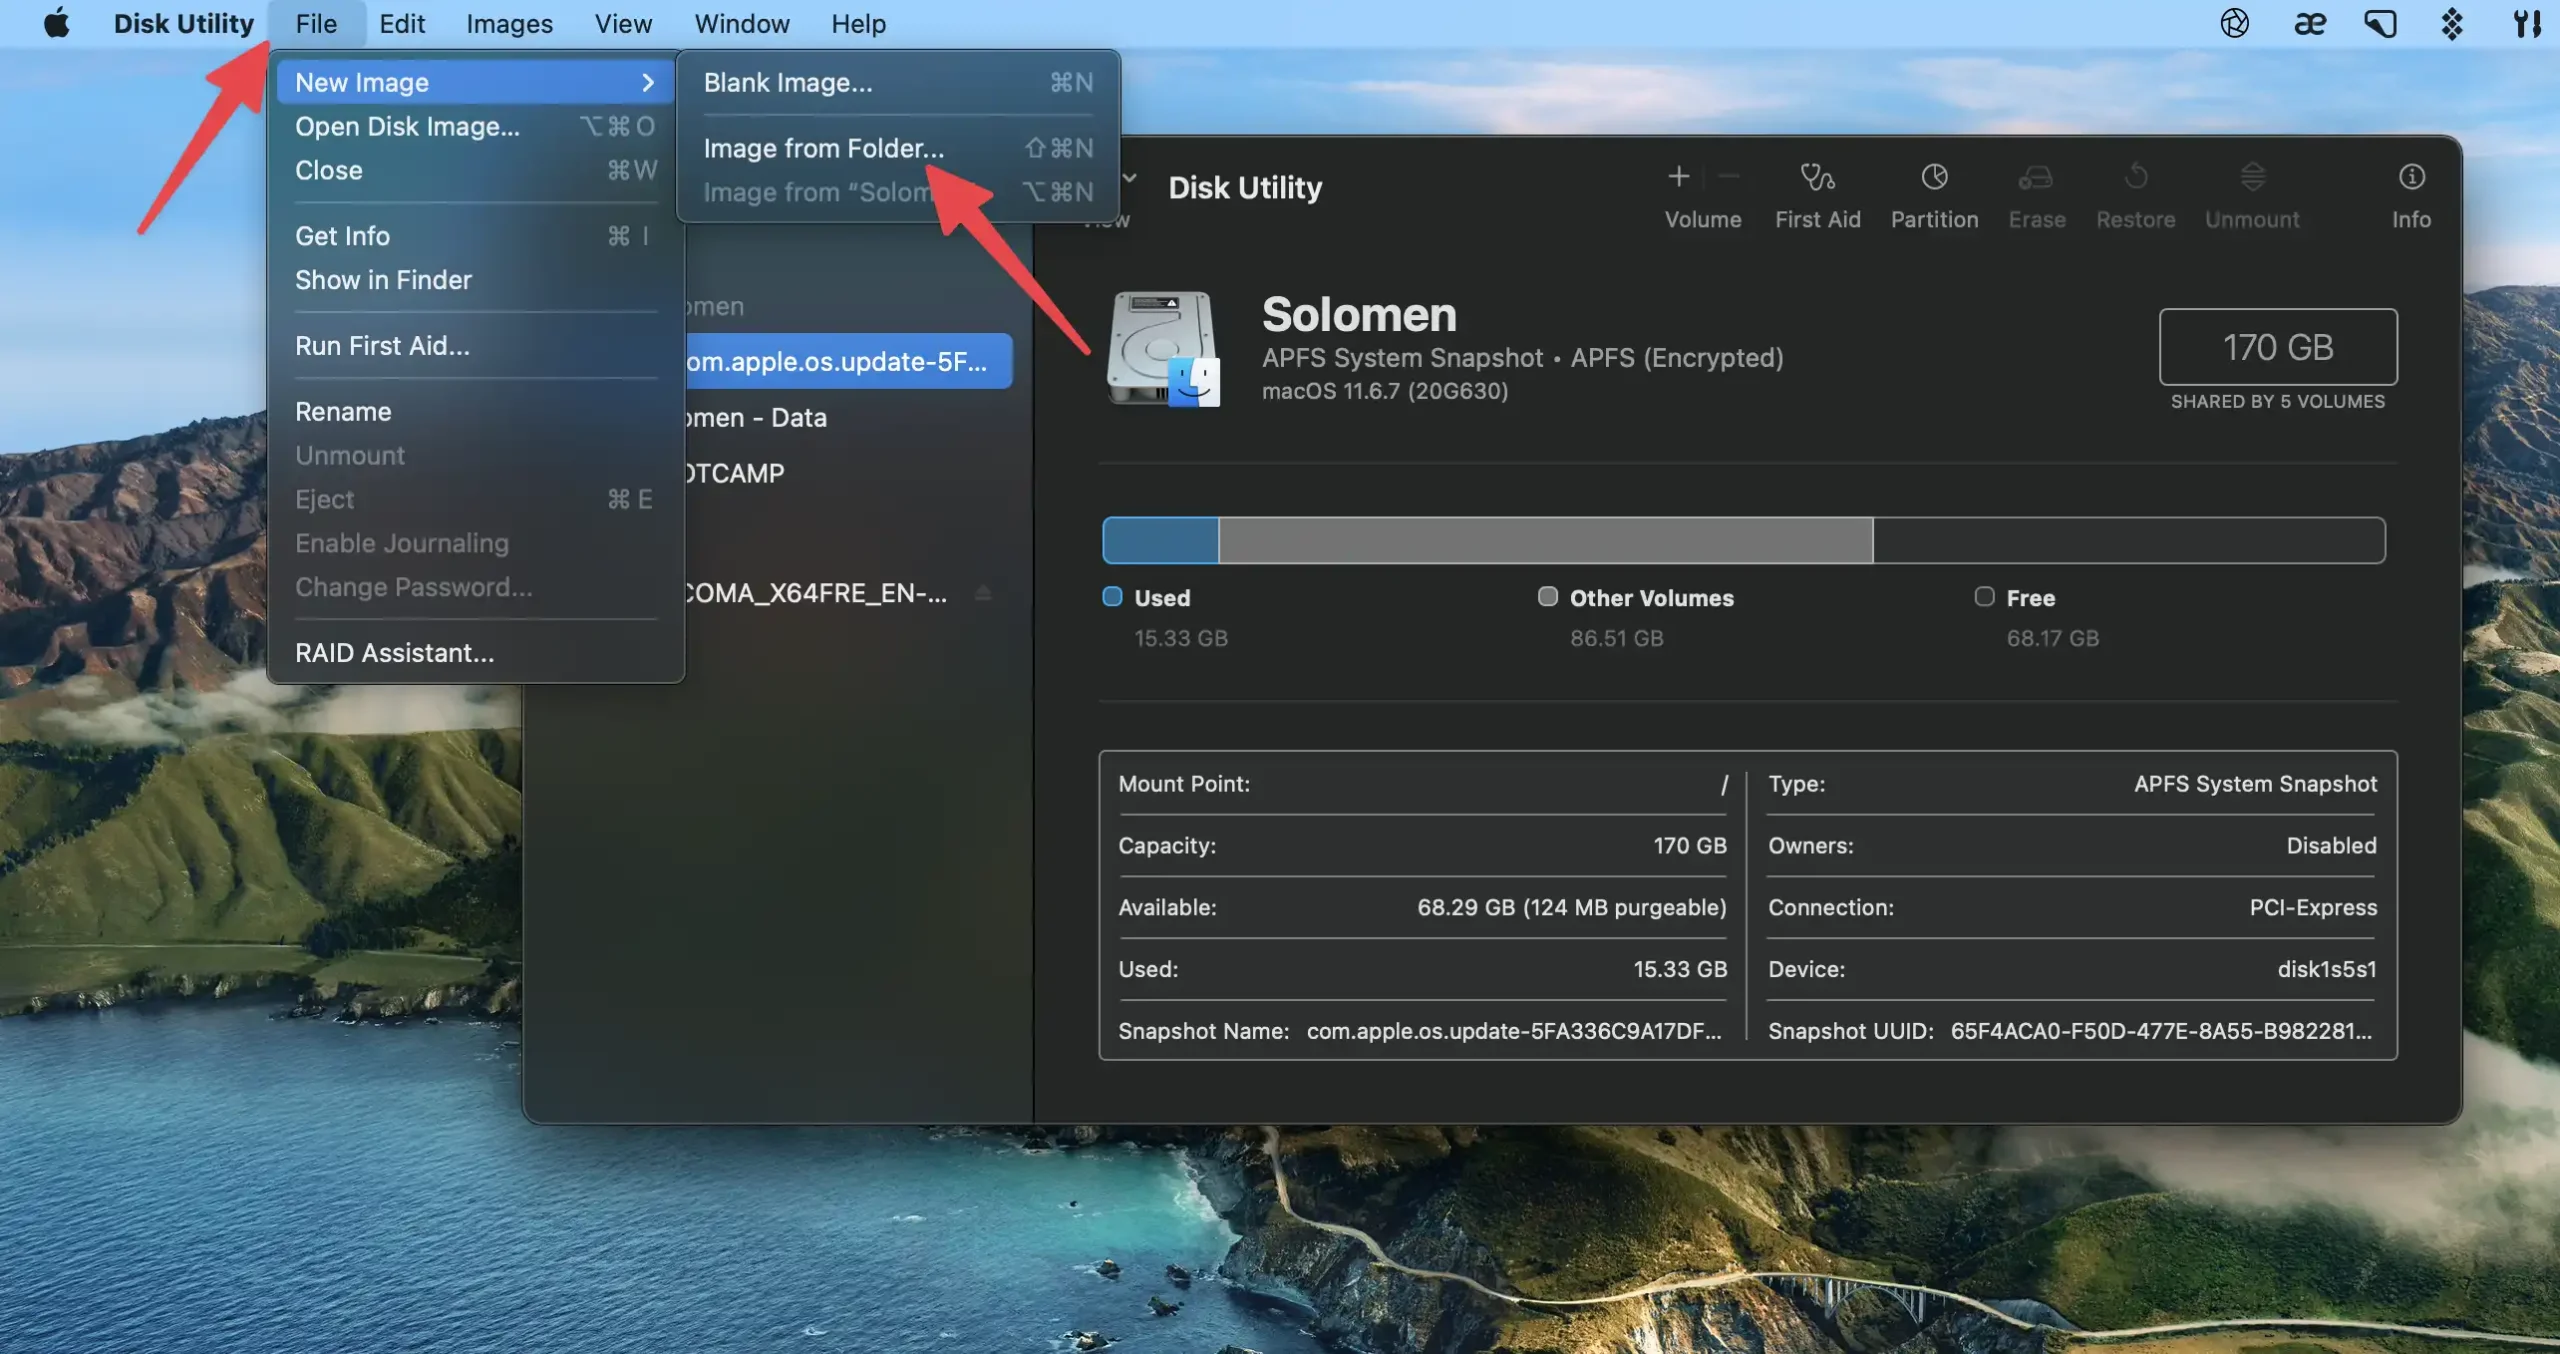
3. Select the folder you want to convert and click Choose.

4. A new window will open.
- Select CD/DVD Master from the Image Format
- Please enter a name for the file and select a location to save it. By default, the file will be kept in the exact location of the original folder.
Click Save and wait for the file to be created.
Creating an ISO Image from the CDR File
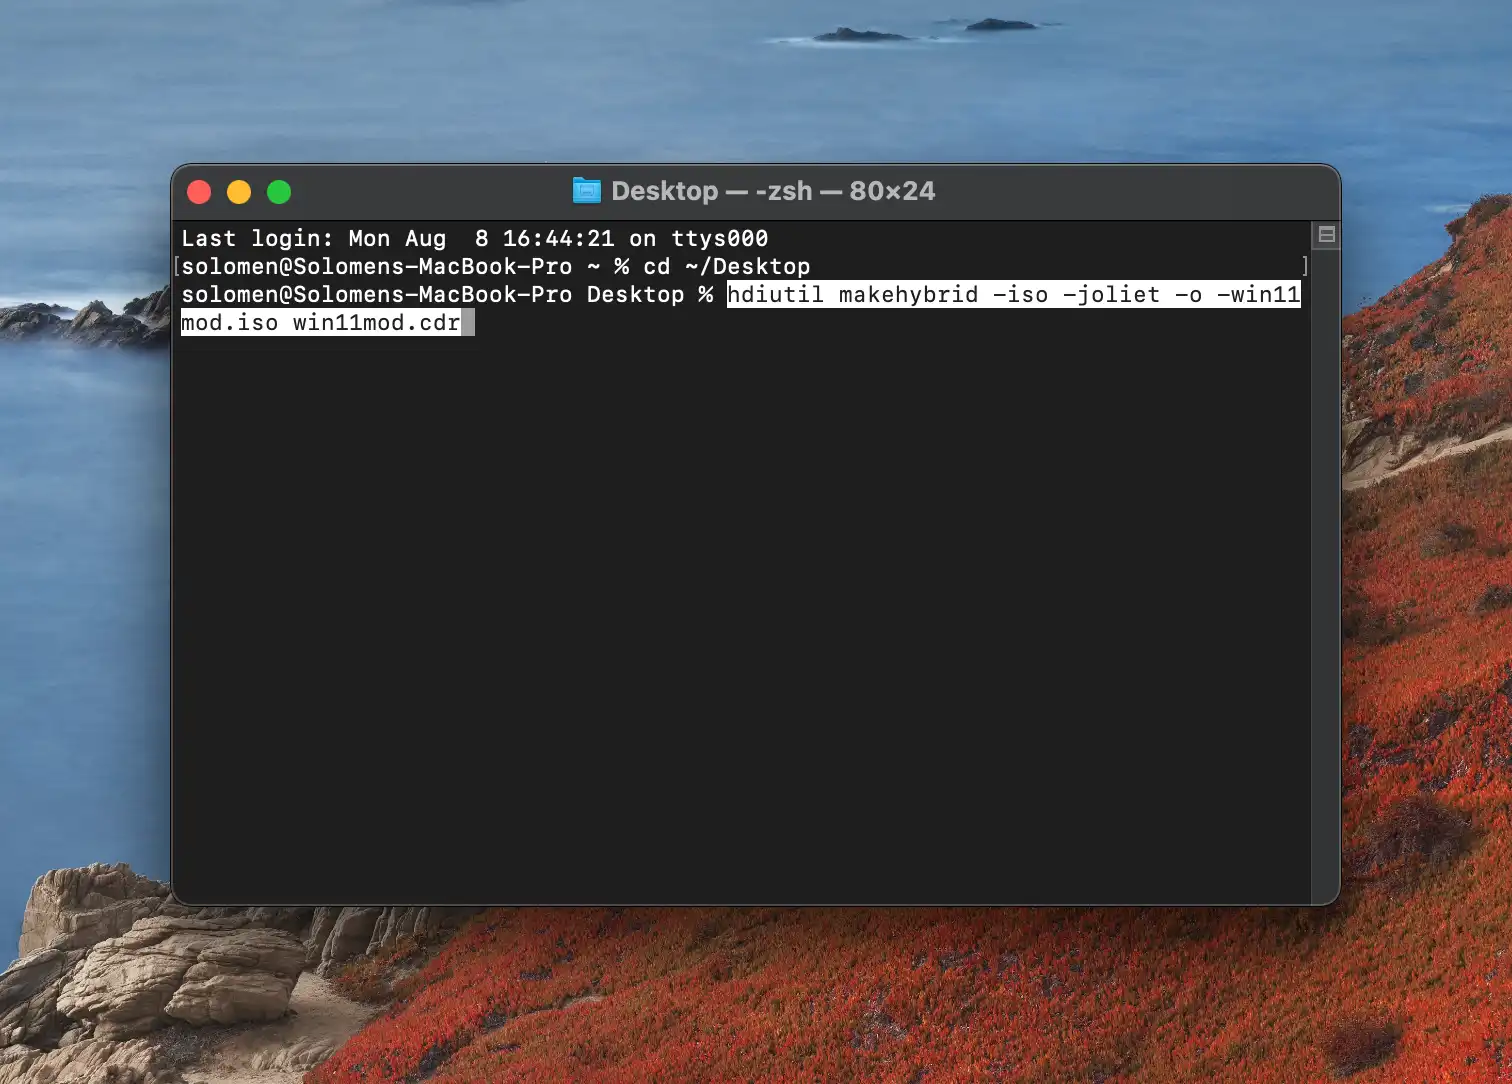
Step 1: Open the Terminal. You can find it in the Utilities folder in your Applications folder.
Step 2: Use the cd command to change the directory to the location of the folder that you want to create an ISO image of. For example, if the folder is on your Desktop, you would type the following command:
cd ~/DesktopStep 3: Type the following command and press Enter:
hdiutil makehybrid -iso -joliet -o outputfile.iso outputfile.cdrChange “outputfile.iso” if you want. Like win11mod.iso, mrhow.iso,…
Replace “outputfile.cdr” with the name of the file that you have created above.
Step 4: Wait for the command to finish. When it is done, you will find the ISO file in the exact location of the folder that you created it from.
There is a simple way to create an ISO file from a CDR file on a Mac. All you need is to change the file extensions.
1. Right-click the file and select Get Info.
2. In the Name & Extension section, change the extension from .cdr to .iso.
3. Hit Enter and confirm that you want to change all extension instances by clicking Use .iso in the pop-up window.
Or Select a cdr file, hit Enter, and then type in the new extension (.iso) to replace the old one. Confirm the change by selecting Use .iso.
Creating an ISO Image Using a Third-Party App
Many apps can create ISO images on Mac. We recommend using the free app “AnyToISO.” It is straightforward to use.
Step 1: Download and install “AnyToISO.”
Step 2: Launch the app and select Folder to ISO tab.
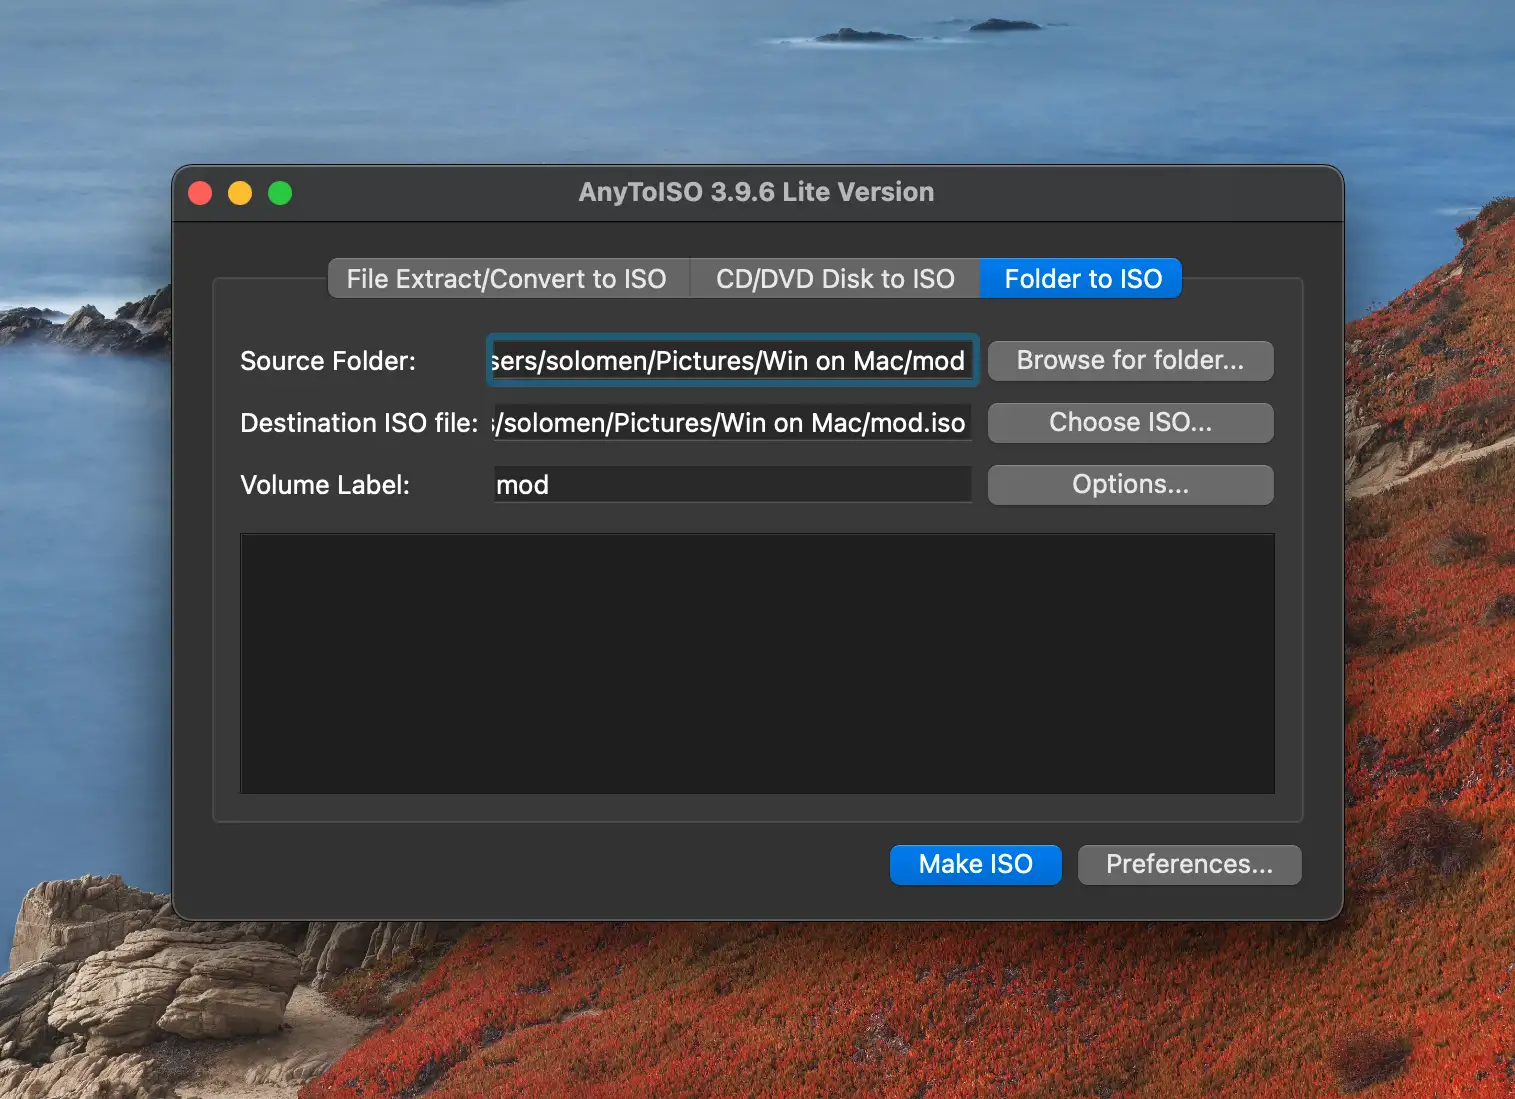
Step 3: Click the “Browser for folder” button and select the folder you want to create an ISO image of.
Step 4: Enter a name for the ISO file in the “Volume Label” field.
Step 5: Click on the “Make ISO” button.
Step 6: Wait for the ISO file to be created. When it is done, you will find it in the exact location of the folder that you made it from.
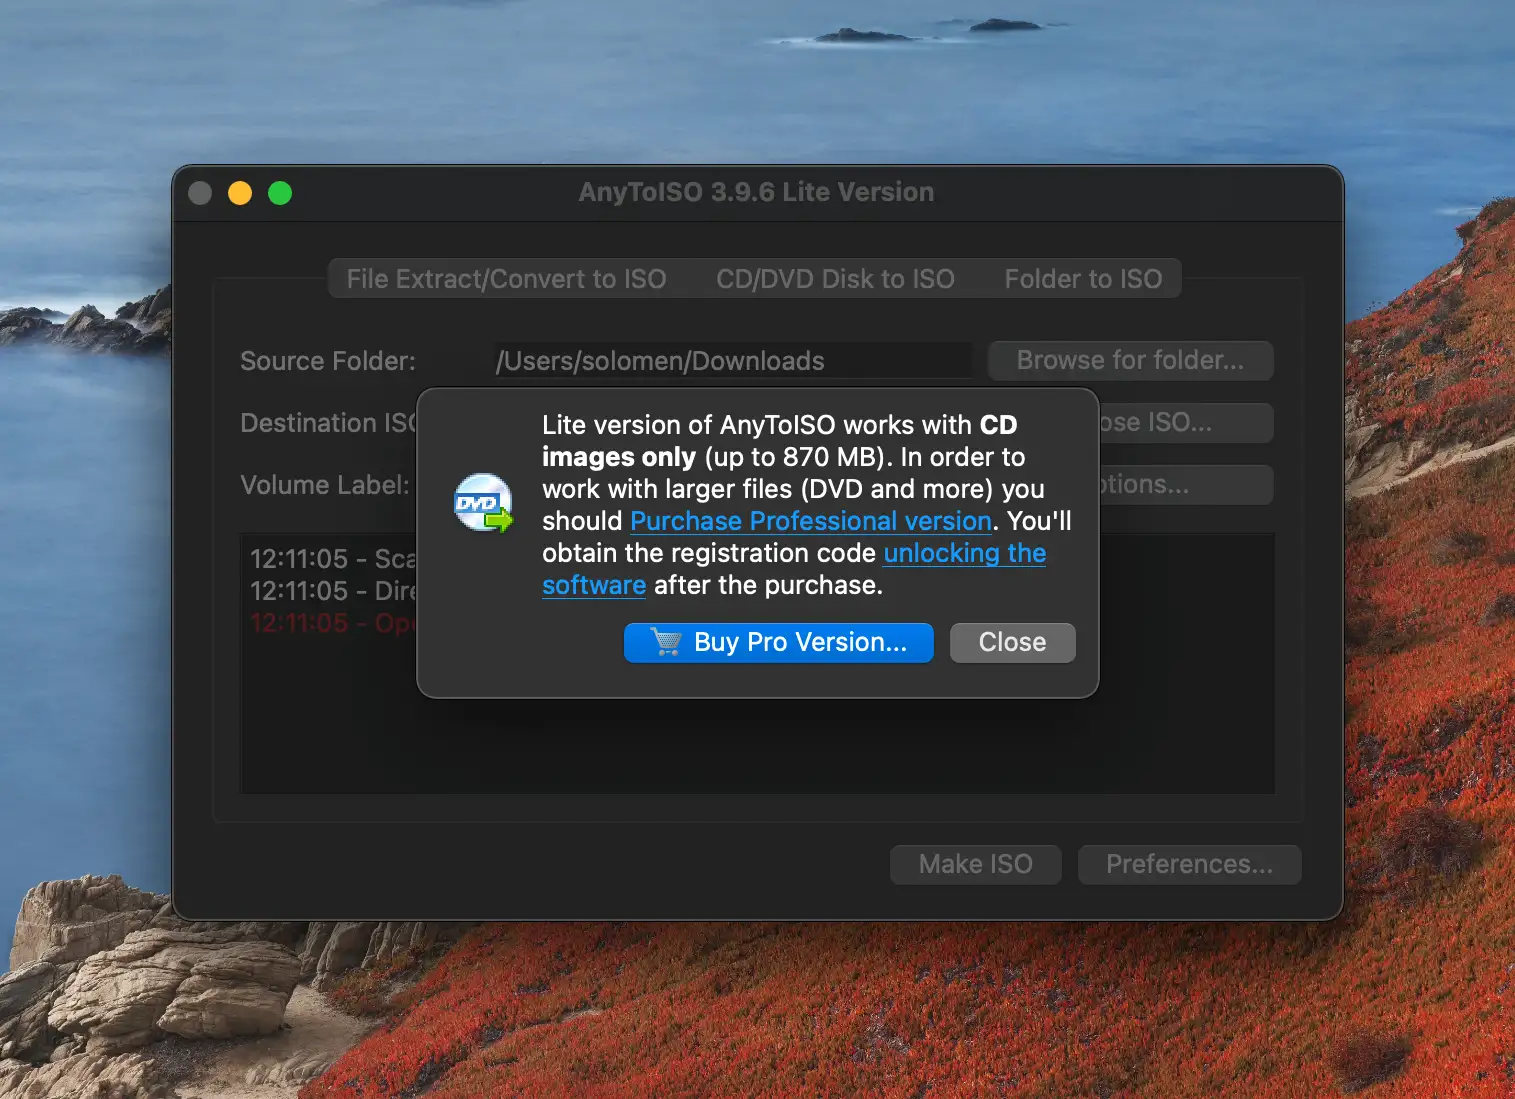
Note:
There are two versions of AnyToISO, Lite and PRO. The free version has some limitations. For example, it can’t create ISO files from a folder more significant than 870MB.
If you want to remove these limitations, buy the PRO version. The PRO version costs ~$23 and can be purchased from the official website.
Wrapping Up
ISO files are handy. They can store backups, create bootable USB drives, and much more. In this article, we showed you how to make an ISO file from a folder on a Mac. Please let us know in the comments below if you have any questions.
Solomen is the founder of MrHow.io, and he is happiest when working with technology and able to help others. In his free time, he often listens to Baroque music, swims or runs. Feel free to contact him on social media!