
macOS provides a method to hide files and folders, similar to other operating systems. However, Apple’s default setting keeps these files and folders hidden to protect them from unauthorized access. This guide will assist you in showing or hiding files or folders on macOS using the Terminal app.
It is compatible with almost all versions of macOS, including Catalina, Mojave, High Sierra, Sierra, El Capitan, and Mavericks, as well as newer versions such as macOS Mojave, Catalina, Big Sur, Monterey, Ventura and Sonoma.
Quick Table
| Terminal | Note | |
| Show Hidden Files and Folders | defaults write com.apple.finder AppleShowAllFiles YES killall Finder | Press Return after each line |
| Hide a File or Folder | defaults write com.apple.finder AppleShowAllFiles NO killall Finder | Press Return after each line |
| Hide Hidden Files and Folders | chflags hidden […] | […] = The path of the file or folder |
| Unhide a File or Folder | chflags nohidden […] | […] = The path of the file or folder |
Show/Hide Hidden Files Mac
macOS Sonoma is the latest operating system, and Apple will release it in the end of this year. It has many new features, including hiding and showing hidden files and folders. Like an older macOS version, you can use the Terminal.
To show hidden files again, use the following command:
defaults write com.apple.Finder AppleShowAllFiles YES
killall Finder
To hide a file or folder, open the Terminal and type the following command:
defaults write com.apple.Finder AppleShowAllFiles NO
killall Finder
This will hide all files that have the “.” character in front of them.
How to Show Hidden Files/Folders
The simplest method of displaying hidden files or folders on macOS involves using the Terminal. Follow the steps below:
Step 1: Open the Terminal
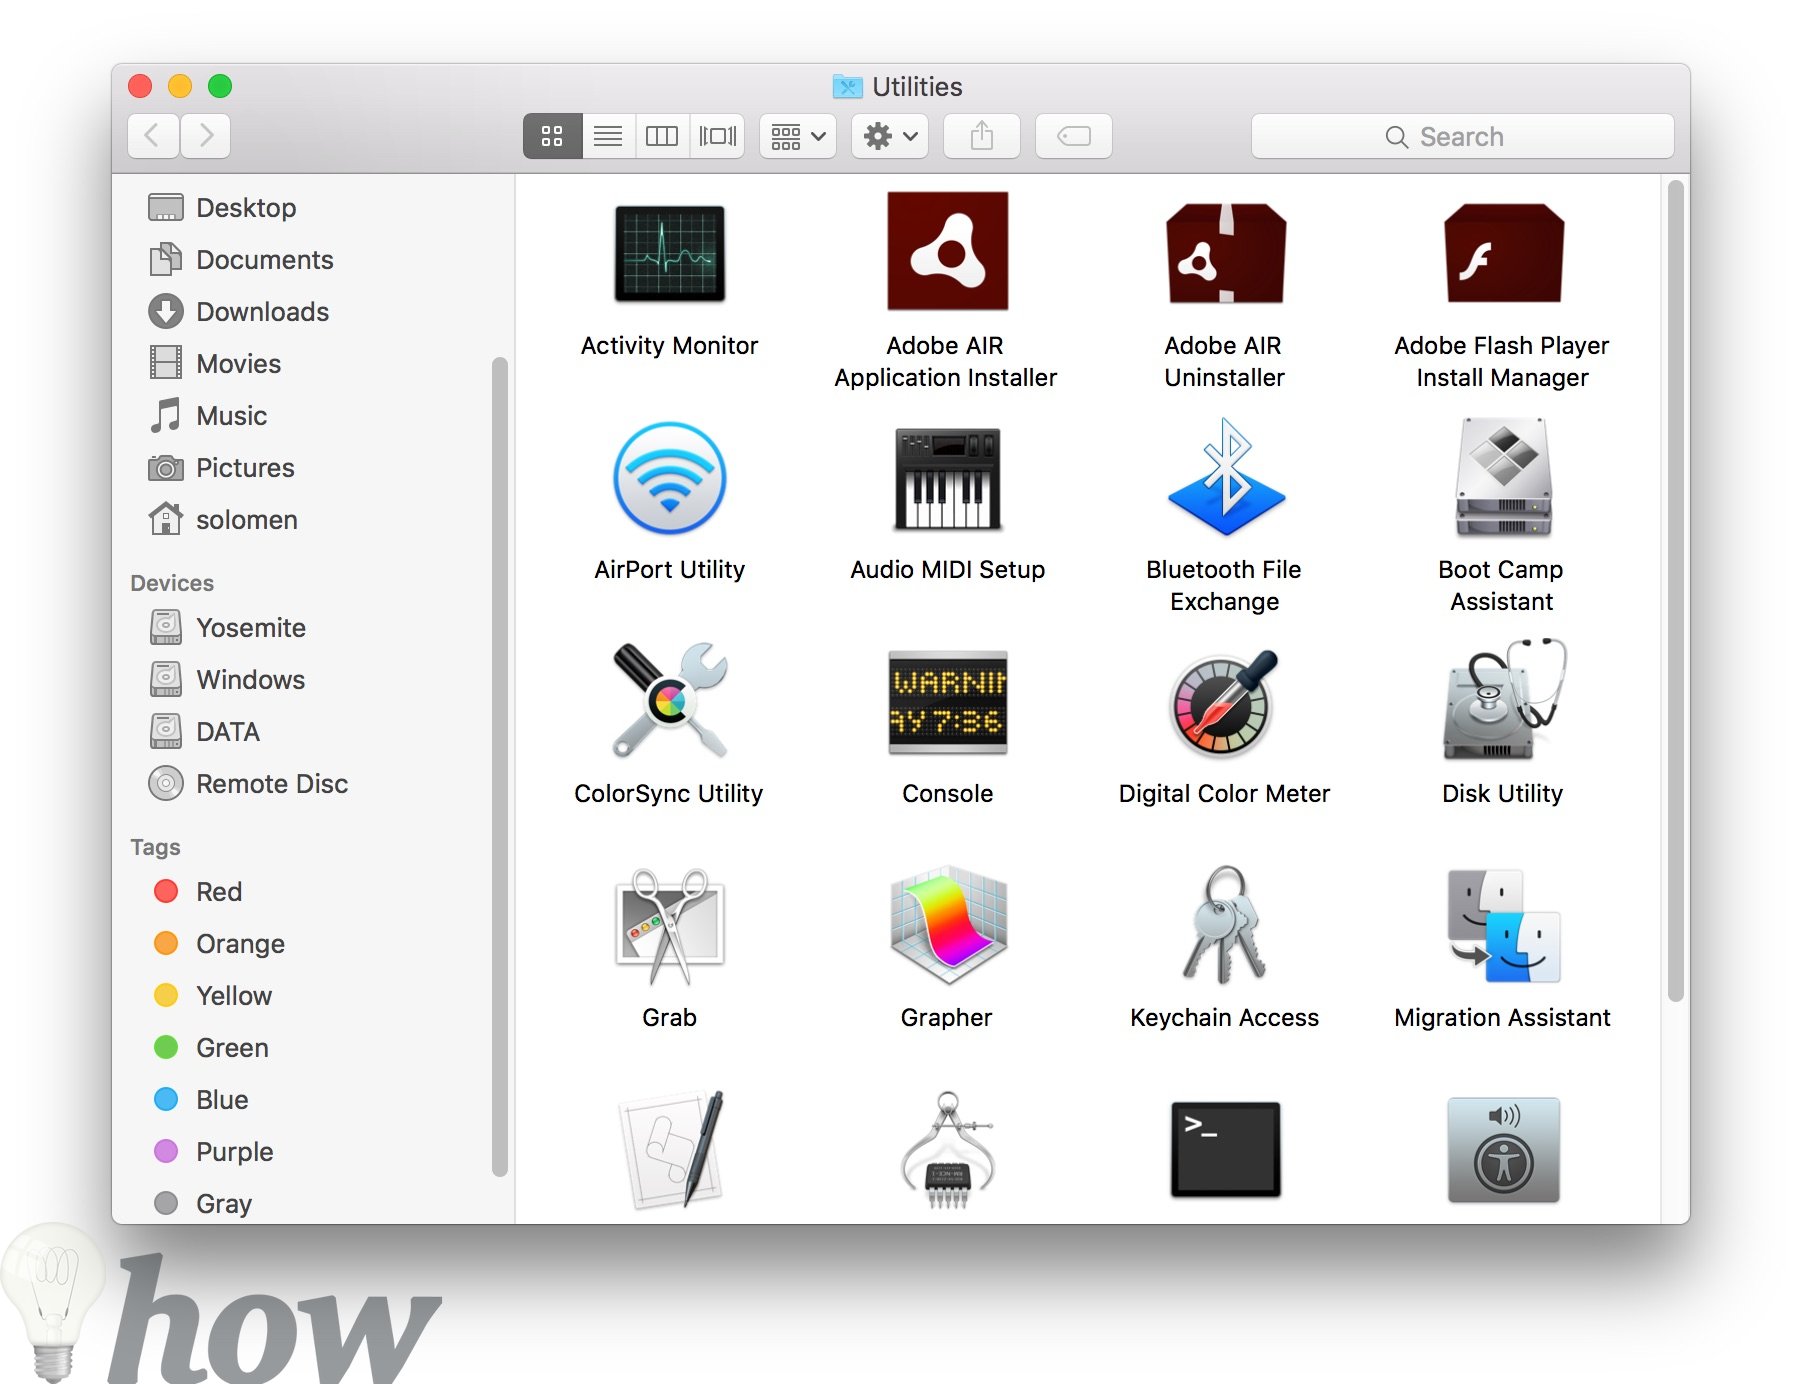
To open Terminal, just go to the Finder and then click Go >> Utilities.
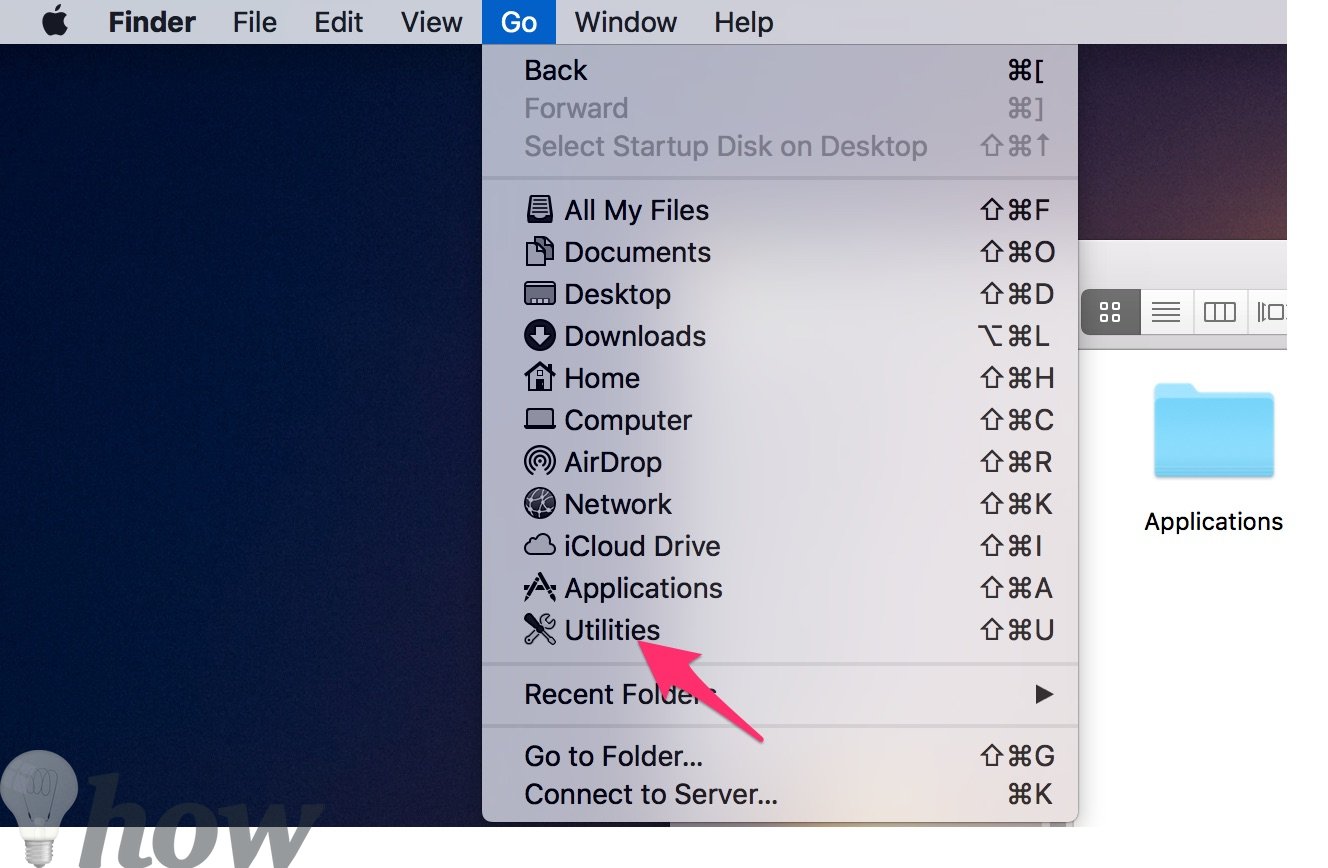
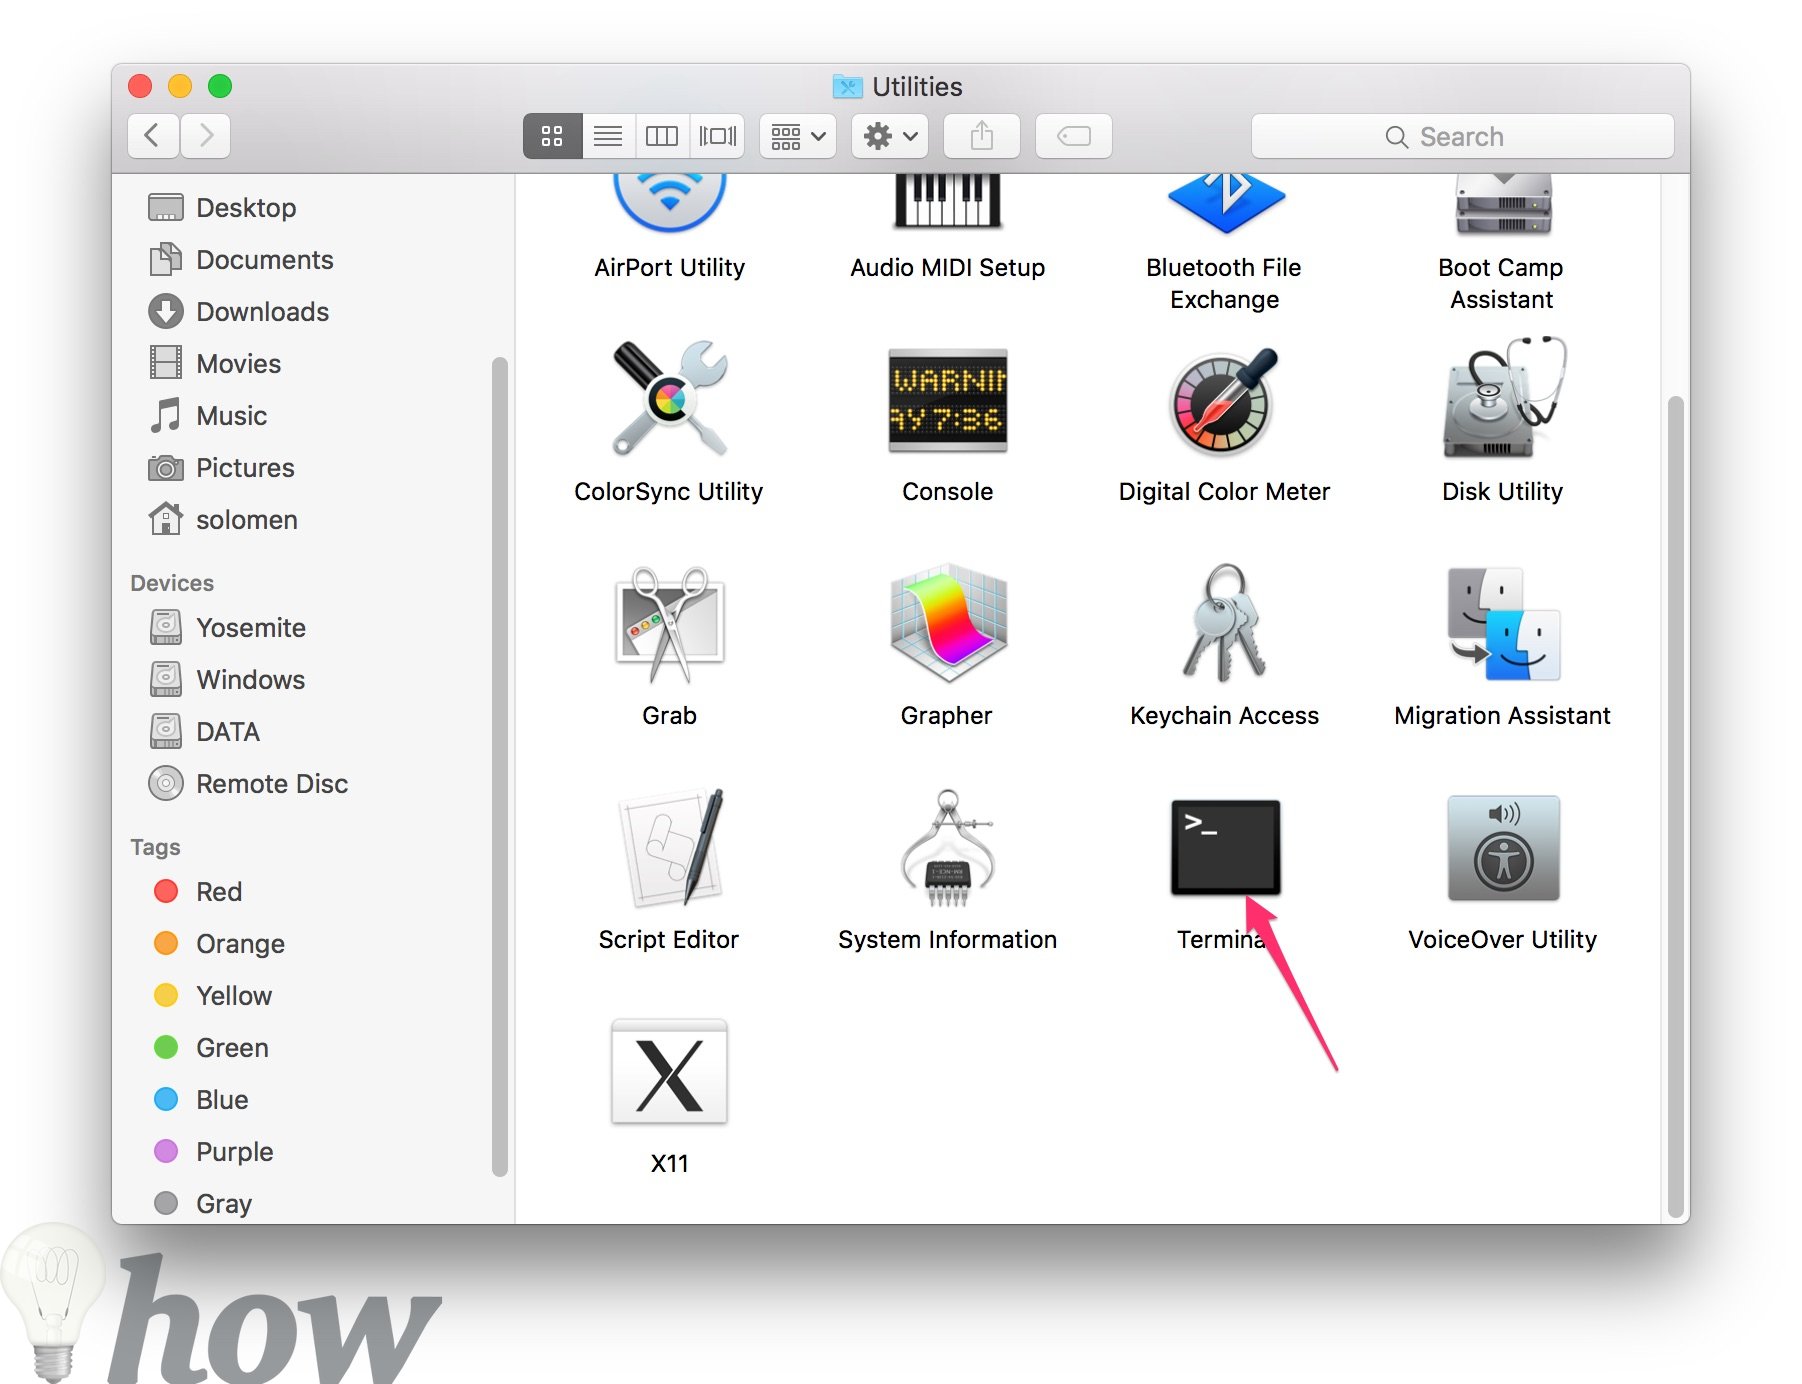
A new window appears, you can see the Terminal app, just double-click on it.
You can also go to LaunchPad >> Find the Others >> Click on Terminal.
Step 2: Use the command lines
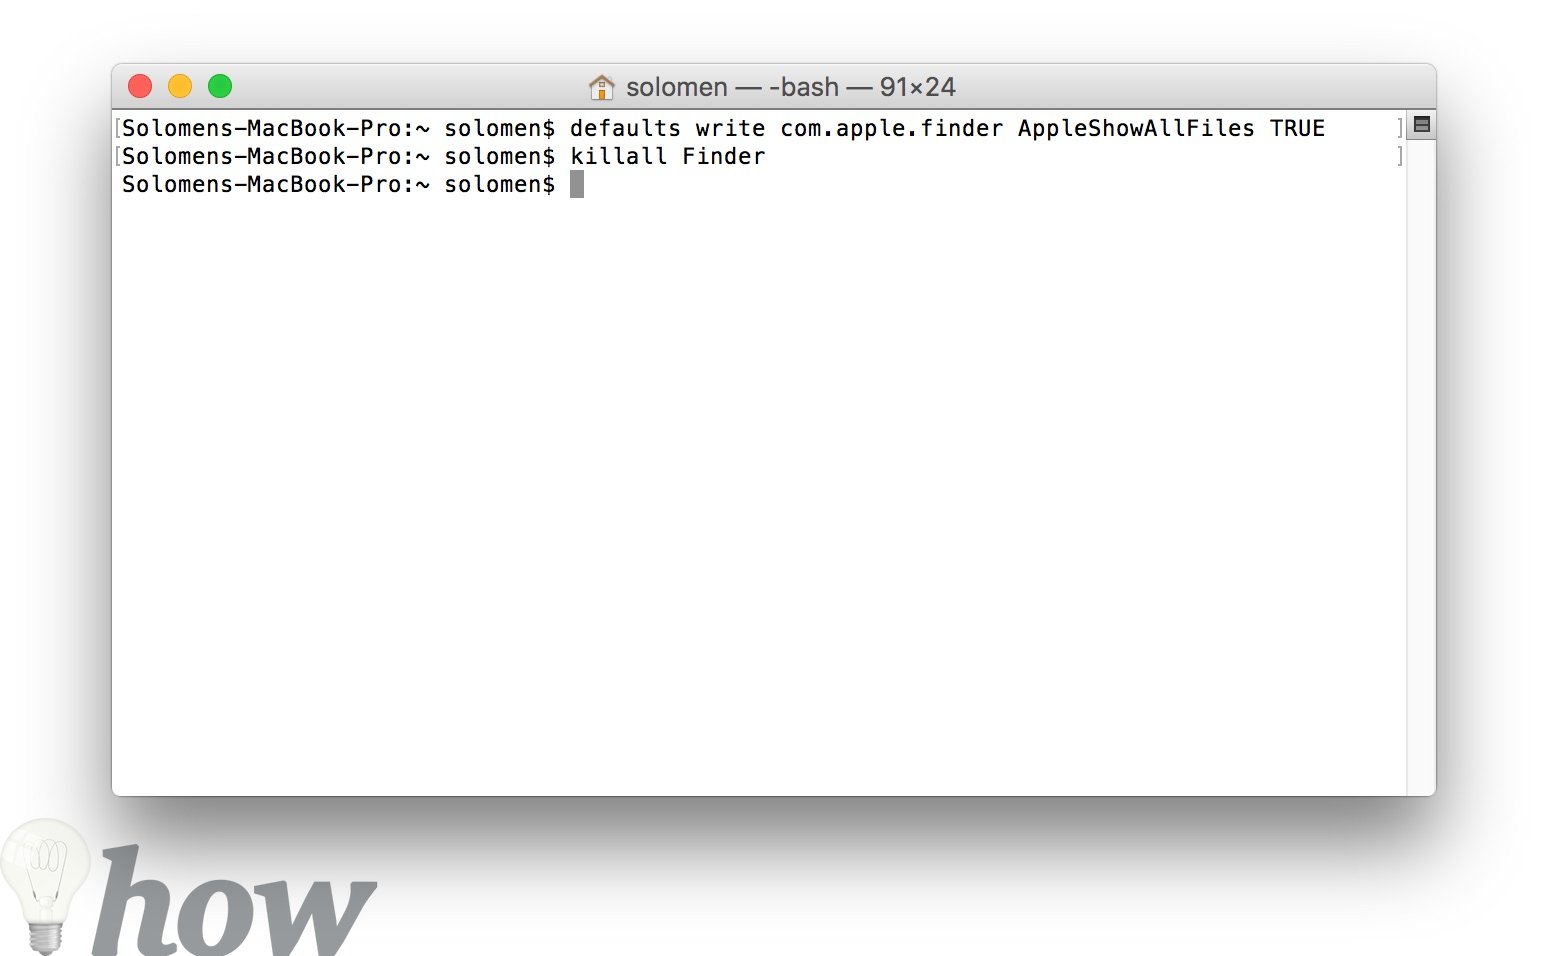
Now, you can copy and paste the two lines listed here into Terminal, and hit Return after each line:
defaults write com.apple.finder AppleShowAllFiles TRUE

killall Finder
or
defaults write com.apple.finder AppleShowAllFiles YES

killall Finder
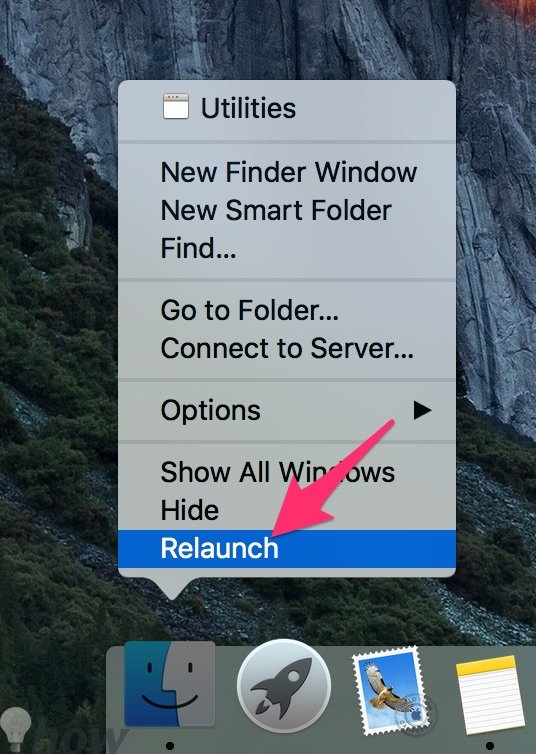
If the last line doesn’t work, you need to relaunch the Finder. To do this, press and hold Option + Control and click on the Finder icon in the Dock. Then, click on Relaunch.
Now go to the Finder by clicking on its icon in the Dock. You are going to view the hidden files. It’s like the image below:

Step 3: Exit the Terminal program
Select the Quit Terminal option from the Menu or press Command + Q.
How to Hide Hidden Files/Folders
Step 1: Open the Terminal
Step 2: If you want to hide hidden files and folders, you can simply use the following command:
defaults write com.apple.finder AppleShowAllFiles NO
killall Finder
or
defaults write com.apple.finder AppleShowAllFiles FALSE
killall Finder
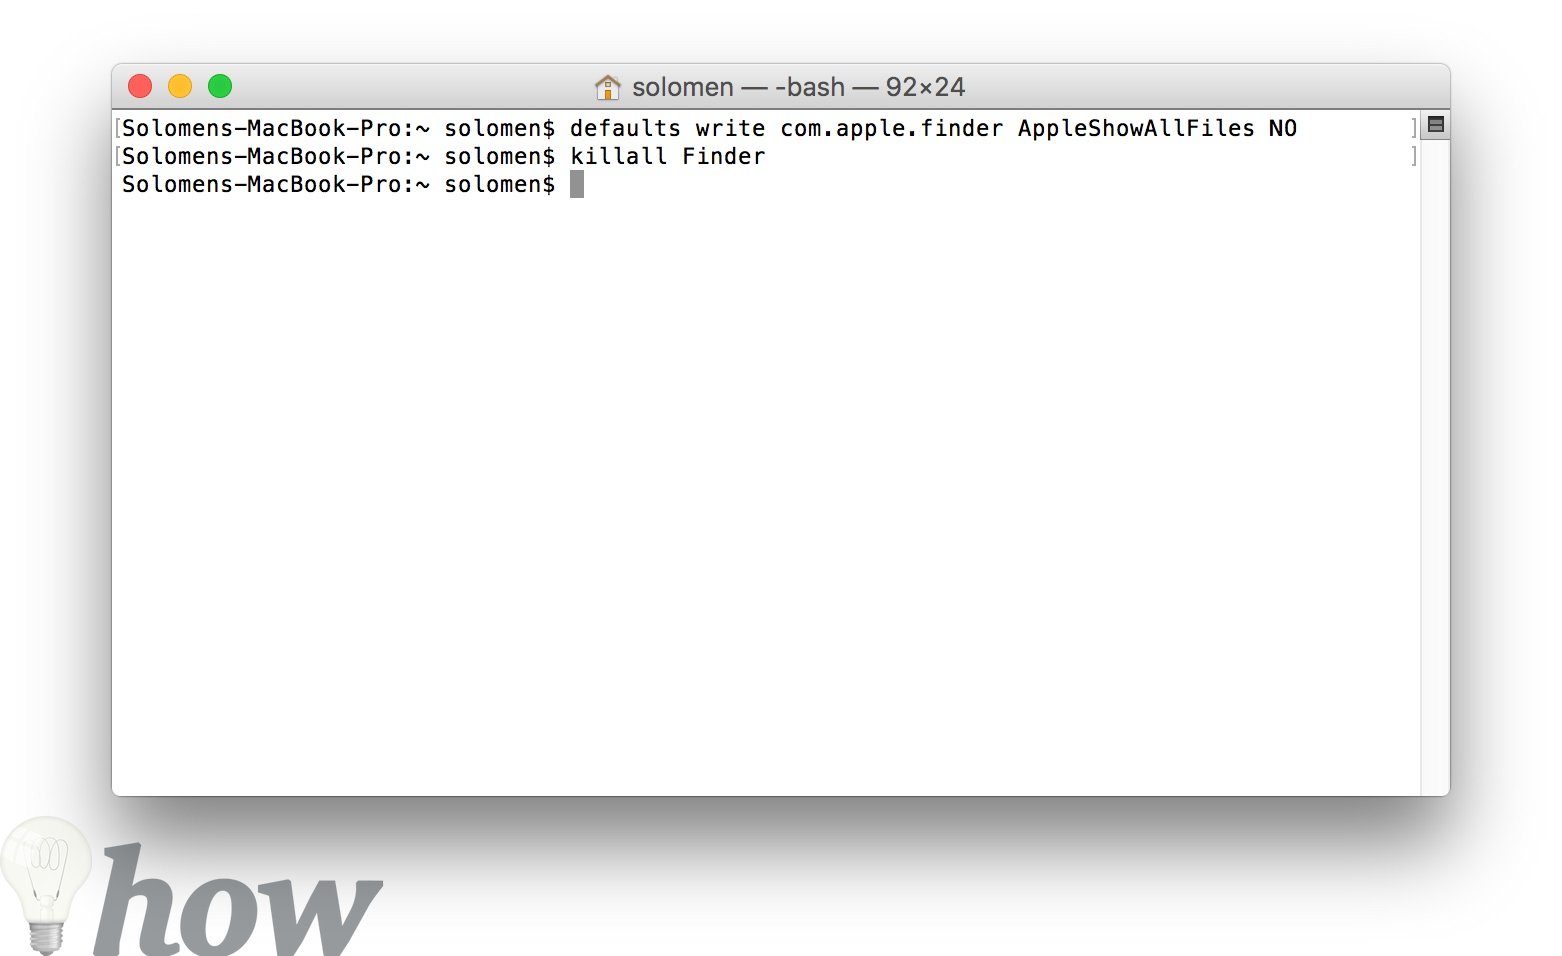
The result.
How to Manage an Individual Hidden File/Folder
Hiding a File or Folder
The simplest method to multiple hidden files that change a unique attribute on the file known as a Finder flag is to use the “chflags” command line in the Terminal.
Just open the Terminal and type the following command line:
chflags hidden
Make sure to type a space after “hidden”.
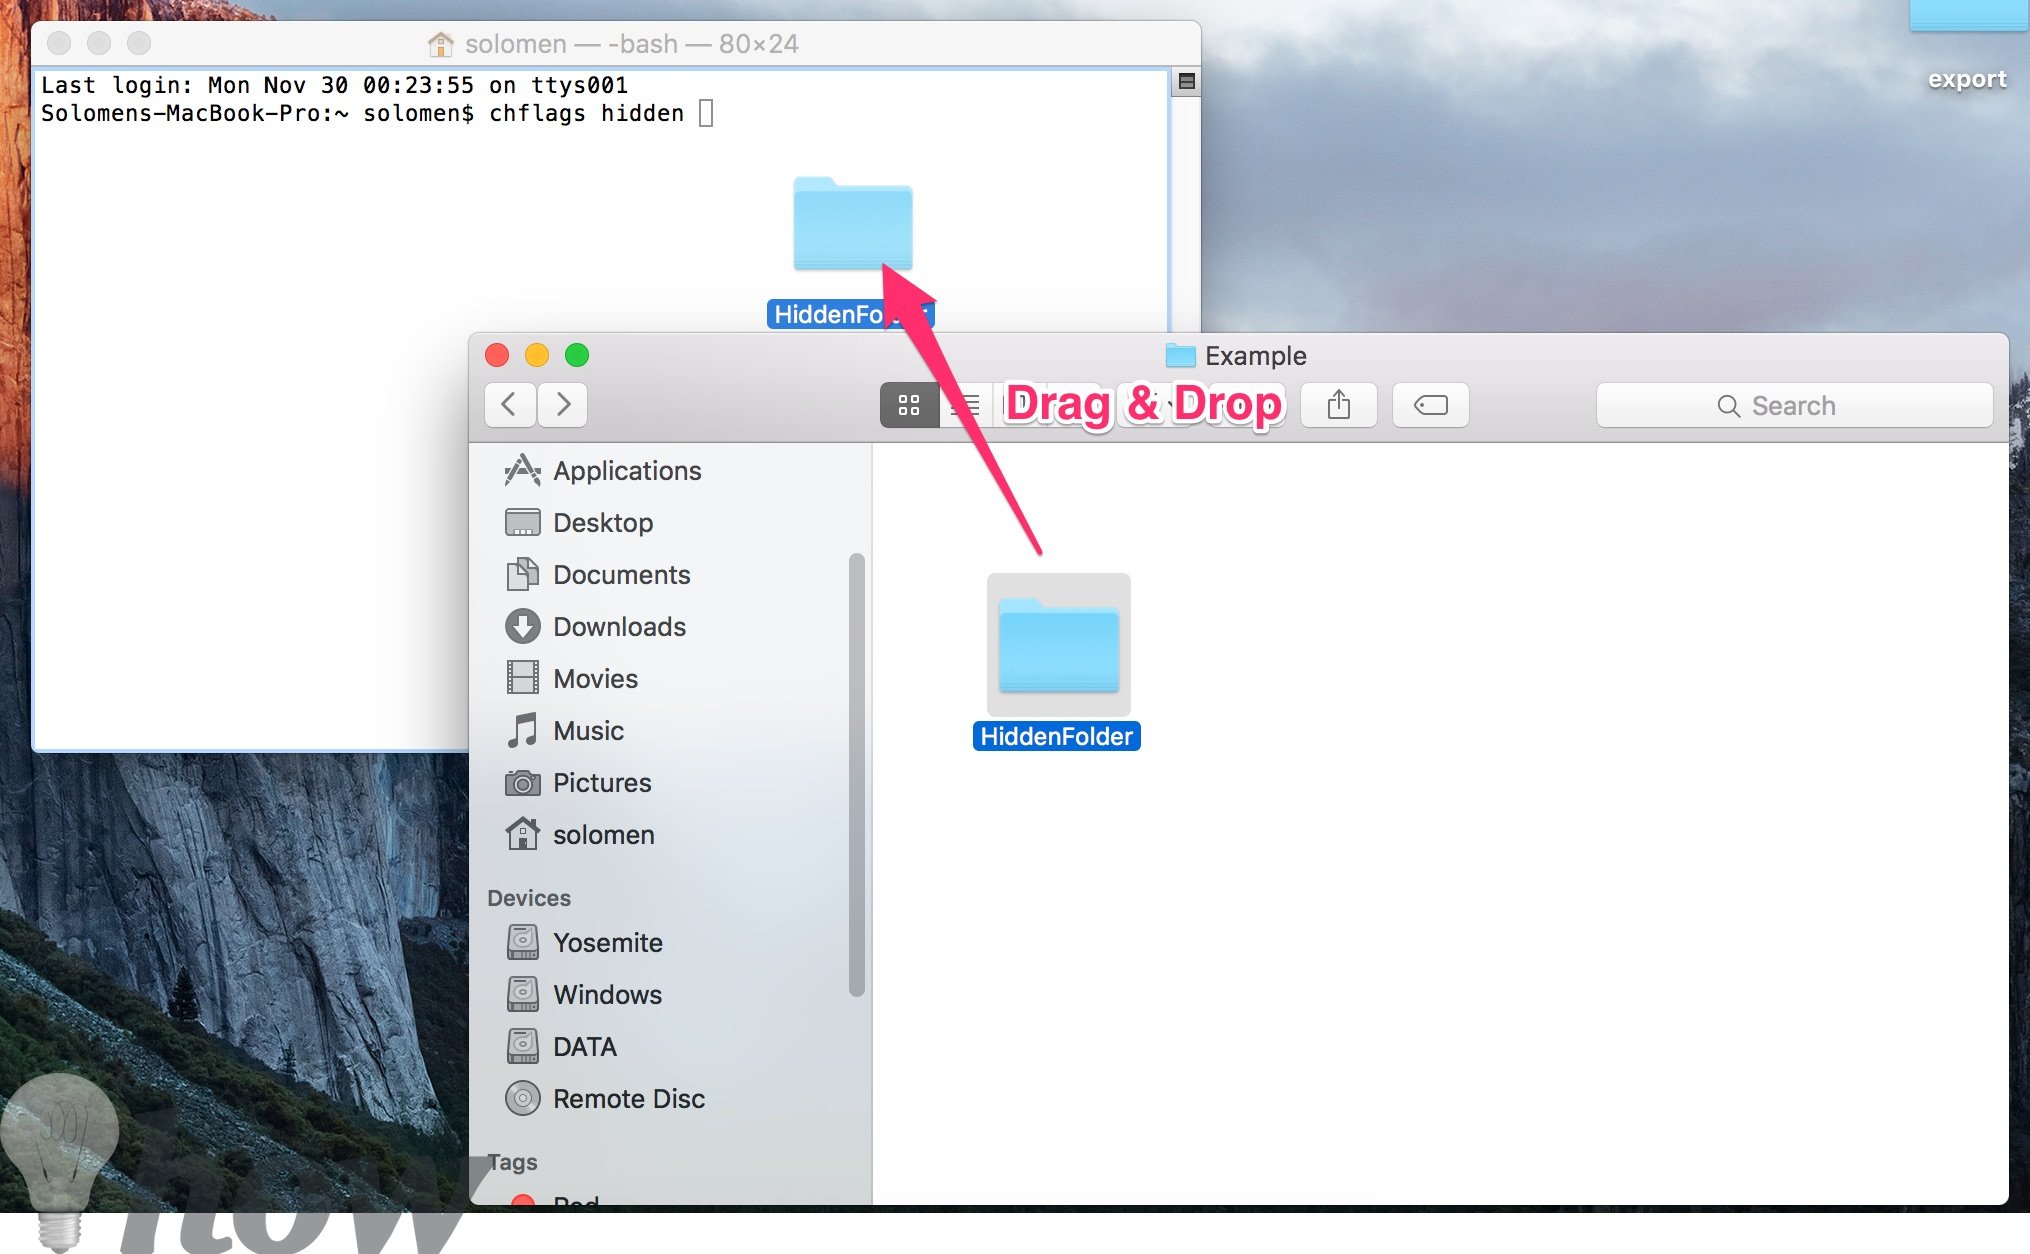
Then drag the wanted file or folder to the Terminal window. Hit Return to run the command.
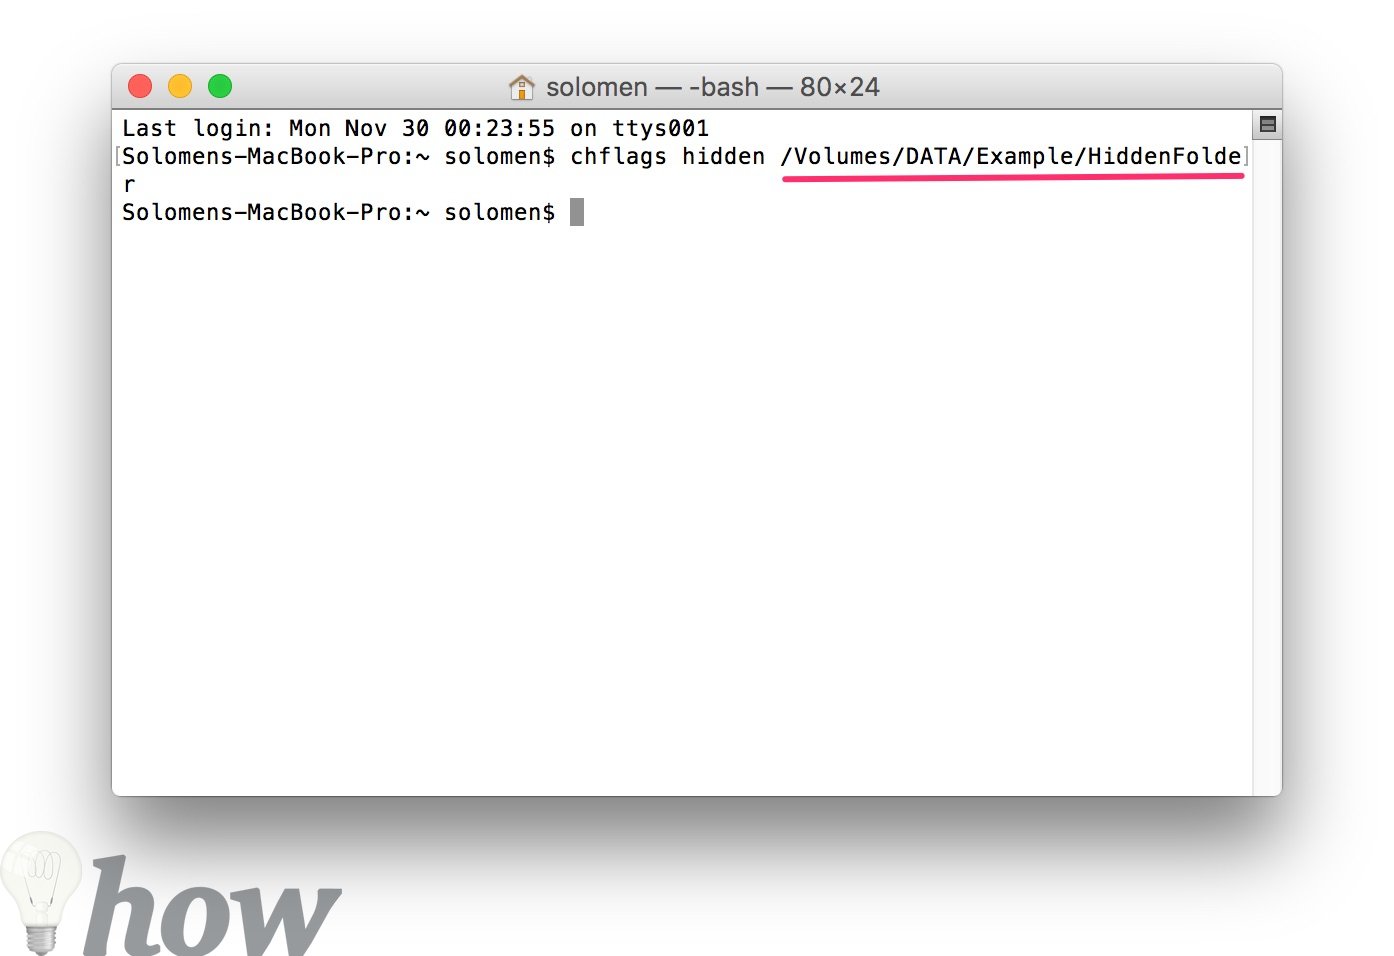
This is going to set the file as hidden.
Opening a Hidden File or Folder
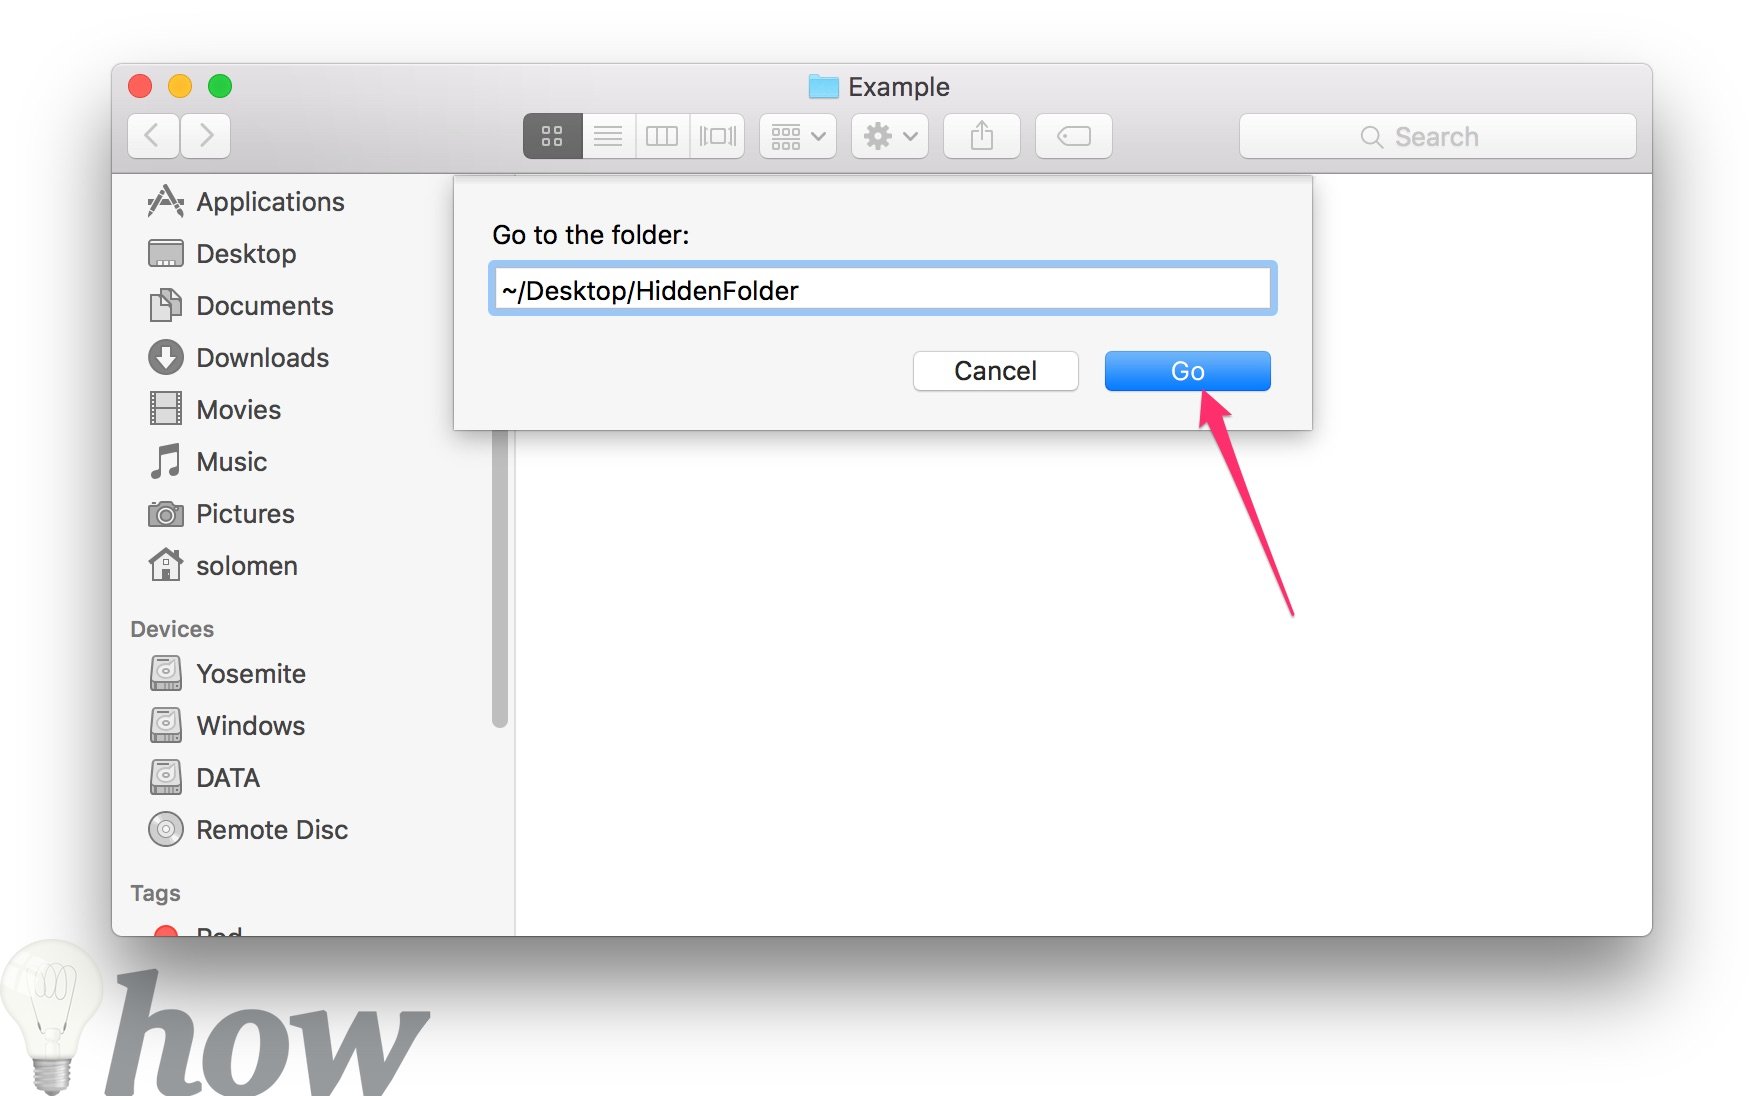
To access the hidden file from the Finder, you can click on the Go menu in the Finder and select Go to Folder.
Put the file’s path into the dialog box and click Go or press Enter. The ~ means your user directory, so if you’ve already had a directory named HiddenFolder on your Documents, you enter:
~/Desktop/HiddenFolder
Open the folder that was hidden recently from your Desktop.
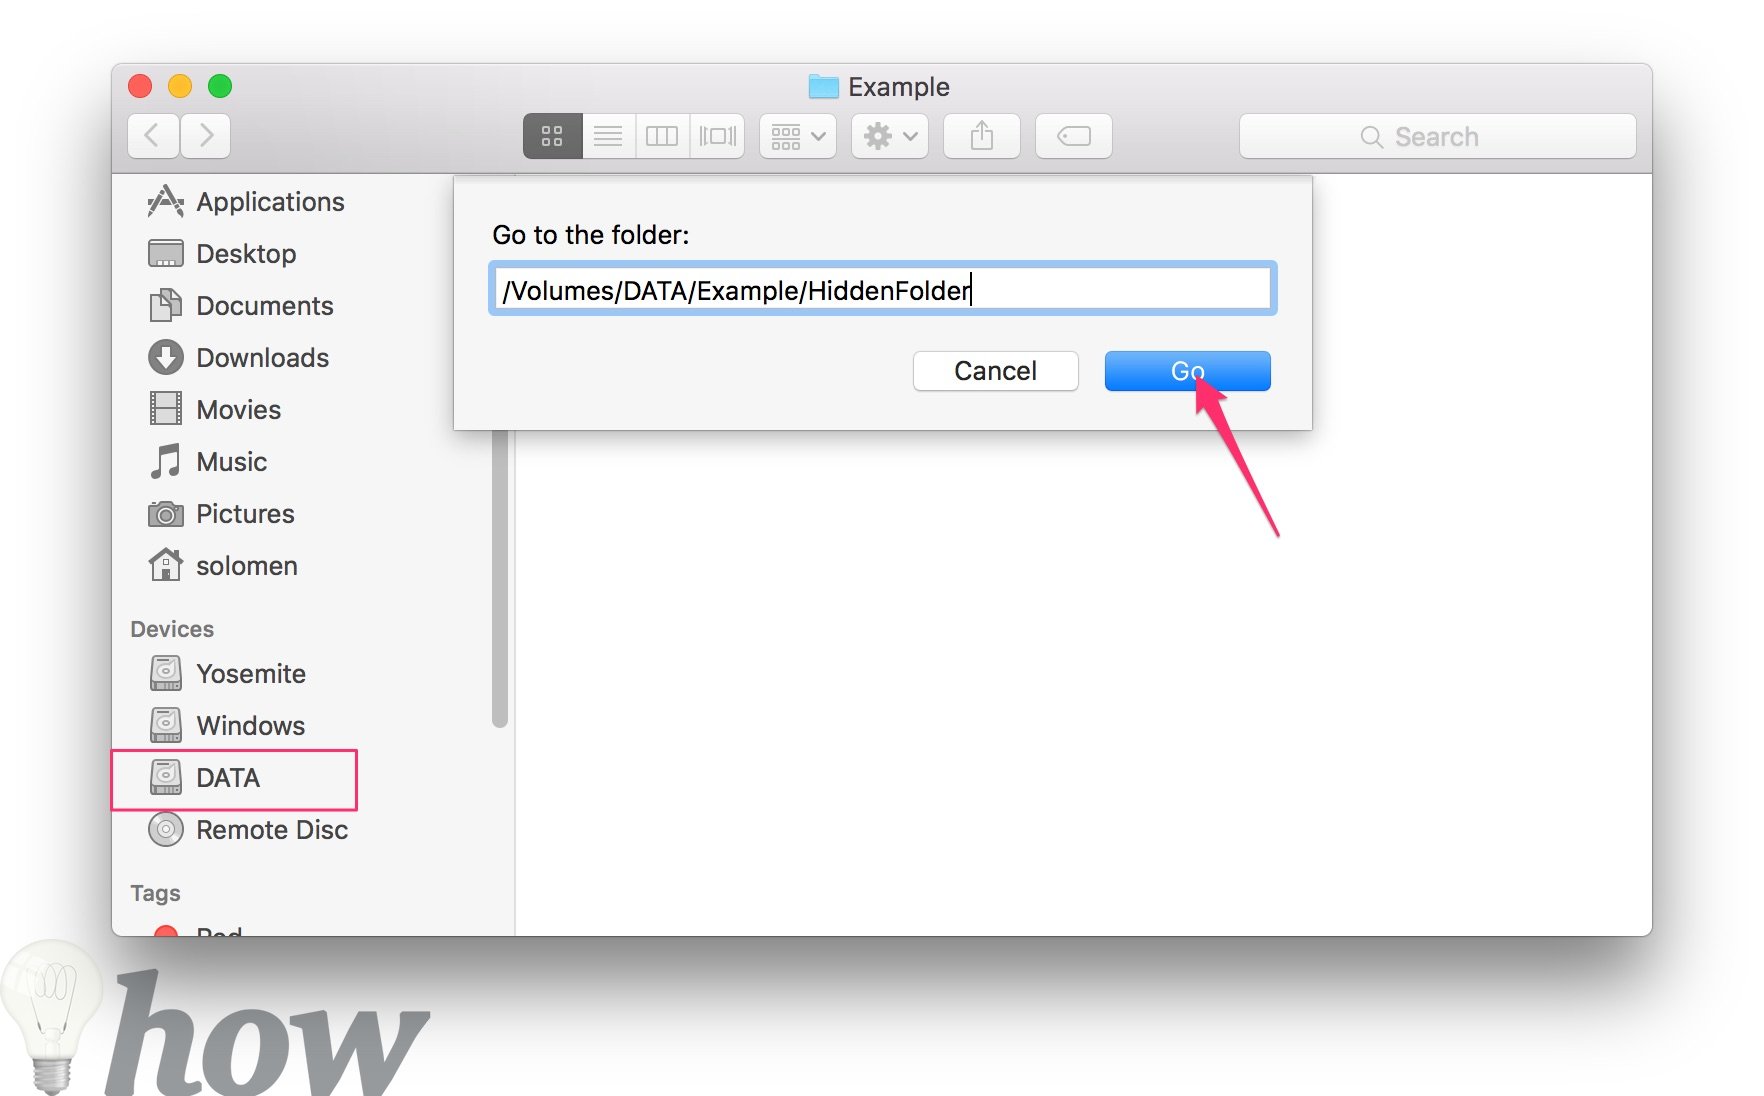
Open the folder which was hidden recently from your Disk.
More:
If you need help with the folder or file’s path, you can open the Terminal and drag the folder into it. Then, you can see the path immediately.
Unhiding a File or Folder
To unhide a file or folder, copy and paste the following command into the Terminal, including a space at the end.
chflags nohidden
If you remember the correct folder or file path, you can type it inside the Terminal. If unsure, use the above tip to show hidden files and folders in the Finder and then drag the hidden file or folder into the Terminal.
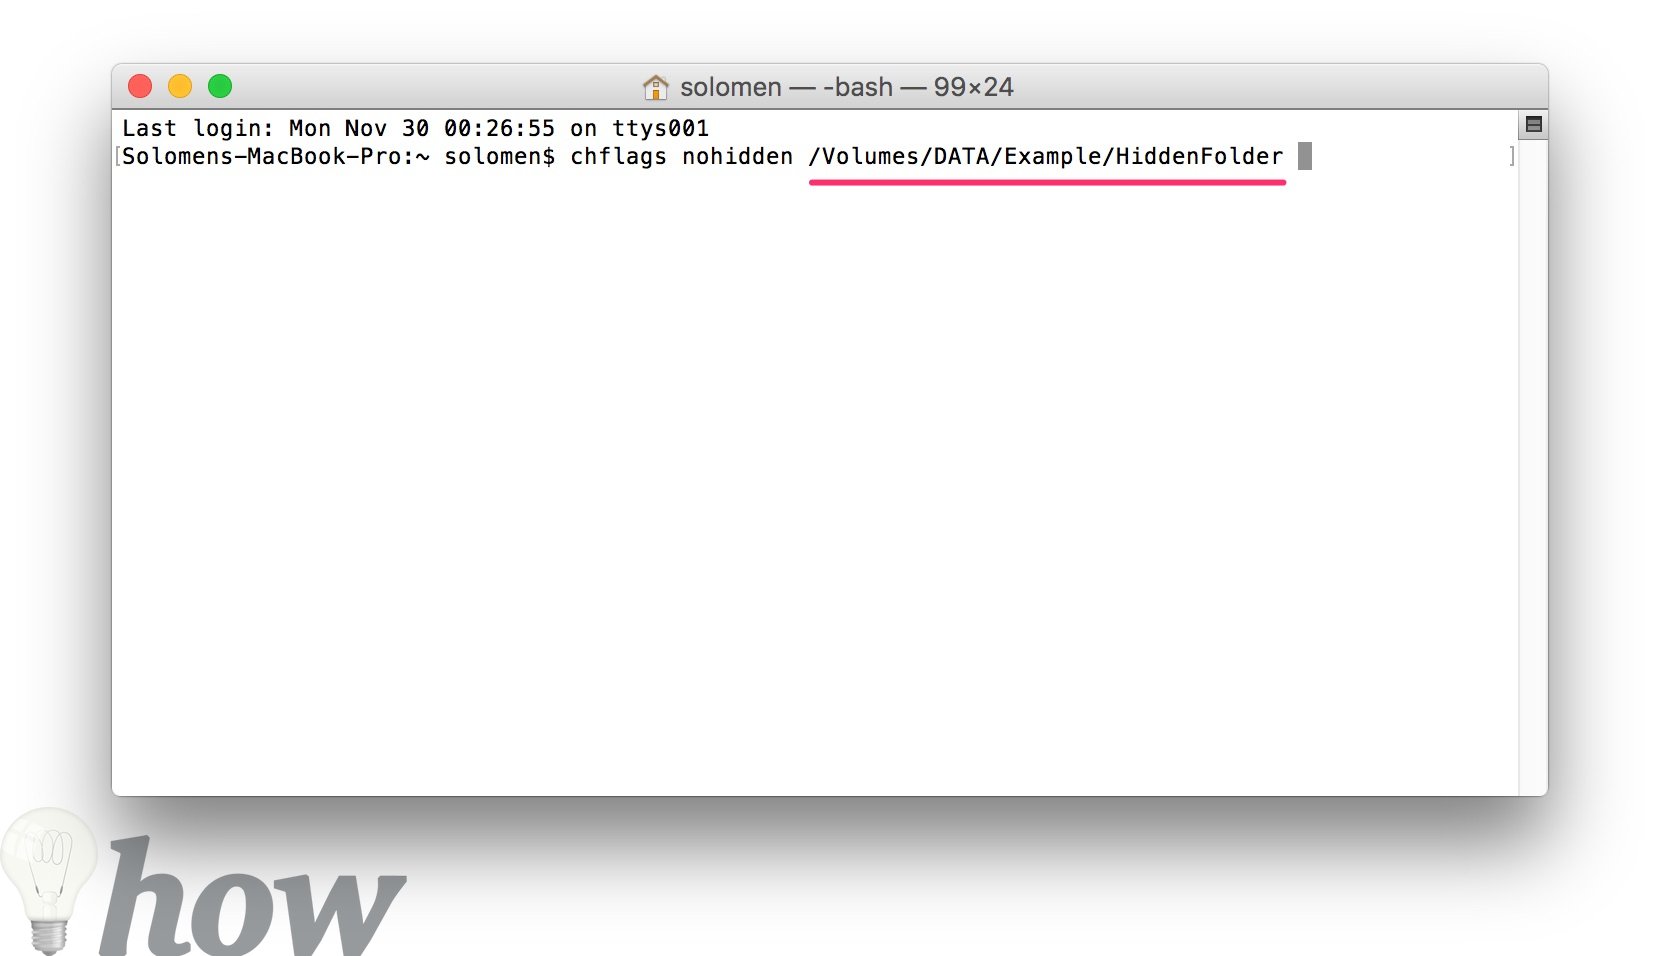
Hit Enter later, and the file or folder will become unhidden so you can open it normally.
More:
You can press the Up or Down arrow button from your keyboard to see the command line which you’ve used.
How To Hide/Show Hidden Files Using Funter
Some apps allow you to use a hotkey for hiding or showing hidden files and folders on Mac, but we highly recommend Funter, a free application to operate hidden files and folders.
This app integrates with your Finder and adds its Command to the context menu, so you can easily change file hidden attributes just from Finder with two steps.
Conclusion
This article shows you how to hide and display hidden files and folders on your Mac computer. We have also explained the various methods you can use to reveal these files, depending on your requirements. Please let us know in the comments section below if you have any questions or need assistance with this process.
Read more:
- Ctrl Alt Delete Alternatives
- How To Set Up Dual Monitors on M1 Macs
- How To Reset NVRAM/PRAM and SMC on a Mac
Tech Savvy, Avid Reader, Phamacist by Profession and a Passionate Writer who loves to help people by his writing guides and tutorials. Need help on Computer or Smartphone, Shoot a question on twitter: @tayyabsa and don't forget to follow me!