
Do you need help running File Explorer as an administrator? You aren’t alone—many people who use Windows 10/11 need help to run this program with elevated permissions. Fortunately, there is a quick and easy way to do the job without hassle!
There are two simple ways to access File Explorer with administrator privilege. The most straightforward methods are below.
How to Run File Explorer as an Administrator With a Right-click
Running File Explorer with administrator privileges on Windows 10 or Windows 11 is quite simple.
Open the File Explorer window by simultaneously holding down the Windows logo + E keys and go to the path below. You can also copy and paste it on the address bar.
C:\Windows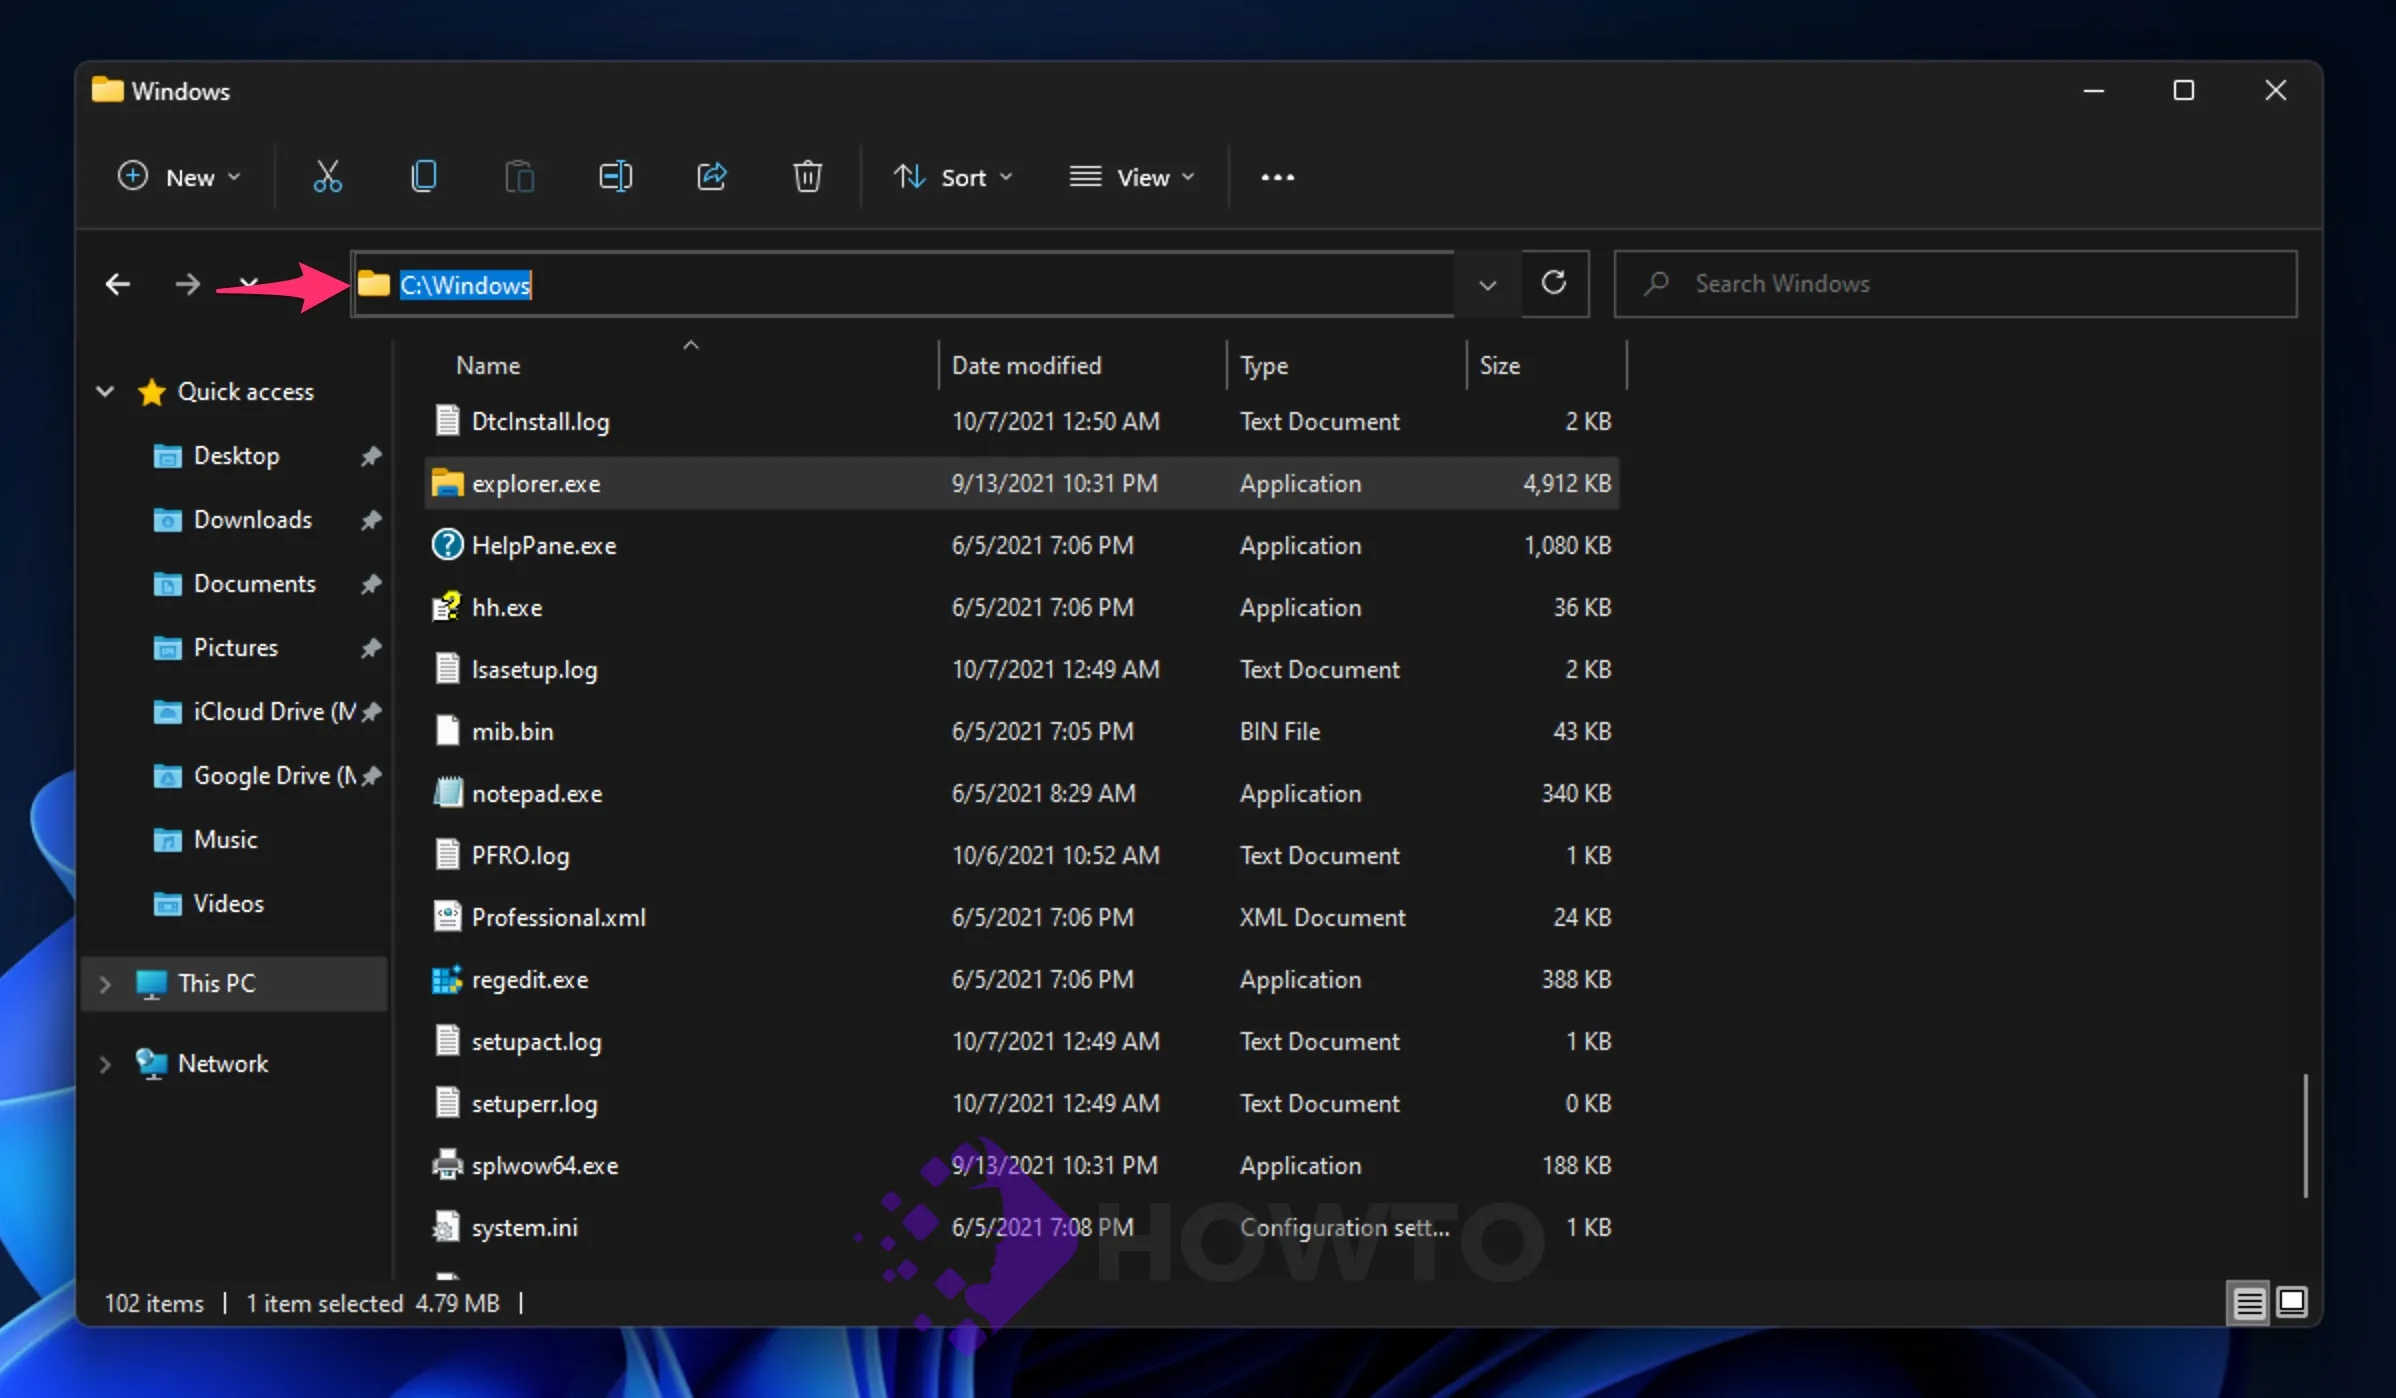
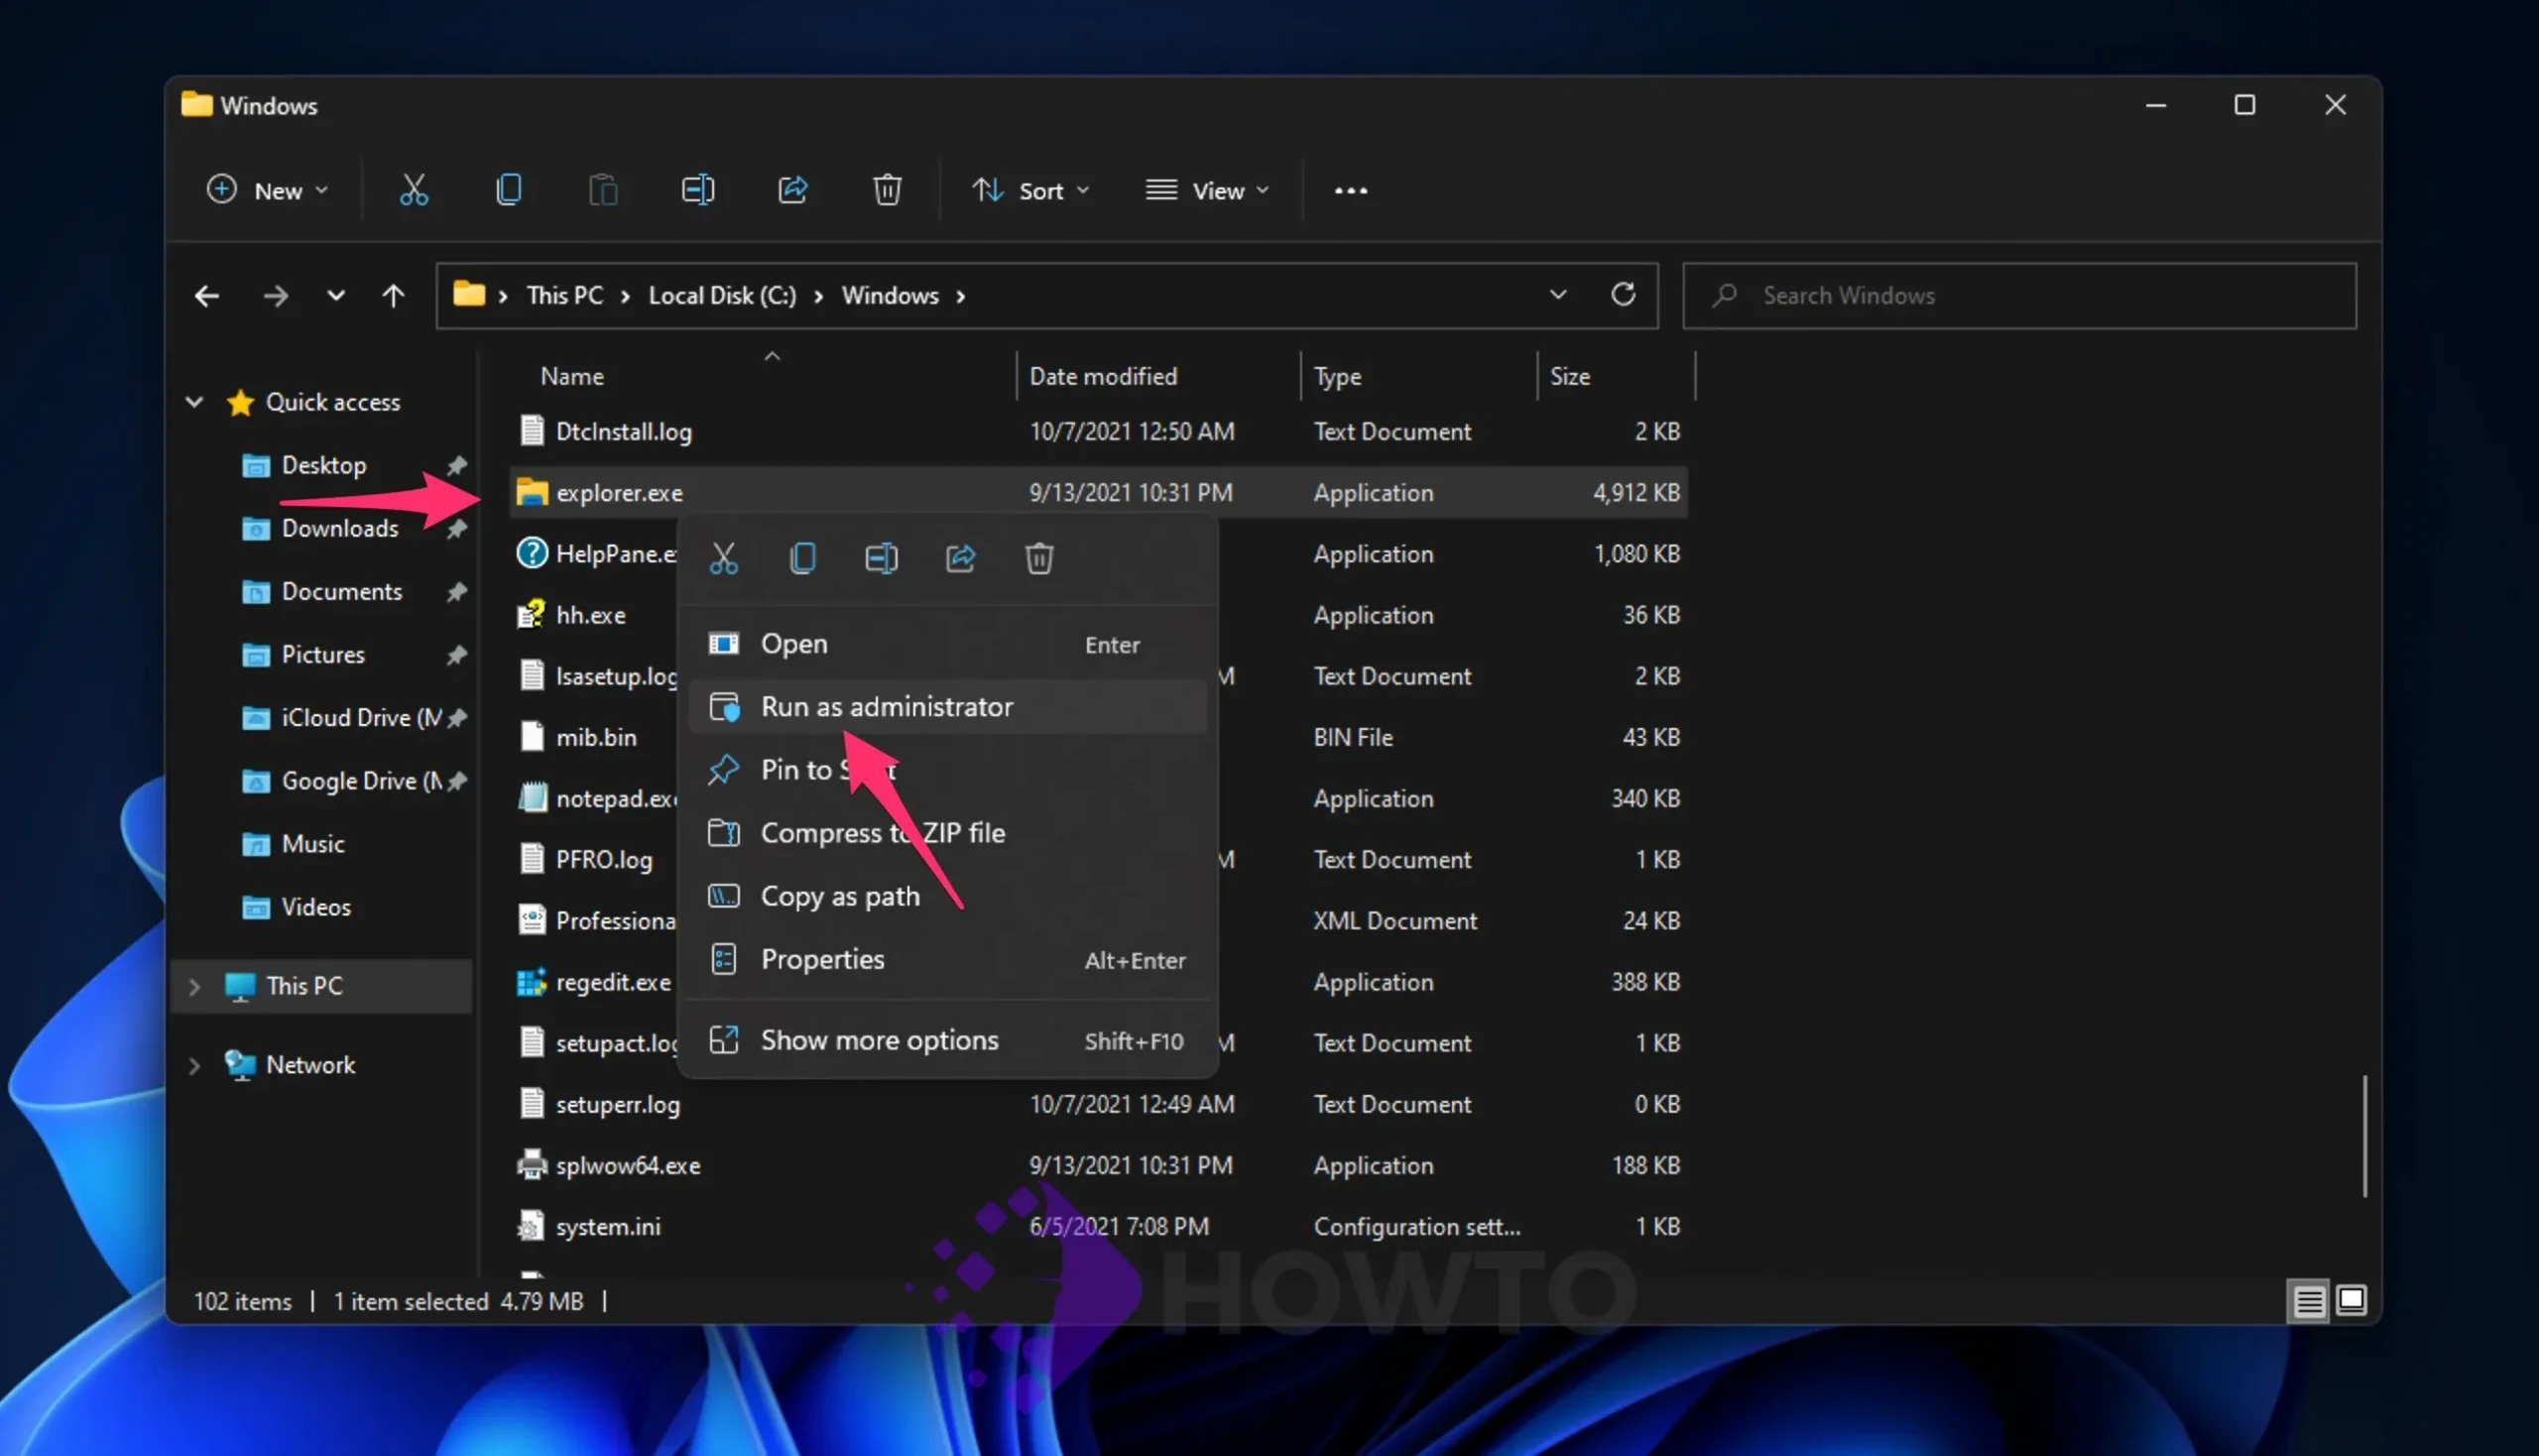
In the Windows folder, find explorer.exe and right-click it. Click Run as administrator from the context menu to launch File Explorer with elevated privileges.
How to Run File Explorer as an Administrator With Task Manager
Task Manager is a program with Windows 8.1, 10, and 11, allowing you to access the applications running on your computer anytime. It can be opened by pressing CTRL + Shift + Escape simultaneously.
We can also view how much CPU or memory power an app uses, which you can sort in ascending or descending order to find what apps are wasting resources, like RAM/CPU usage. Using Task Manager on Windows, you can run File Explorer with administrator privileges.
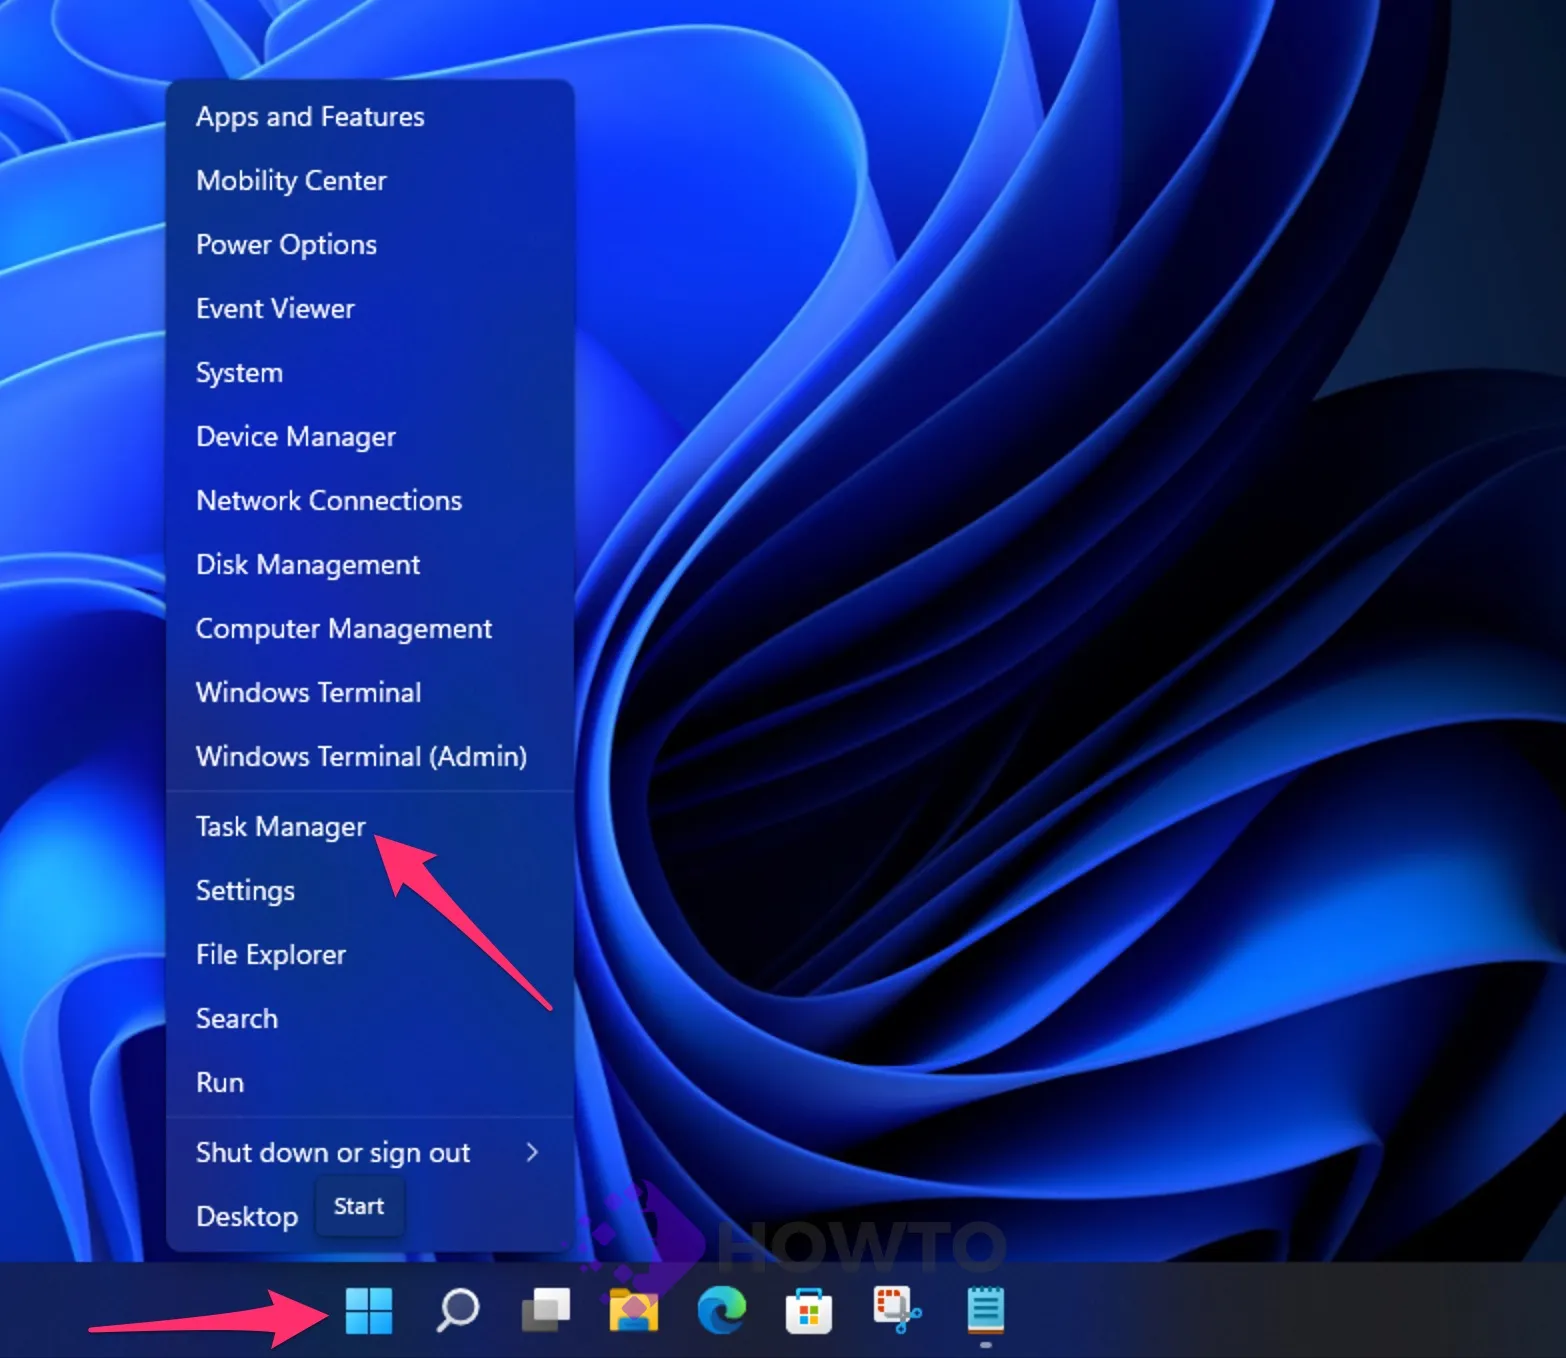
Step 1. On the Windows 10 Taskbar, right-click into the free space and select the Task Manager option. Right-click on the Start button and select Task Manager on Windows 11.
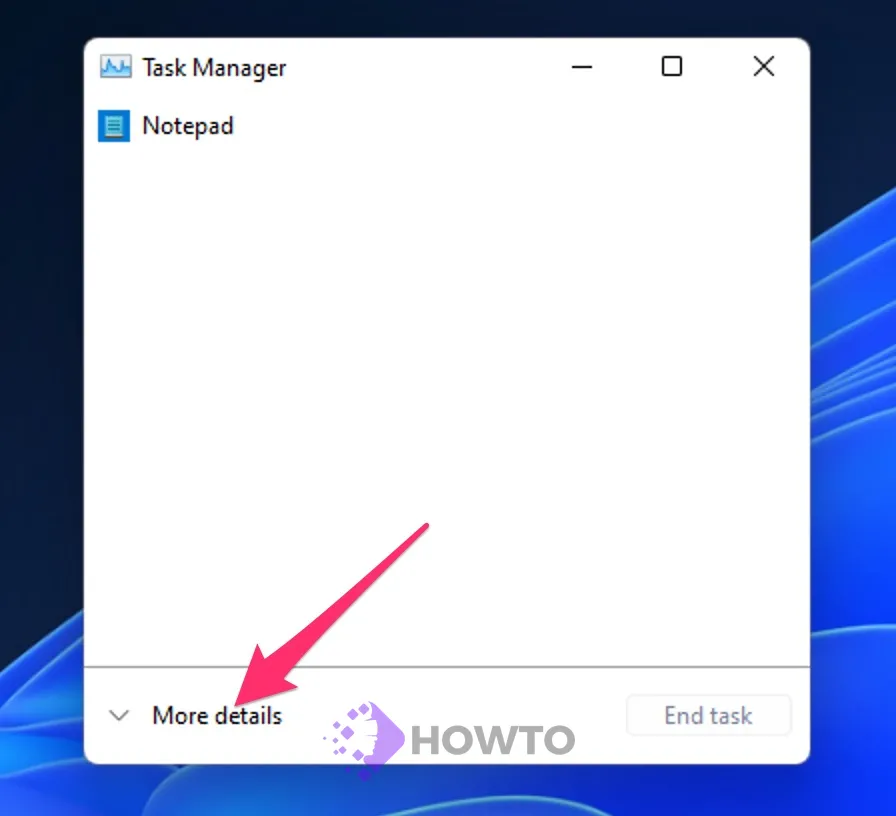
Step 2. To view the complete information in the Task Manager, click More Details on the left-bottom corner of the window to open it in full-screen mode.
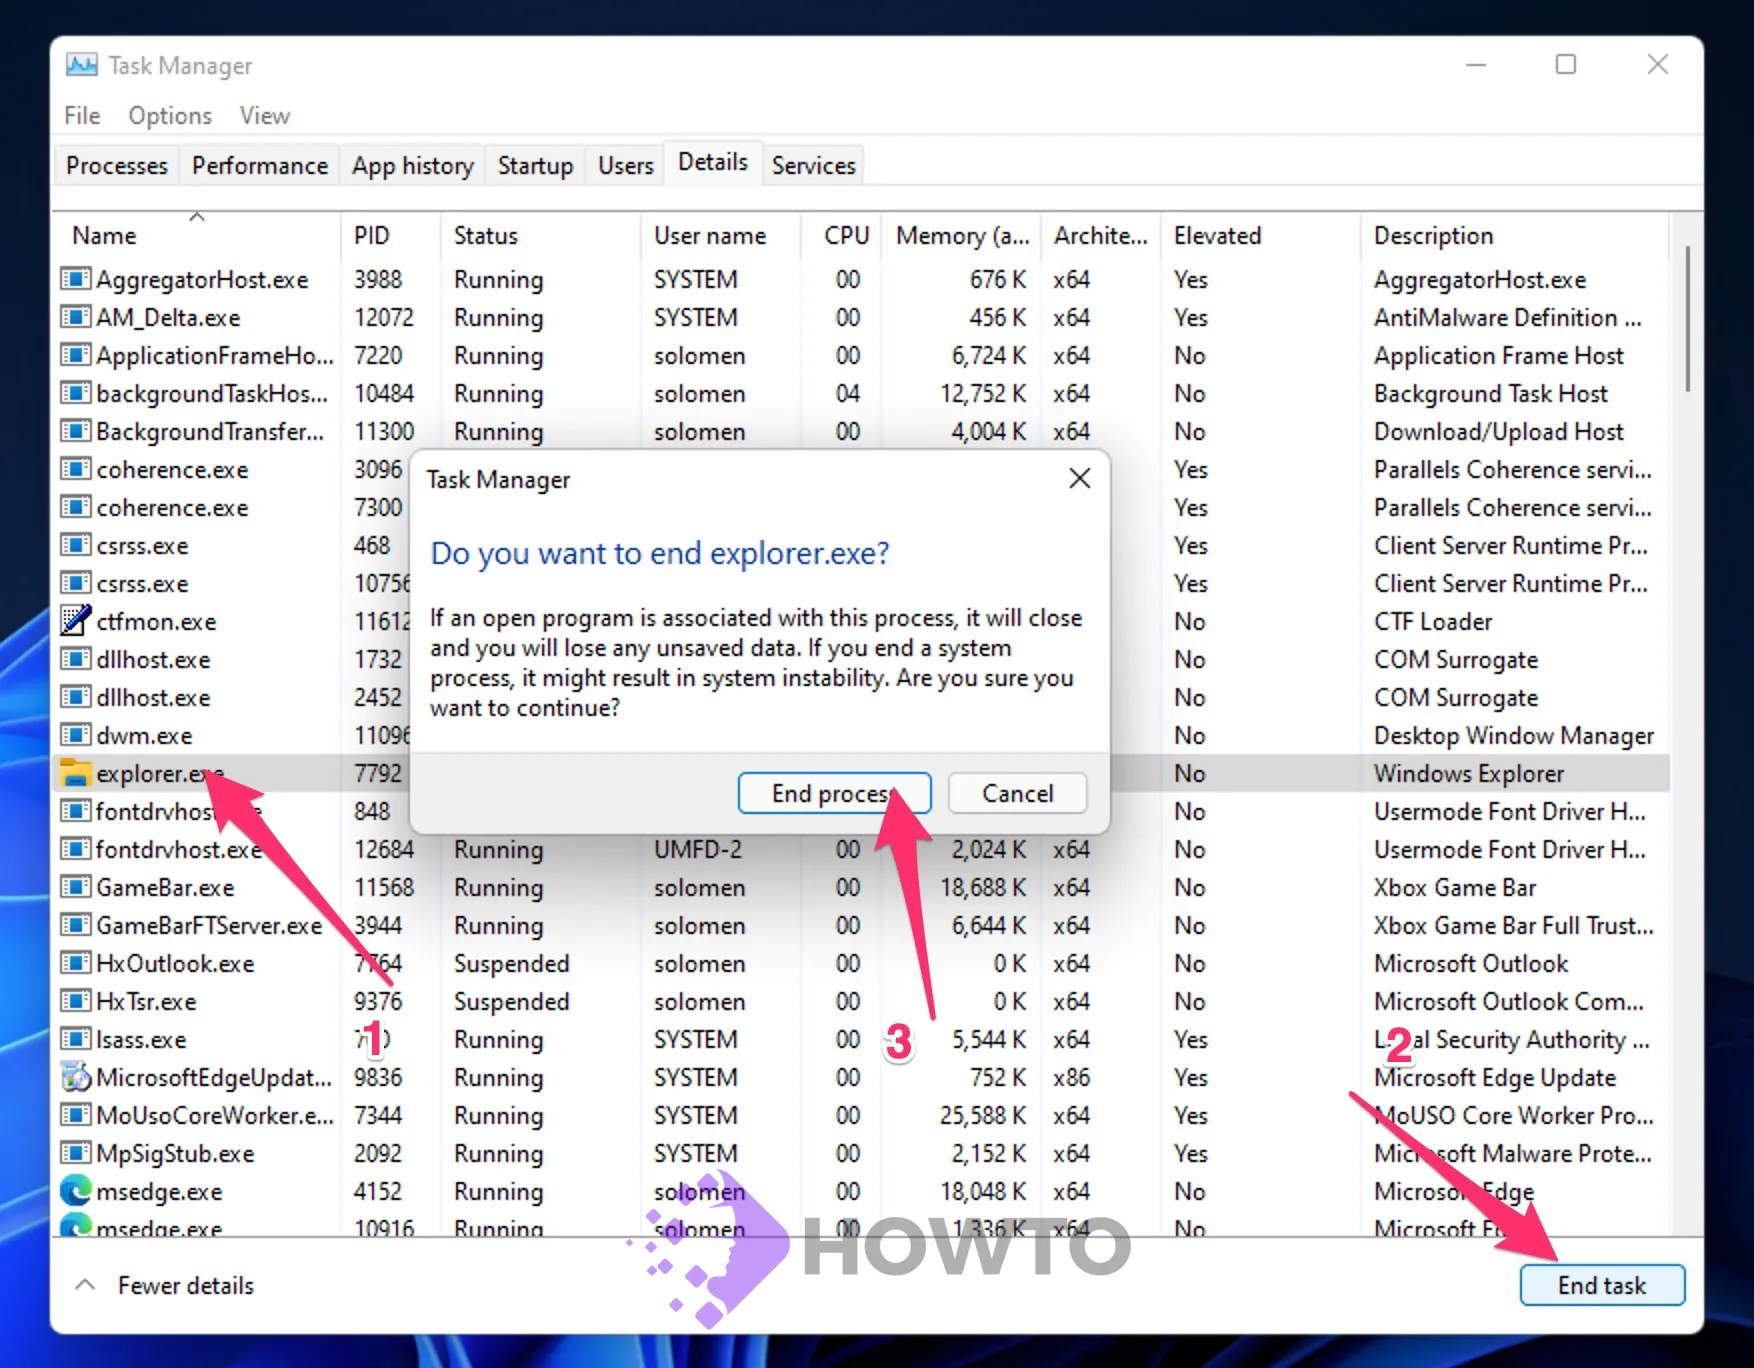
Step 3. When the Task Manager is in full-screen mode, select the Details tab.
Step 4. Click on the explorer.exe process entry from the list and hit the End task button at the bottom right-hand corner of the Task Manager.
Step 5. Select the File menu and choose Run new task once the explorer.exe process has ended. The new task window opens.
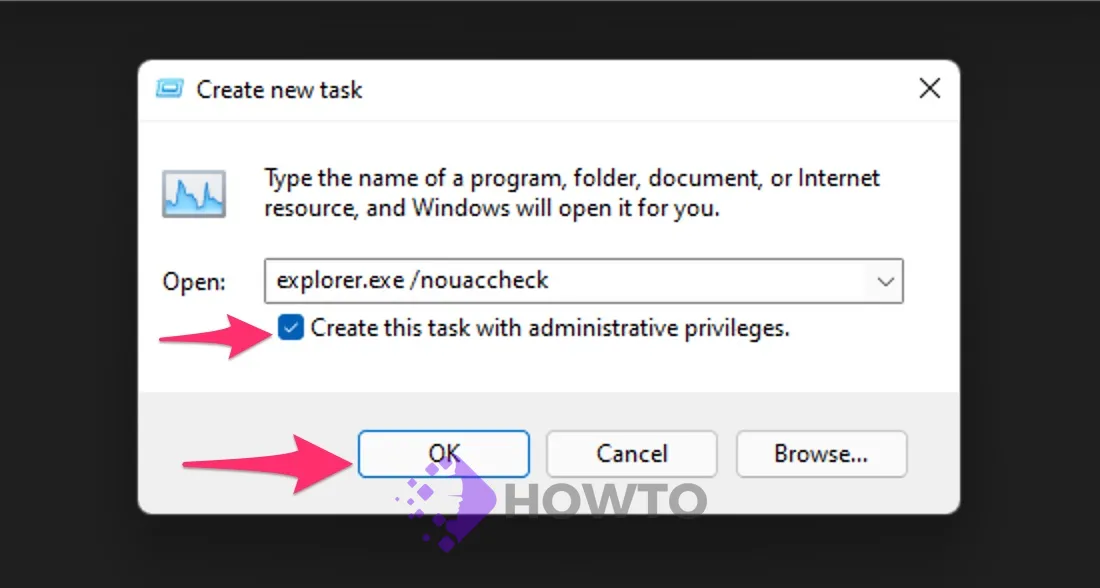
Type the following command into a new window interface (or you can copy and paste it), and please make sure the checkbox is labeled ‘Create this task with administrative privileges.’ Select the OK button, then.
explorer.exe /nouaccheckStep 6. File Explorer is now set up to run with administrator or elevated privileges.
When you use File Explorer or explorer.exe with administrative permissions, you won’t receive a UAC warning when you run any program. You can easily access system files, even if there are permission issues.
When you no longer need File Explorer to run with administrative permissions, log off or restart your computer. It will return to its default state if you close and continue your PC/Laptop.
When you sign back into your account, File Explorer will revert to its regular mode, which means it will no longer have administrator access.
How to Display the Elevated Column in Task Manager
To find out whether a process is running with administrator privileges on Windows 10/11 or you want to display the Elevated Column in Task Manager, go through the following procedure in Task Manager:
Step 1. Right-click on the empty portion of the Windows Taskbar and choose the Task Manager option. On Windows 11, you need to right-click on the Start button.
Step 2. Select the More Details option from the bottom left corner if only a few pieces of information appear in the Task Manager window.
Step 3. Switch to the Details tab after the Task Manager activates in full-screen mode.
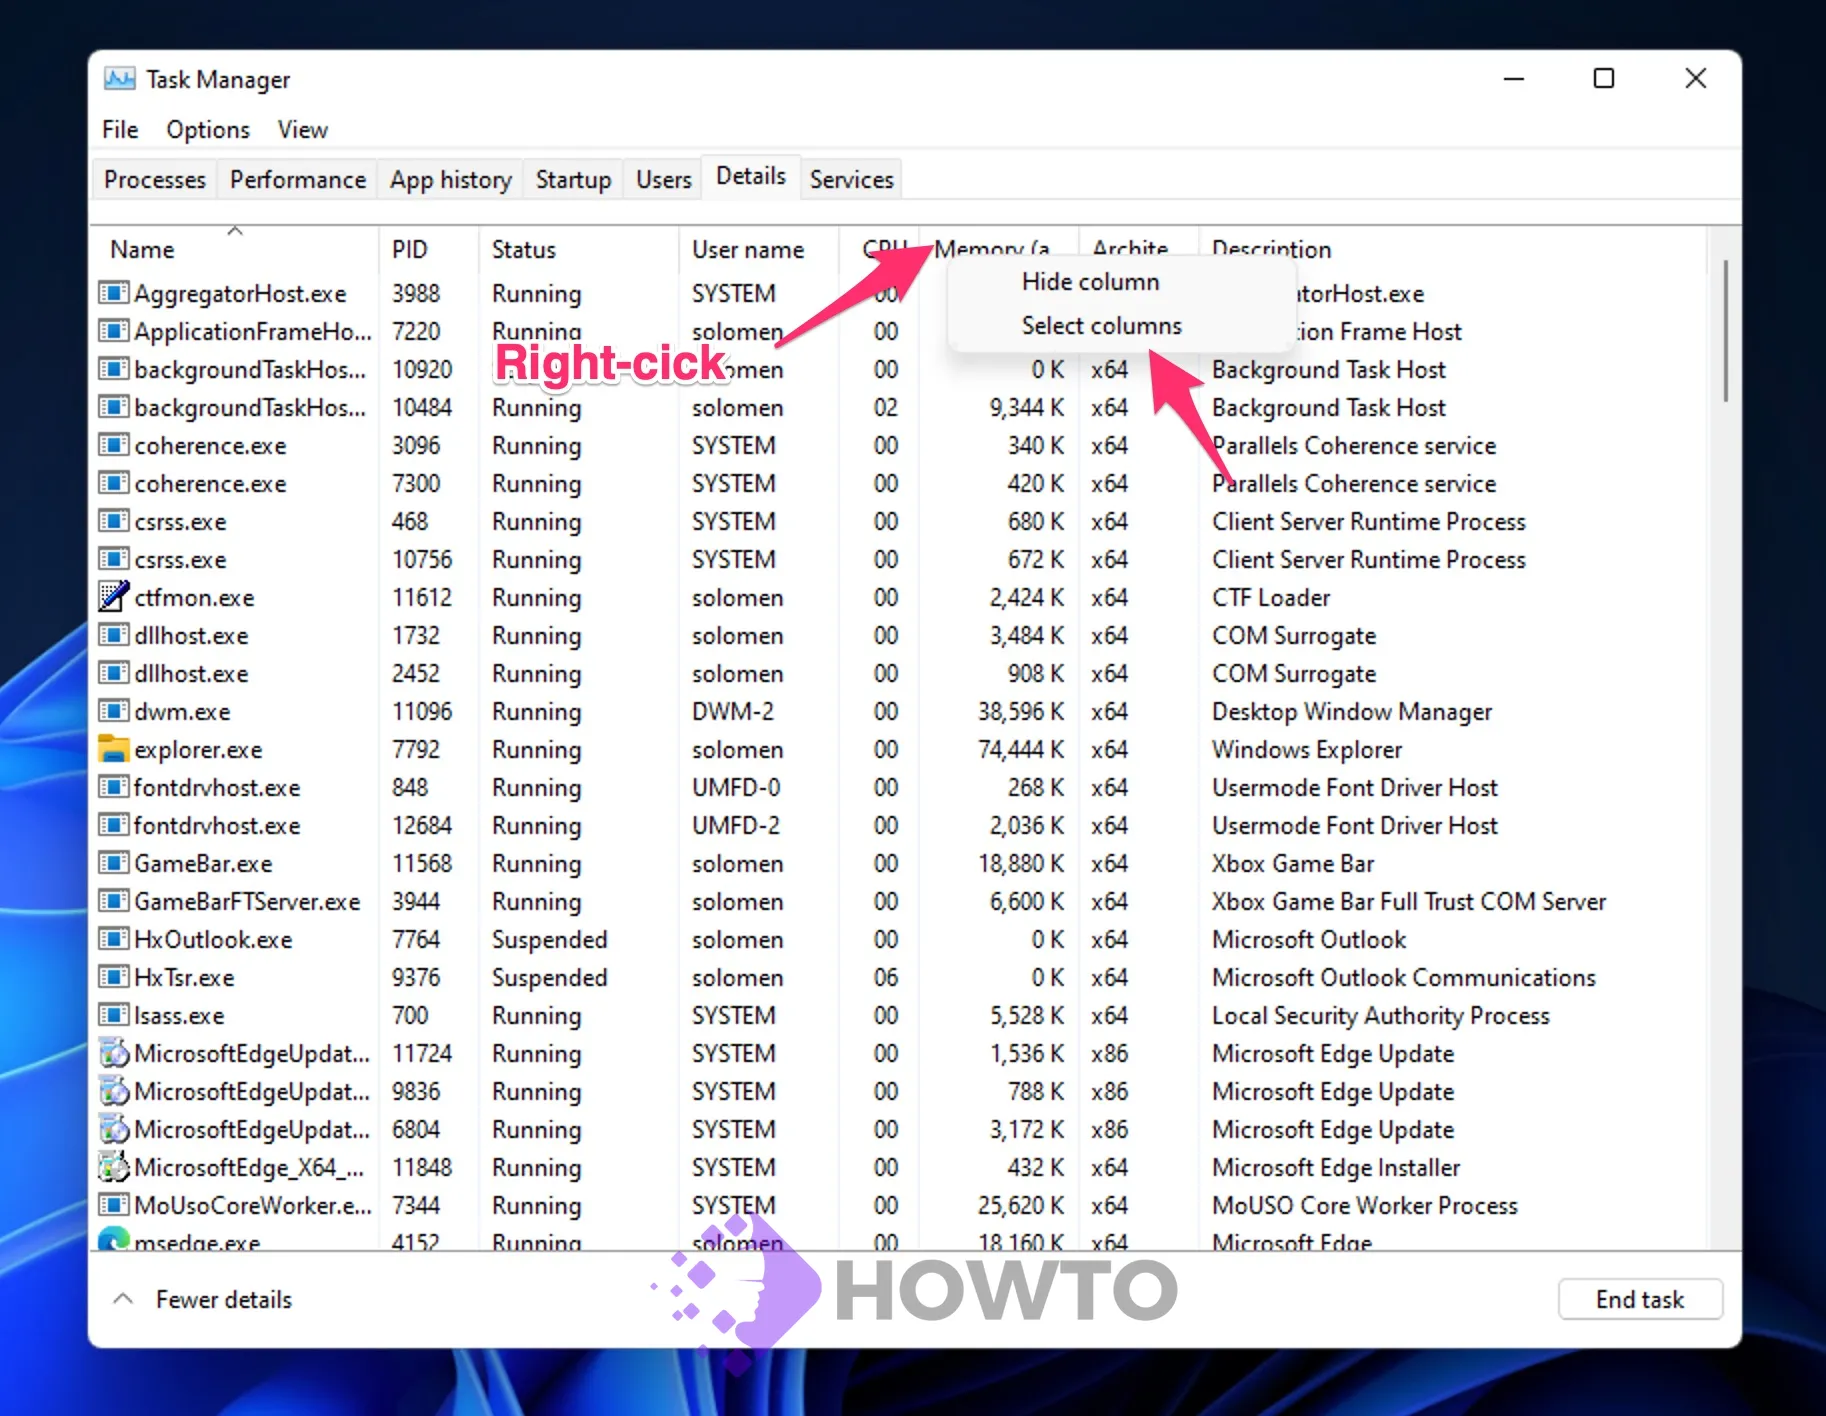
Step 4. Right-click on the column name of your choice in the Details tab (for example, Name, PID, Status, User Name, CPU, Memory, UAC virtualization, etc.) and choose Select Columns.
Step 5. Select the checkbox Elevated in the Select Columns box that appears. Click the OK button, then.
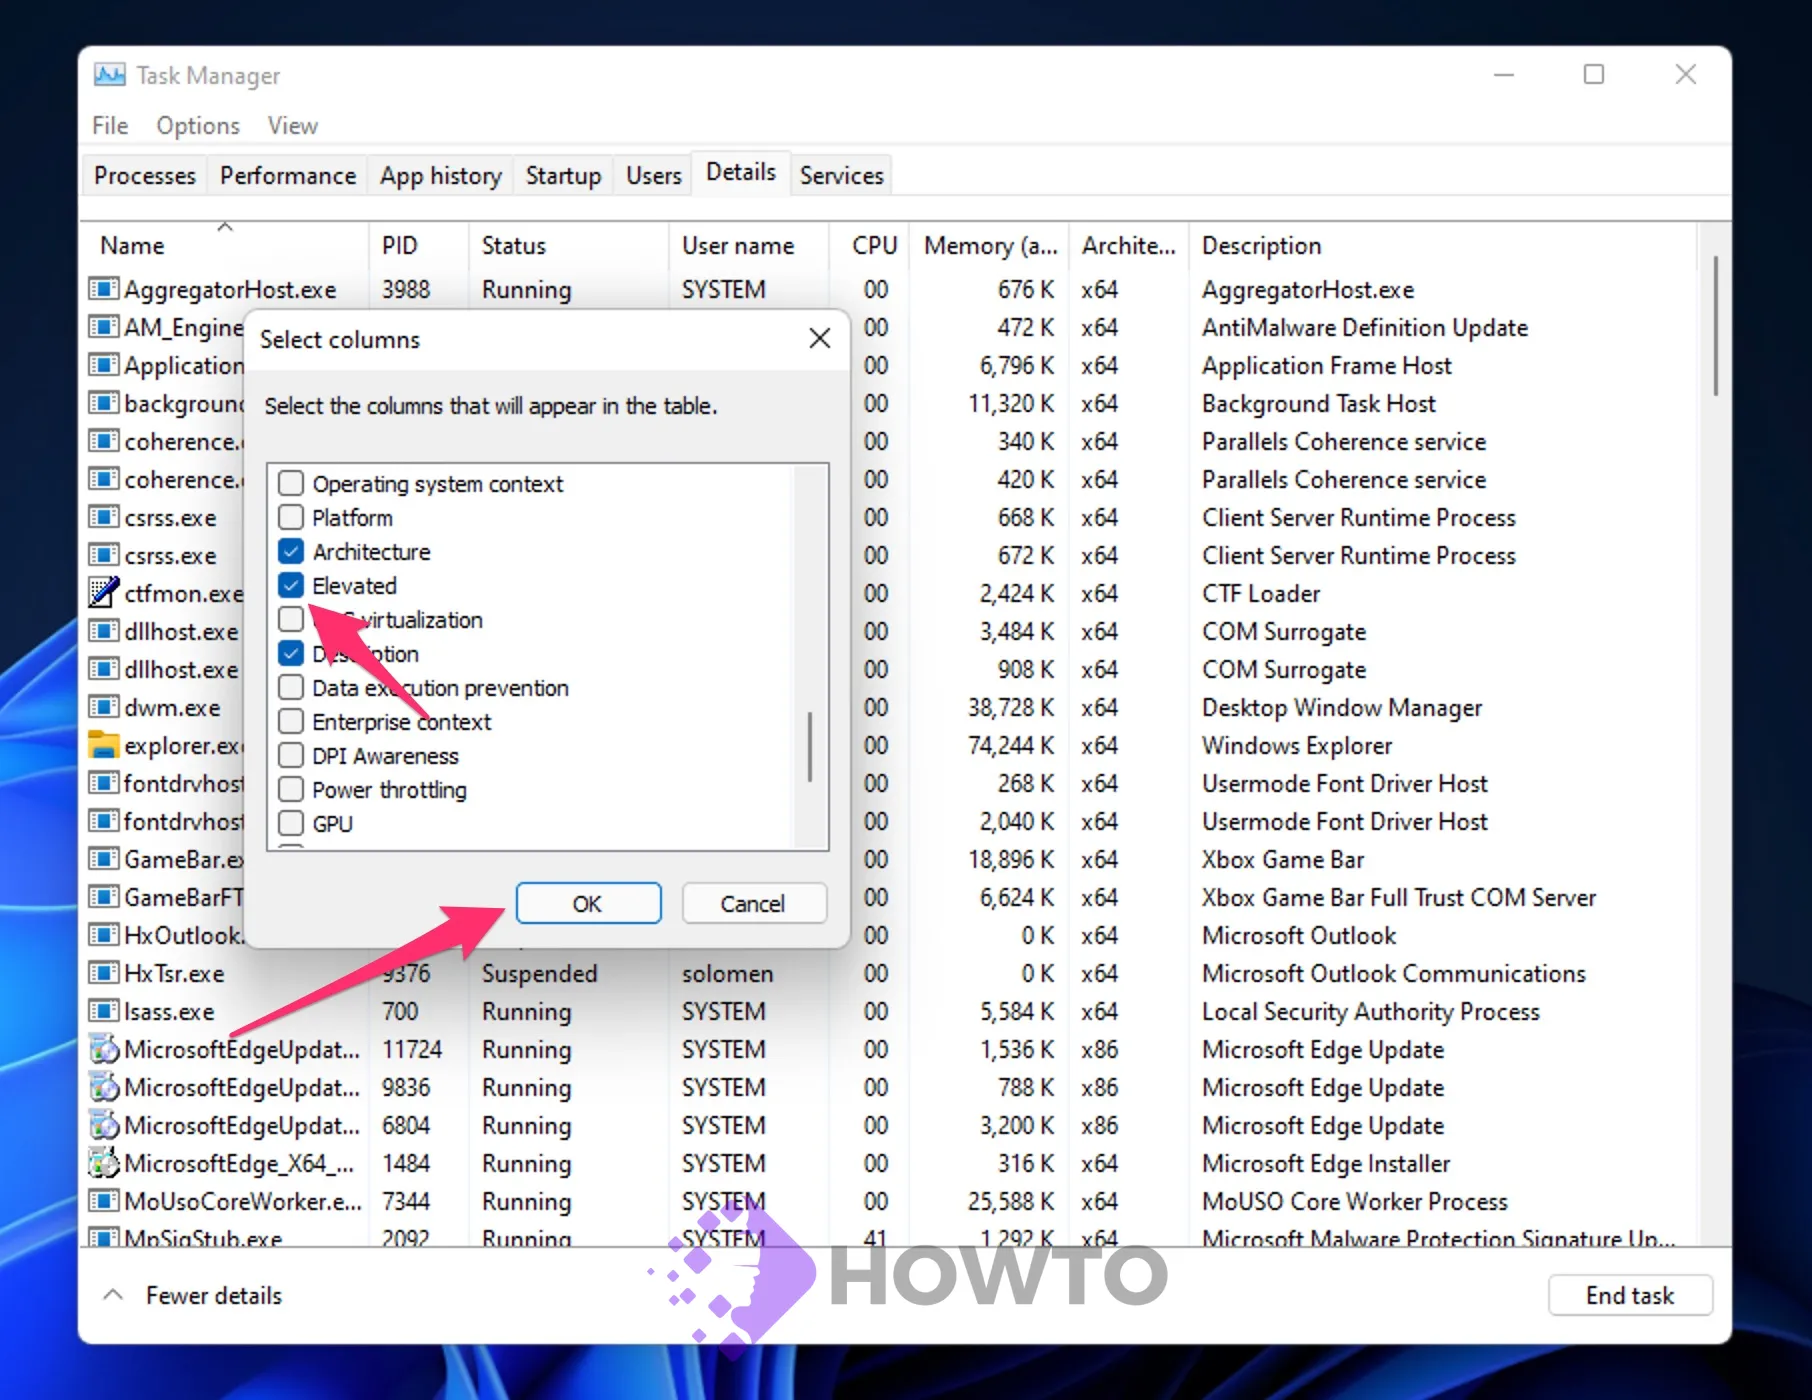
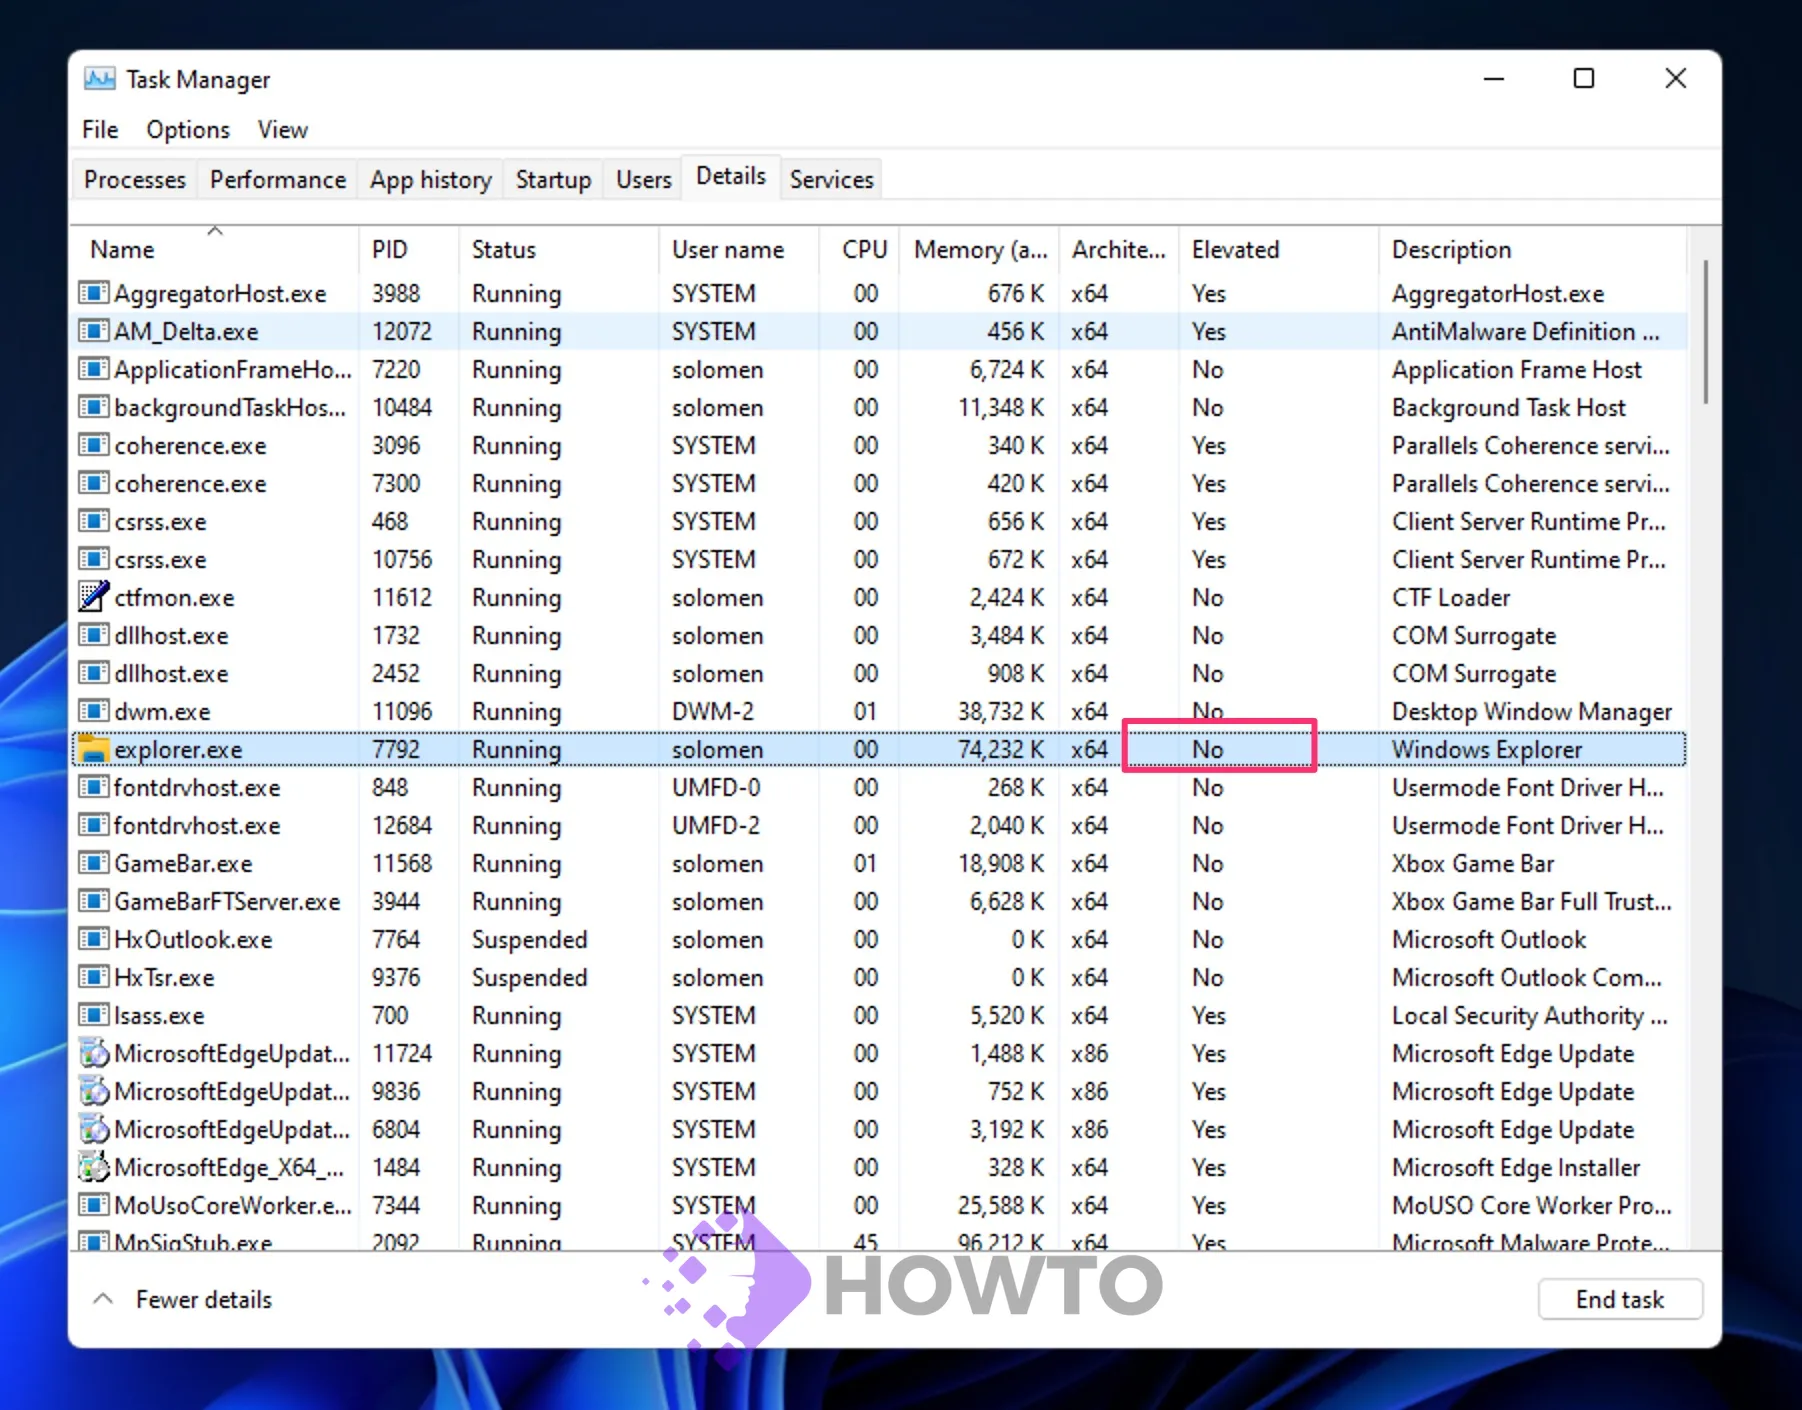
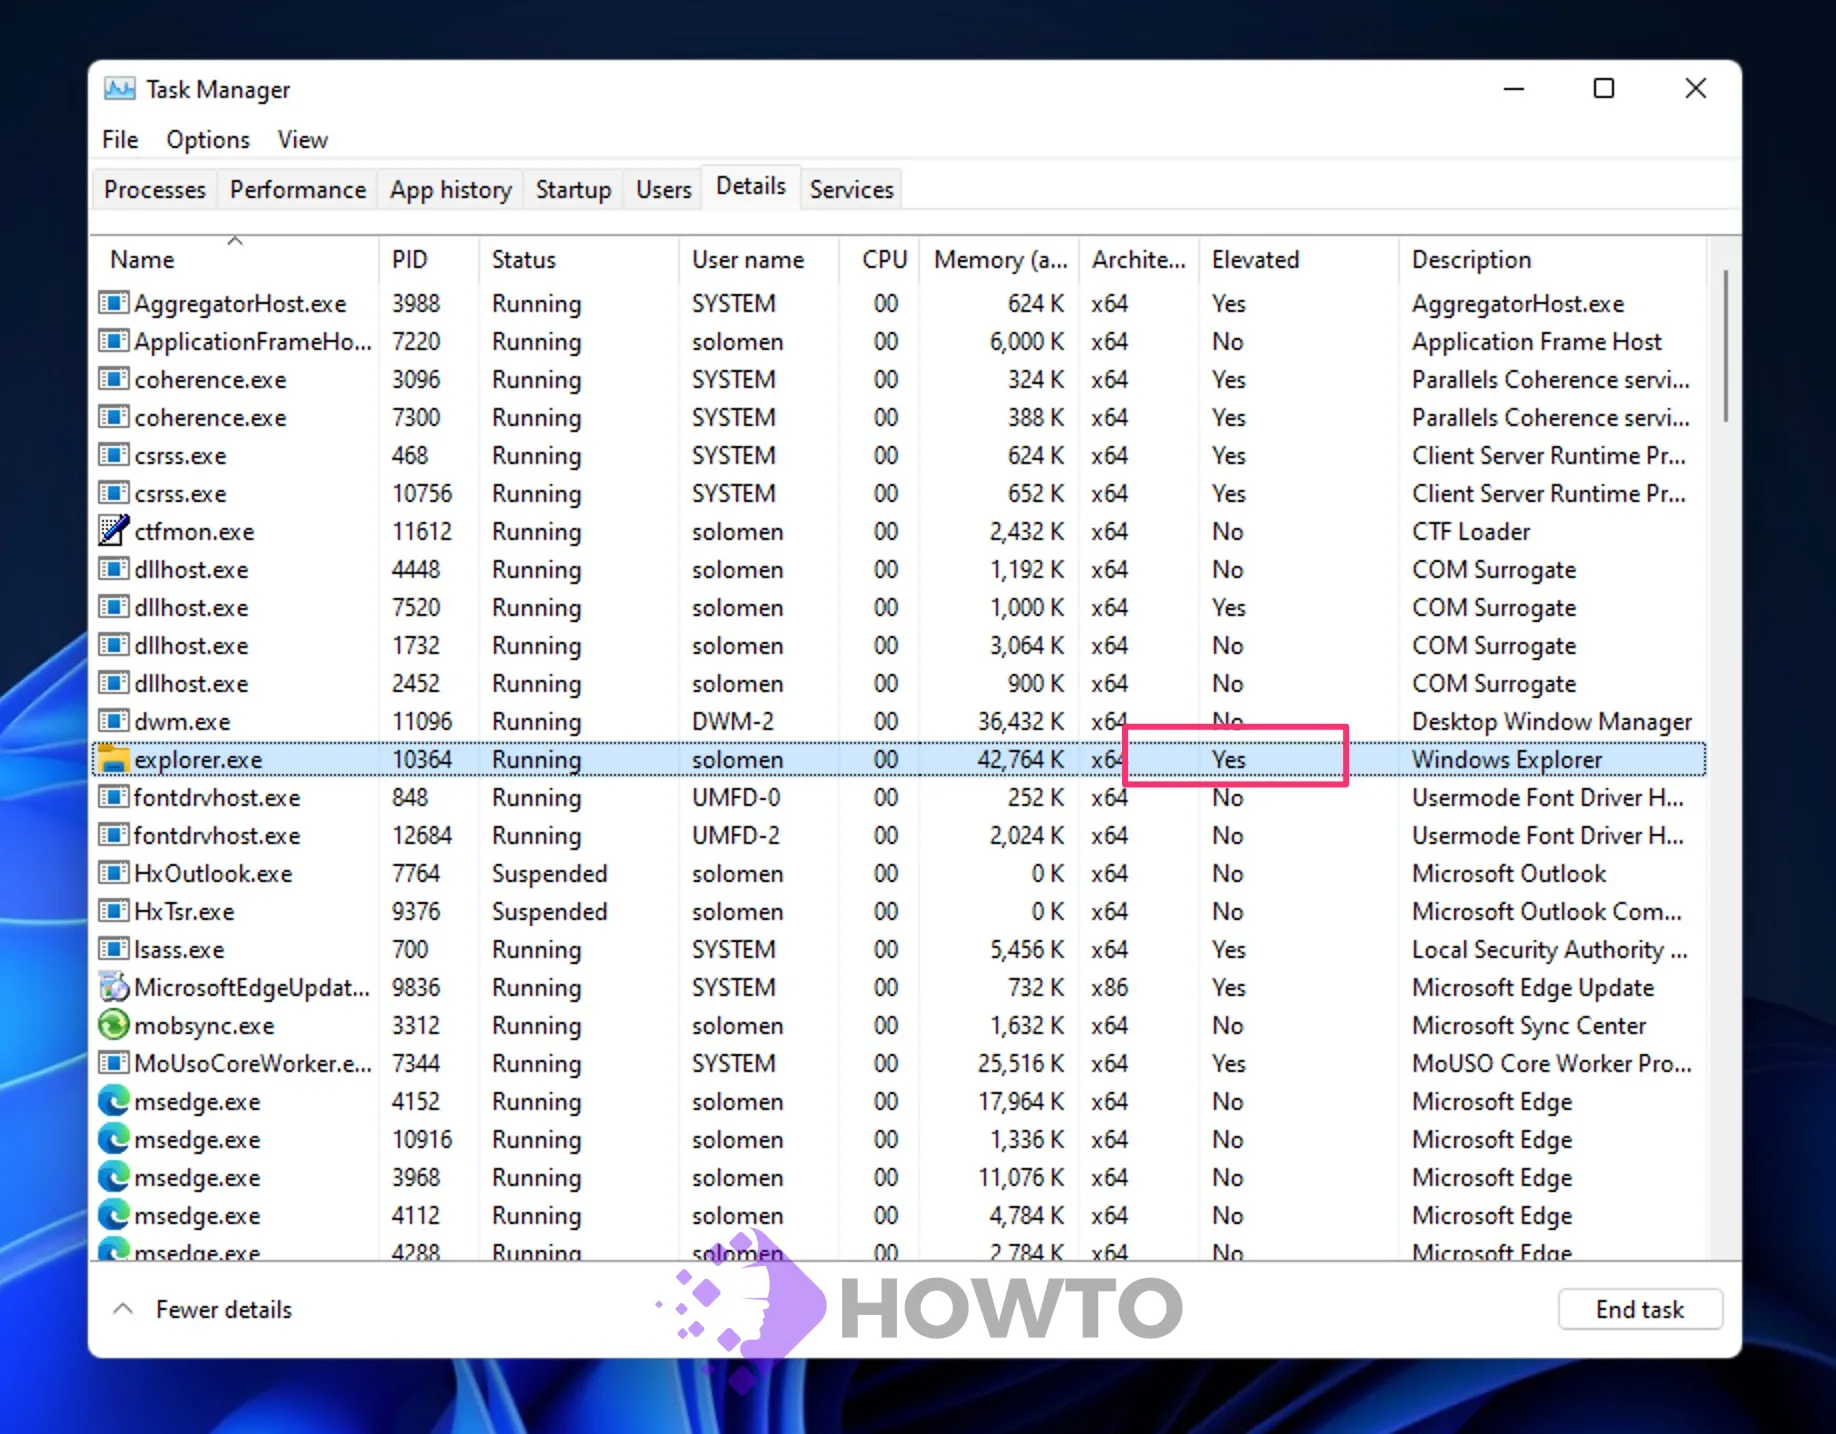
Step 6. All running processes will have a new Elevated column in the Details tab.
If the value in the Elevated column for a process is Yes, it indicates that it has administrator privileges. A No means that it is not running with superpowers.
Conclusion
File Explorer is the default Windows application for browsing and managing files on your computer. You may need to run it as an administrator if you want to change permissions, rename a file system folder, or perform other actions that require administrative privileges.
We hope this post will be helpful to you. Please leave a comment below with any questions about this blog post.
Solomen is the founder of MrHow.io, and he is happiest when working with technology and able to help others. In his free time, he often listens to Baroque music, swims or runs. Feel free to contact him on social media!


Thanks, just done easily